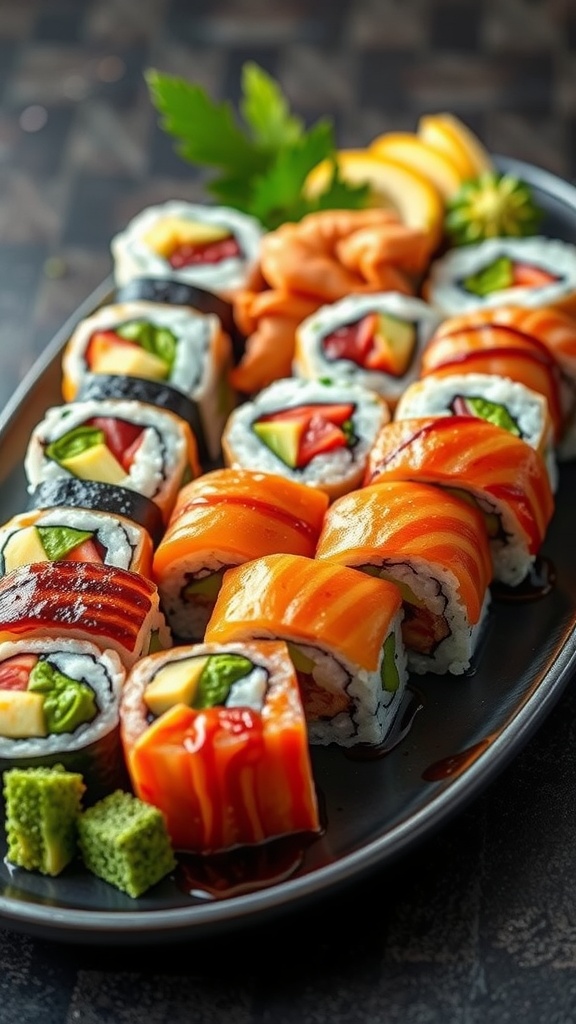
If you’re in the mood for some delicious Japanese cuisine, we’ve got some fun recipe ideas to try out! From classic sushi rolls to comforting ramen and flavorful teriyaki dishes, there’s something for everyone to enjoy. Let’s dive into these tasty options and get cooking!
Umami Miso Soup
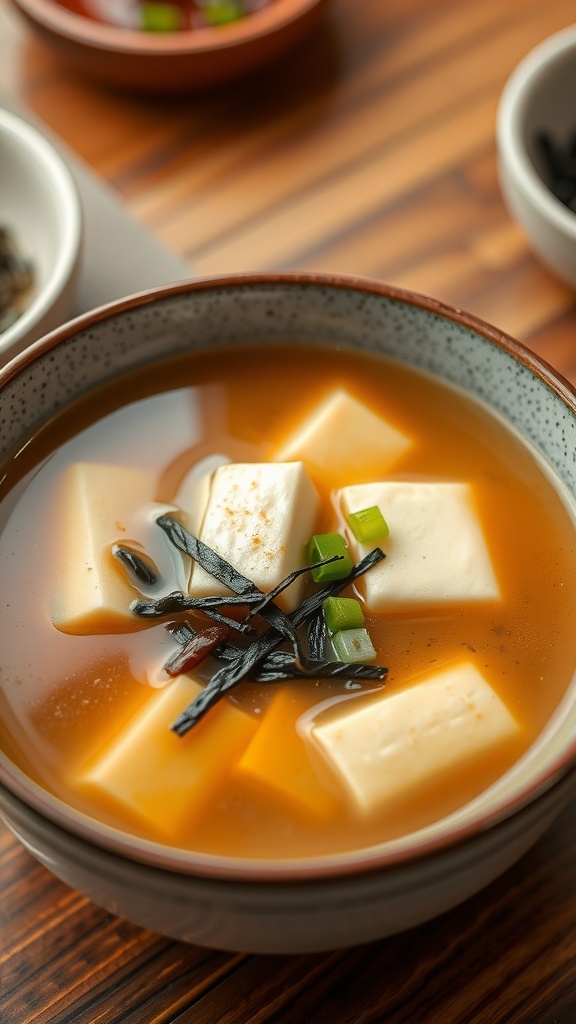
Miso soup is a comforting Japanese staple that brings warmth and depth to any meal. With its rich umami flavor, this soup is both savory and satisfying, making it a delightful start to any dinner or a light lunch on its own. Plus, it’s simple to whip up, using just a handful of ingredients that you may already have in your pantry!
The key ingredient, miso paste, not only adds flavor but also brings a variety of health benefits. Whether you prefer it with tofu, seaweed, or fresh scallions, miso soup is versatile and can be customized to suit your taste. Give this simple recipe a try!
Ingredients
- 4 cups dashi broth (or vegetable broth)
- 3 tablespoons miso paste (red or white)
- 1 cup firm tofu, cubed
- 1/2 cup wakame seaweed, rehydrated
- 2 green onions, sliced
Instructions
- Prepare the Broth: In a pot, bring the dashi broth to a gentle simmer over medium heat.
- Dissolve Miso: In a small bowl, mix a ladle of the hot broth with the miso paste until smooth. Stir this mixture back into the pot.
- Add Tofu and Seaweed: Gently add the cubed tofu and rehydrated wakame to the pot, allowing them to warm through for about 2-3 minutes.
- Serve: Ladle the soup into bowls and garnish with sliced green onions. Enjoy your homemade miso soup!
Savory Ramen Noodle Soup
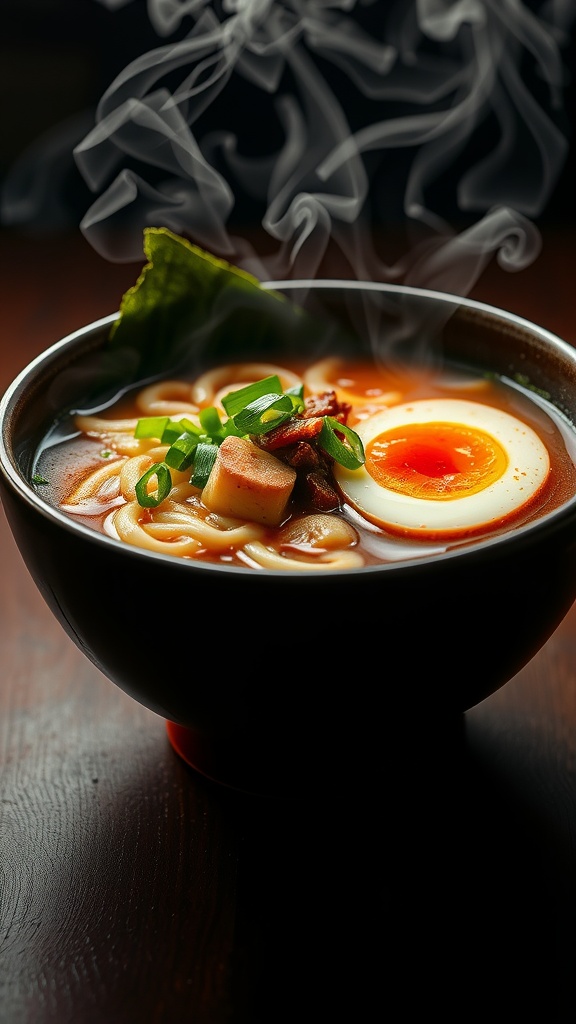
Ramen noodle soup is a cozy dish that brings warmth and comfort in every slurp. This savory soup is packed with umami flavors, often enhanced by a rich broth and a variety of toppings. It’s surprisingly easy to make, making it a perfect choice for a weeknight dinner or a weekend treat.
With tender noodles bathing in a flavorful broth, combined with veggies, protein, and a soft-boiled egg, this recipe can be customized to suit your taste. Whether you prefer it spicy, mild, or loaded with toppings, ramen is a delightful and satisfying meal.
Ingredients
- 4 cups chicken or vegetable broth
- 2 packs of instant ramen noodles
- 2 green onions, chopped
- 1 cup sliced mushrooms
- 1 carrot, julienned
- 2 garlic cloves, minced
- 1 tablespoon soy sauce
- 1 tablespoon miso paste (optional)
- 2 soft-boiled eggs
- Fresh spinach or bok choy
- Sesame seeds for garnish
Instructions
- Prepare the Broth: In a large pot, heat the broth over medium heat. Add garlic, soy sauce, and miso paste, stirring until combined.
- Add Vegetables: Once the broth is simmering, add the mushrooms and carrots. Cook for about 5 minutes until tender.
- Cook Noodles: Add the ramen noodles and cook according to package instructions, usually around 3-4 minutes.
- Finish the Soup: Stir in the chopped green onions and fresh spinach or bok choy, cooking for an additional minute.
- Serve: Ladle the soup into bowls. Halve the soft-boiled eggs and place on top. Garnish with sesame seeds and extra green onions if desired.
Flavorful Teriyaki Chicken
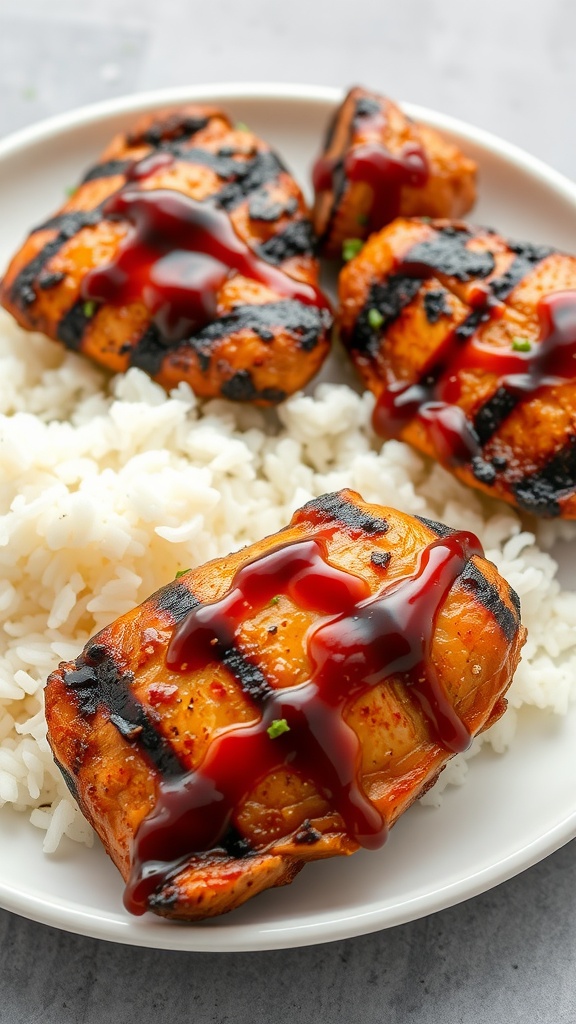
Teriyaki chicken is a delightful dish that brings together sweet and savory flavors in a simple yet satisfying way. The sticky glaze, made from soy sauce, mirin, and sugar, coats tender chicken pieces, creating a mouthwatering experience that pairs wonderfully with rice or steamed vegetables.
What makes this dish stand out is its ease of preparation. Even if you’re new to cooking, you can whip up this recipe in no time. The combination of grilling or pan-frying gives the chicken a slight char, enhancing the flavor profile beautifully. It’s a dish the whole family can enjoy!
Ingredients
- 4 boneless, skinless chicken thighs
- 1/4 cup soy sauce
- 1/4 cup mirin
- 2 tablespoons brown sugar
- 1 tablespoon sesame oil
- 1 clove garlic, minced
- 1 teaspoon grated fresh ginger
- 1 tablespoon cornstarch (optional)
- Cooked white rice, for serving
- Chopped green onions, for garnish
Instructions
- Marinate the Chicken: In a bowl, whisk together soy sauce, mirin, brown sugar, sesame oil, garlic, and ginger. Add the chicken thighs, making sure they are well-coated. Cover and refrigerate for at least 30 minutes.
- Cook the Chicken: Heat a grill or skillet over medium-high heat. Remove the chicken from the marinade (reserve the marinade) and cook for about 6-7 minutes per side, until fully cooked. If desired, you can brush some of the marinade on the chicken while it cooks for extra flavor.
- Make the Sauce: While the chicken cooks, pour the reserved marinade into a saucepan. Bring to a boil and let it simmer for about 5 minutes. For a thicker sauce, whisk in cornstarch mixed with a little water and stir until thickened.
- Serve: Slice the cooked chicken and serve over a bed of rice. Drizzle with the teriyaki sauce and garnish with chopped green onions.
Fluffy Japanese Pancakes

Fluffy Japanese pancakes are a delightful twist on the classic breakfast favorite. Known for their airy texture and light flavor, these pancakes are perfect for a weekend brunch or a cozy breakfast at home. The combination of fluffy batter and sweet toppings creates a satisfying experience that anyone can enjoy.
Making these pancakes is simpler than you might think! While they do require some unique techniques to achieve that airy rise, the process is straightforward and can be done with ingredients you likely already have. Once you master the art of fluffy Japanese pancakes, you’ll want to whip them up again and again!
Ingredients
- 1 cup all-purpose flour
- 2 tablespoons granulated sugar
- 1 teaspoon baking powder
- 1/4 teaspoon baking soda
- 1/4 teaspoon salt
- 3/4 cup milk
- 1 large egg, separated
- 1 tablespoon vegetable oil
- 1/2 teaspoon vanilla extract
- Butter for cooking
- Maple syrup and fresh fruits for serving
Instructions
- Prepare the Batter: In a bowl, mix together flour, sugar, baking powder, baking soda, and salt. In another bowl, whisk the milk, egg yolk, vegetable oil, and vanilla extract until smooth. Combine the wet and dry ingredients until just mixed.
- Whip the Egg White: In a separate bowl, beat the egg white until soft peaks form. Gently fold the whipped egg white into the pancake batter, being careful not to deflate it.
- Cook the Pancakes: Heat a non-stick skillet over low heat and add a little butter. Use a ring mold to pour in the batter, filling about halfway. Cover the skillet and cook for about 4-5 minutes on one side. Flip and cook for an additional 4-5 minutes, or until golden brown.
- Serve: Stack the pancakes high and top with maple syrup and your choice of fresh fruits. Enjoy your fluffy Japanese pancakes warm!
Traditional Sushi Rolls
Sushi rolls offer a delightful combination of flavors and textures, making them a favorite in Japanese cuisine. With a base of vinegared rice, wrapped in seaweed and filled with an array of ingredients, they bring a taste of freshness that’s irresistible. Making sushi at home is simpler than you might think and can be a fun activity to enjoy with friends or family.
The flavors in sushi rolls can range from savory to slightly sweet, depending on the fillings you choose. Whether you prefer classic ingredients like fresh fish or veggies, or want to explore creative combinations, there’s a sushi roll for everyone. Let’s dive into the ingredients and steps needed to create your own sushi rolls!
Ingredients
- 2 cups sushi rice
- 2 1/2 cups water
- 1/4 cup rice vinegar
- 2 tablespoons sugar
- 1 teaspoon salt
- Nori sheets (seaweed)
- 1 cucumber, sliced into thin strips
- 1 avocado, sliced
- 1 carrot, julienned
- Fresh fish (like salmon or tuna) or cooked shrimp
- Soy sauce, for serving
- Pickled ginger, for garnish
- Wasabi, optional
Instructions
- Rinse the Rice: Start by rinsing the sushi rice under cold water until the water runs clear. This helps remove excess starch.
- Cook the Rice: In a rice cooker or pot, combine the rice and water. Cook according to the rice cooker instructions or bring to a boil, then lower the heat and simmer for about 20 minutes until the water is absorbed.
- Season the Rice: In a small bowl, mix rice vinegar, sugar, and salt until dissolved. Once the rice is cooked, transfer it to a large bowl and gently fold in the vinegar mixture. Let it cool to room temperature.
- Prepare the Roll: Lay a sheet of nori on a bamboo mat. With wet hands, spread a thin layer of rice evenly over the nori, leaving about an inch at the top free of rice.
- Add Fillings: Arrange your choice of fillings (cucumber, avocado, fish, etc.) in a line across the rice.
- Roll it Up: Starting from the bottom, roll the sushi tightly using the bamboo mat. Moisten the top edge of the nori to seal the roll.
- Cut and Serve: Use a sharp knife to slice the roll into bite-sized pieces. Serve with soy sauce, pickled ginger, and wasabi on the side.
Sweet and Sour Yakitori
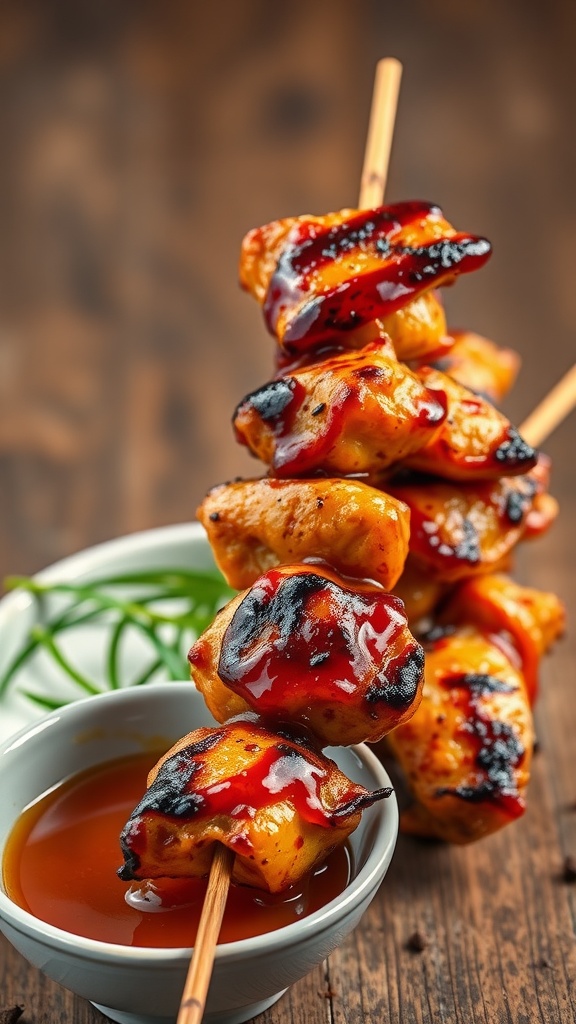
Sweet and Sour Yakitori is a delightful Japanese dish that combines the juicy flavors of grilled chicken with a tangy sauce. It’s a fantastic option for a casual dinner or a fun gathering with friends. The balance of sweetness and a hint of sourness makes this dish both refreshing and satisfying.
This recipe is simple to make, even if you’re new to cooking. With just a few ingredients and some skewering, you can create a restaurant-worthy dish right in your kitchen!
Ingredients
- 1 pound chicken thighs, cut into bite-sized pieces
- 1/4 cup soy sauce
- 2 tablespoons mirin
- 2 tablespoons honey
- 1 tablespoon rice vinegar
- 1 teaspoon sesame oil
- 1 clove garlic, minced
- 1 tablespoon ginger, minced
- Wooden skewers, soaked in water
- Chopped green onions for garnish
Instructions
- Prepare the Marinade: In a bowl, combine soy sauce, mirin, honey, rice vinegar, sesame oil, garlic, and ginger. Stir until well mixed.
- Marinate the Chicken: Add the chicken pieces to the marinade, ensuring they are well coated. Cover and let it marinate in the fridge for at least 30 minutes.
- Skewer the Chicken: Thread the marinated chicken onto the soaked wooden skewers, leaving a little space between each piece.
- Grill the Yakitori: Preheat your grill or grill pan over medium heat. Place the skewers on the grill and cook for about 10-15 minutes, turning occasionally, until the chicken is cooked through and has a nice char.
- Serve: Drizzle any remaining marinade over the skewers, garnish with chopped green onions, and enjoy your Sweet and Sour Yakitori!
Crispy Tempura Vegetables
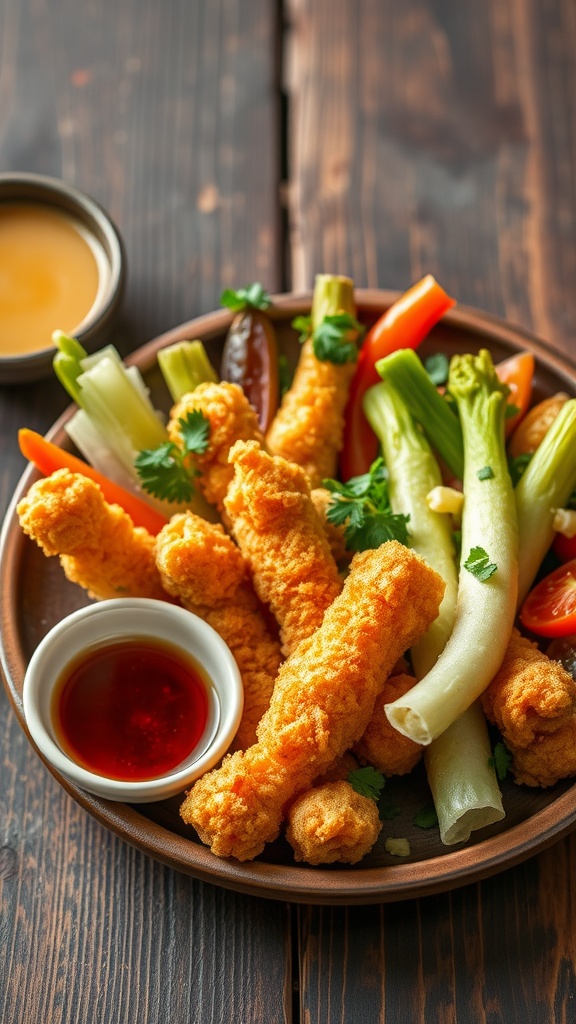
Crispy tempura vegetables are a delightful treat, combining the crunch of light batter with the freshness of seasonal veggies. This dish is both flavorful and satisfying, making it a great appetizer or side. The tempura batter creates a delicate, airy texture that perfectly complements the vegetables, allowing their natural flavors to shine through.
The good news? Making crispy tempura is simpler than you might think! With just a few ingredients and a bit of frying magic, you can whip up this tasty dish in no time. Whether you’re serving it as a snack or a side dish, crispy tempura vegetables are sure to be a hit!
Ingredients
- 1 cup all-purpose flour
- 1/2 cup cornstarch
- 1 teaspoon baking powder
- 1 cup cold water
- 1 teaspoon salt
- Assorted vegetables (such as bell peppers, zucchini, sweet potatoes, and broccoli)
- Oil for frying
- Soy sauce or dipping sauce of your choice
Instructions
- Prepare the Vegetables: Wash and cut the vegetables into even-sized pieces for consistent cooking.
- Make the Batter: In a bowl, mix together the flour, cornstarch, baking powder, salt, and cold water until just combined. Avoid overmixing to keep the batter light.
- Heat the Oil: In a deep pan, heat oil over medium-high heat until it reaches about 350°F (175°C).
- Fry the Vegetables: Dip the vegetable pieces into the batter, allowing any excess to drip off. Carefully place them in the hot oil and fry for about 2-3 minutes or until golden brown and crispy. Work in batches to avoid overcrowding.
- Drain and Serve: Remove the tempura from the oil and place on a paper towel to drain excess oil. Serve hot with soy sauce or your favorite dipping sauce.
Spicy Tuna Poke Bowl
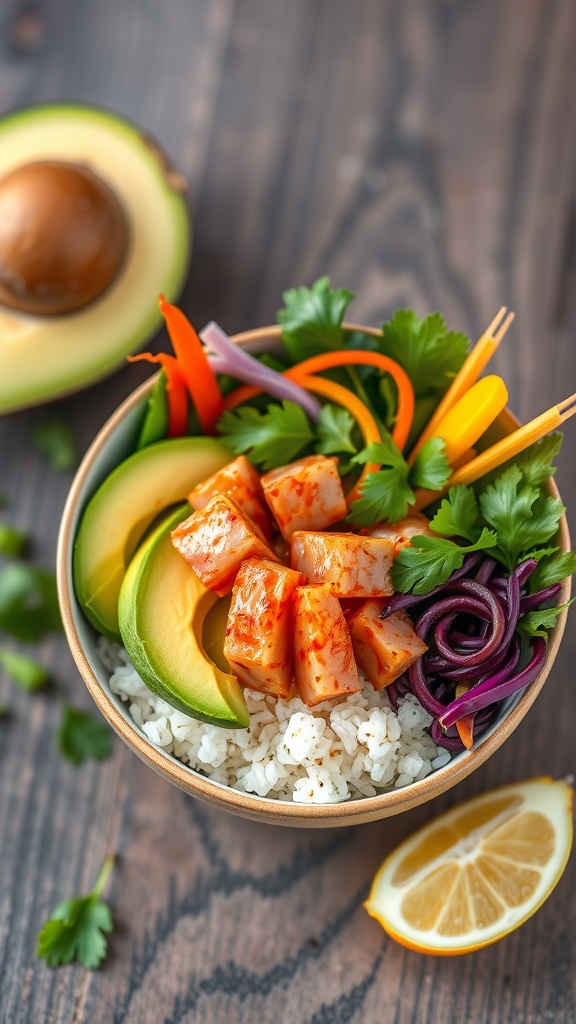
A Spicy Tuna Poke Bowl is a delightful mix of fresh flavors and textures that bring a taste of Hawaii right to your kitchen. It combines tender sushi-grade tuna with a spicy sauce, and is often served over a bed of rice and topped with vibrant vegetables like avocado, cucumbers, and carrots. This dish is not only tasty but also pretty simple to prepare, making it a great choice for a quick weeknight dinner or a special occasion.
The combination of the spicy tuna with the refreshing crunch of the vegetables creates a satisfying meal that’s both healthy and fulfilling. Plus, you can customize it to your liking by adding your favorite toppings or adjusting the spice level. Whether you’re a poke bowl newbie or a seasoned fan, this recipe is sure to please!
Ingredients
- 1 cup sushi rice
- 1 1/4 cups water
- 8 oz sushi-grade tuna, diced
- 2 tablespoons soy sauce
- 1 tablespoon sriracha (or to taste)
- 1 teaspoon sesame oil
- 1 avocado, sliced
- 1/2 cucumber, thinly sliced
- 1/2 cup carrots, julienned
- 1/4 cup red cabbage, shredded
- 2 tablespoons green onions, chopped
- Fresh cilantro for garnish
- Sesame seeds for garnish
Instructions
- Cook the Rice: Rinse the sushi rice under cold water until the water runs clear. In a saucepan, combine the rice and water, bring to a boil, then cover and reduce to low heat. Cook for about 18 minutes until the rice is tender and water is absorbed. Remove from heat and let it sit covered for 10 minutes.
- Prepare the Tuna: In a bowl, combine the diced tuna, soy sauce, sriracha, and sesame oil. Mix gently to coat the tuna evenly. Adjust the sriracha based on your preferred spice level.
- Assemble the Bowl: Once the rice has cooled slightly, scoop it into serving bowls. Top with the spicy tuna mixture, avocado, cucumber, carrots, and red cabbage. Sprinkle with chopped green onions, cilantro, and sesame seeds.
- Serve: Enjoy your Spicy Tuna Poke Bowl immediately, or chill it for a bit to serve cold!
Aromatic Japanese Curry Rice
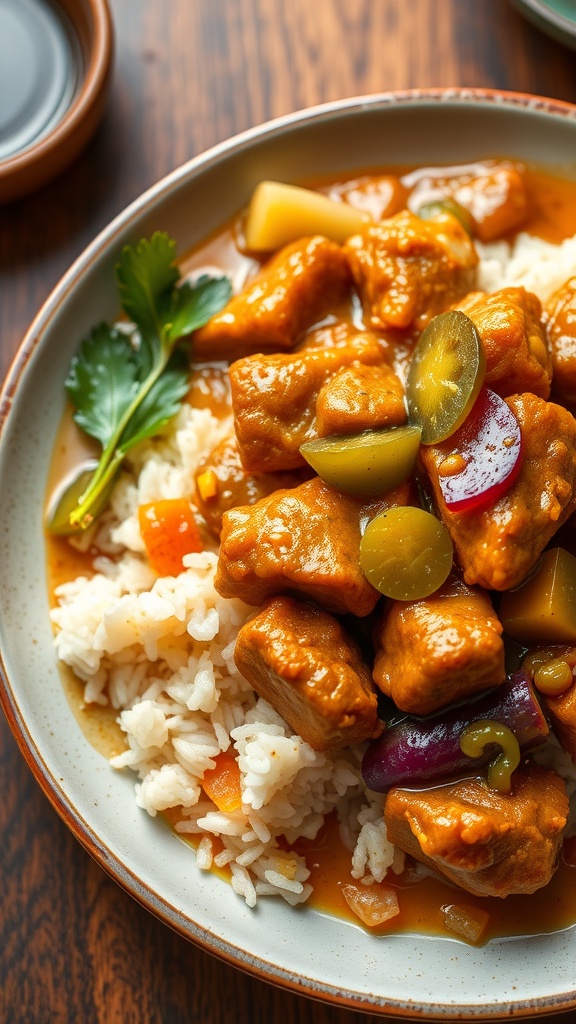
Japanese curry rice is a comforting dish that features tender meat and vegetables simmered in a rich, aromatic sauce. It has a mild sweetness and a hint of spiciness, making it a favorite among both kids and adults. The dish is not only delicious but also easy to prepare, perfect for a cozy weeknight dinner.
This recipe showcases the magic of Japanese curry, which typically relies on a curry roux to create its signature flavor. With just a few ingredients and simple steps, you’ll have a satisfying meal that brings the warmth of Japan right to your kitchen.
Ingredients
- 1 lb beef or chicken, cut into bite-sized pieces
- 2 cups diced vegetables (carrots, potatoes, and onions)
- 3 cups water
- 1 tablespoon vegetable oil
- 1 package of Japanese curry roux (such as Vermont Curry)
- 2 cups cooked rice
- Optional: pickled vegetables for serving
Instructions
- Heat the vegetable oil in a large pot over medium heat. Add the meat and cook until browned on all sides.
- Add the diced vegetables and stir for a few minutes until they start to soften.
- Pour in the water and bring the mixture to a boil. Reduce the heat and let it simmer for about 15 minutes, or until the vegetables are tender.
- Break the curry roux into pieces and stir it into the pot until fully dissolved. Simmer for an additional 5-10 minutes until the sauce thickens.
- Serve the curry over the cooked rice and add pickled vegetables on the side if desired.
Delicate Soba Noodles with Dipping Sauce
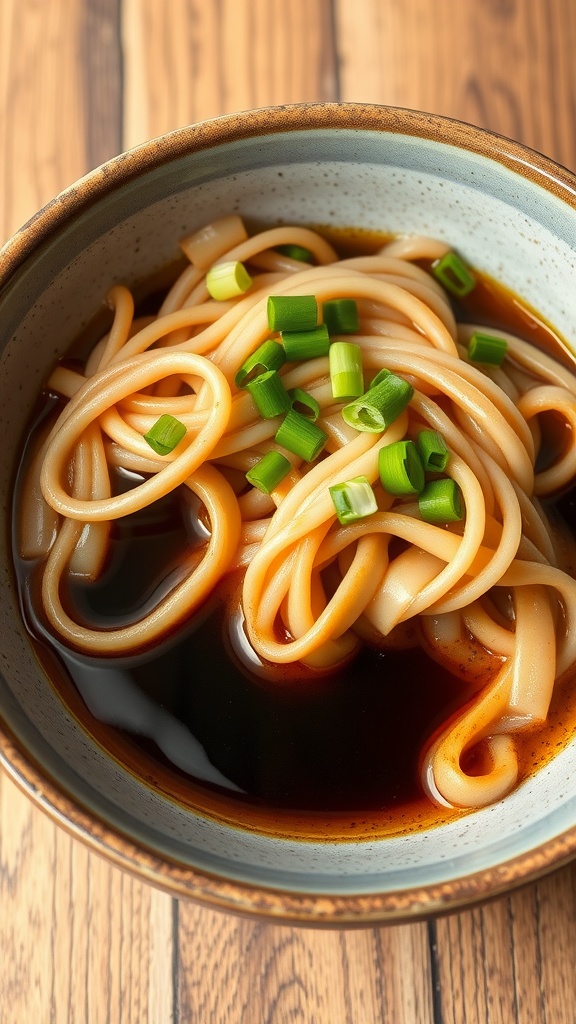
Soba noodles are a delightful dish that brings a taste of Japan right to your kitchen. With a nutty flavor and a slightly chewy texture, they pair wonderfully with a savory dipping sauce. This recipe is not only easy to make but also offers a refreshing option for a light meal or snack.
Perfect for warm weather or any time you crave something simple yet satisfying, these soba noodles can be enjoyed hot or cold. Serve them with a dipping sauce made from soy sauce, mirin, and a hint of wasabi for an extra kick. Let’s dive into the recipe!
Ingredients
- 8 oz soba noodles
- 2 cups dashi stock (or water)
- 3 tablespoons soy sauce
- 2 tablespoons mirin
- 1 teaspoon wasabi (optional)
- 2 green onions, sliced
- Sesame seeds for garnish
Instructions
- Cook the Soba: Bring a large pot of water to a boil. Add the soba noodles and cook according to package instructions until tender, usually about 4-5 minutes. Drain and rinse under cold water to stop the cooking process.
- Make the Dipping Sauce: In a saucepan, combine dashi stock, soy sauce, and mirin. Heat until warm, then stir in wasabi if using.
- Serve: Place the soba noodles in individual bowls or one large bowl. Pour the warm dipping sauce over the noodles, allowing guests to dip as desired. Sprinkle with sliced green onions and sesame seeds before enjoying.
Rich Chashu Pork for Ramen
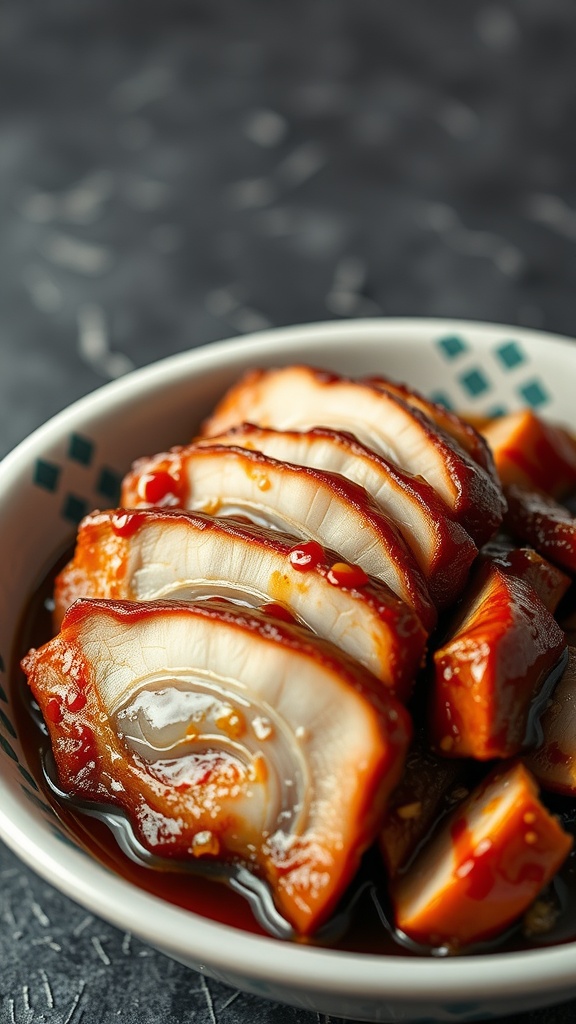
Chashu is a beloved element in Japanese ramen, adding a rich, savory depth to each bowl. This braised pork belly is tender, juicy, and infused with a sweet and salty marinade that enhances its flavor. While it may seem gourmet, making chashu at home is quite simple and requires minimal active cooking time, allowing you to enjoy the process.
With its melt-in-your-mouth texture and luscious sauce, chashu pork elevates your ramen experience. Perfect for weekend meal prep, this dish can be made ahead and used throughout the week in various dishes, from ramen to rice bowls.
Ingredients
- 2 pounds pork belly
- 1/2 cup soy sauce
- 1/4 cup mirin
- 1/4 cup sake
- 1/4 cup sugar
- 4 cloves garlic, crushed
- 1-inch piece of ginger, sliced
- 2 green onions
Instructions
- Prepare the Pork: Roll the pork belly tightly and secure it with kitchen twine. This helps it hold its shape while cooking.
- Make the Marinade: In a bowl, combine soy sauce, mirin, sake, sugar, garlic, ginger, and green onions. Mix until the sugar dissolves.
- Braise the Pork: Place the rolled pork belly in a pot, add the marinade, and cover. Simmer on low heat for about 2-3 hours, turning occasionally, until the pork is tender.
- Cool and Slice: Once done, let the pork cool in the marinade. Slice it into thin pieces when ready to serve.
- Serve: Add the chashu to your ramen bowls, drizzling some of the marinade over the top for extra flavor.
Vegetarian Gyoza Dumplings
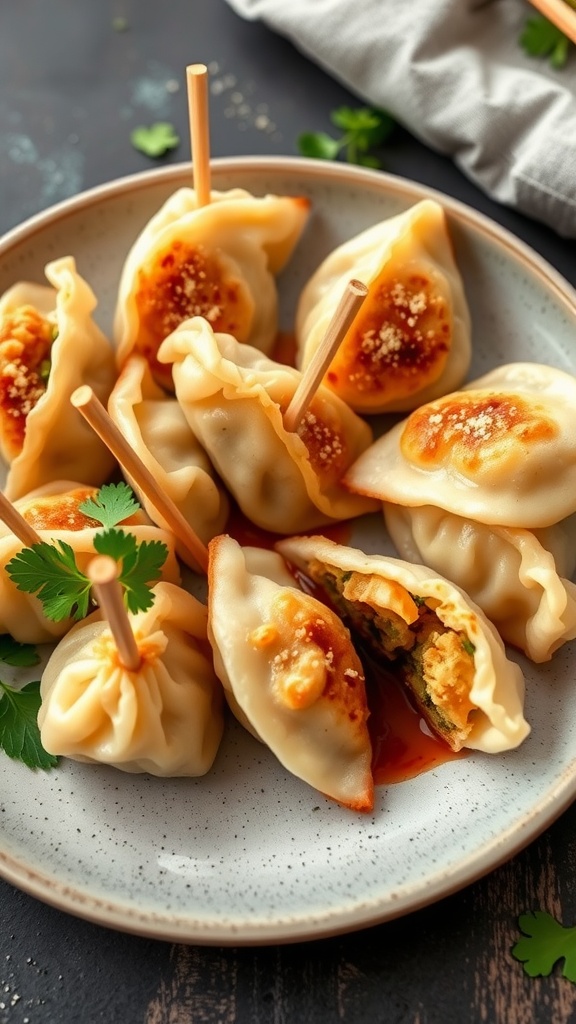
Vegetarian gyoza dumplings are a delightful and savory treat that brings a taste of Japan right to your kitchen. These dumplings are filled with a mix of fresh vegetables, making them both delicious and satisfying. With their crispy bottoms and tender tops, they offer a perfect combination of textures that everyone will love.
Making gyoza at home is simpler than you might think! With just a few ingredients and some folding skills, you can whip up a batch that’s sure to impress. Whether you enjoy them steamed, pan-fried, or even boiled, these dumplings are a versatile dish that can be served as an appetizer or a main course.
Ingredients
- 2 cups all-purpose flour
- 3/4 cup water
- 1 cup finely chopped cabbage
- 1 cup sliced mushrooms
- 1/2 cup shredded carrots
- 2 green onions, chopped
- 2 tablespoons soy sauce
- 1 tablespoon sesame oil
- 1 teaspoon grated ginger
- Salt and pepper to taste
- Oil for frying
Instructions
- Make the Dough: In a bowl, mix the flour and water until a soft dough forms. Knead for about 5 minutes, then cover and let it rest for 30 minutes.
- Prepare the Filling: In a pan, heat sesame oil over medium heat. Sauté cabbage, mushrooms, and carrots until softened. Add green onions, soy sauce, ginger, salt, and pepper. Cook for another 2 minutes and let it cool.
- Shape the Dumplings: Roll the dough into thin circles. Place a spoonful of the filling in the center of each circle. Fold the dough over the filling and pinch the edges to seal.
- Cook the Gyoza: Heat oil in a skillet over medium-high heat. Place the gyoza in the pan and fry until the bottoms are golden brown. Add a splash of water, cover, and steam for 5 minutes.
- Serve: Enjoy your gyoza hot, with soy sauce for dipping!
Decadent Matcha Green Tea Cake
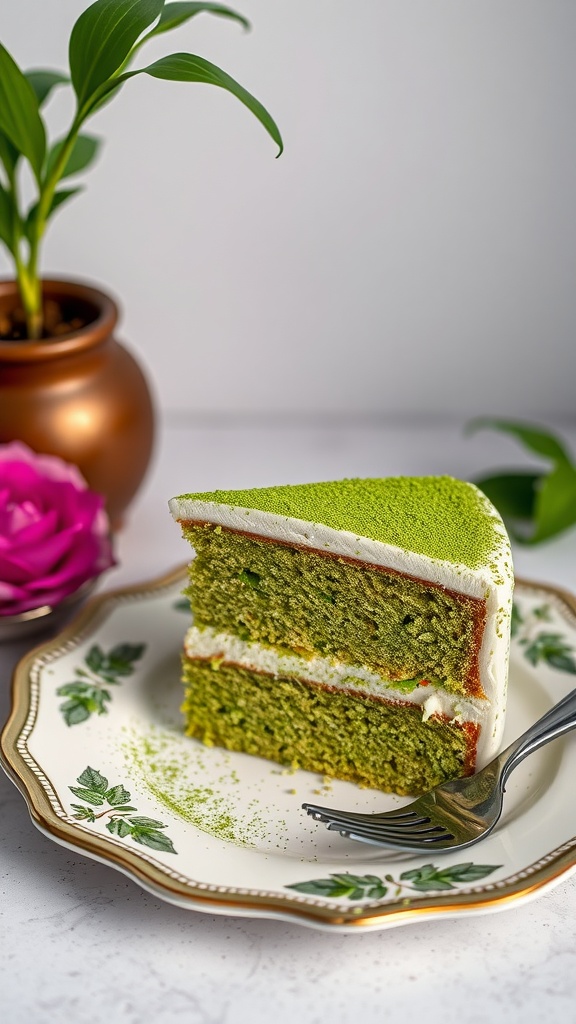
This Matcha Green Tea Cake is a delightful treat that brings a unique twist to traditional cake. Its soft and moist texture, combined with the earthy flavor of matcha, creates a balanced dessert that’s not too sweet. Perfect for both tea lovers and those new to matcha, this cake serves as a lovely centerpiece for any occasion.
Making this cake is straightforward, and it’s a fun way to impress your friends and family. With just a few simple ingredients, you can create layers of fluffy green tea goodness, topped with a creamy frosting that complements the matcha flavor beautifully. Let’s dive into the recipe!
Ingredients
- 1 ½ cups all-purpose flour
- 1 ½ teaspoons baking powder
- ½ teaspoon baking soda
- ½ teaspoon salt
- 1 cup granulated sugar
- ½ cup unsalted butter, softened
- 2 large eggs
- 1 cup buttermilk
- 2 tablespoons matcha green tea powder
- 1 teaspoon vanilla extract
- For Frosting: 1 cup heavy cream
- ½ cup powdered sugar
- 1 teaspoon vanilla extract
- 1 tablespoon matcha green tea powder (for dusting)
Instructions
- Preheat your oven to 350°F (175°C) and grease two 8-inch round cake pans.
- In a bowl, whisk together flour, baking powder, baking soda, and salt.
- In another mixing bowl, beat the sugar and softened butter until light and fluffy. Add the eggs one at a time, mixing well.
- Gradually add the dry ingredients to the wet mixture, alternating with the buttermilk. Stir in the matcha powder and vanilla extract until well combined.
- Divide the batter evenly between the prepared pans and smooth the tops. Bake for 25-30 minutes, or until a toothpick inserted in the center comes out clean.
- Let the cakes cool in the pans for 10 minutes before transferring them to a wire rack to cool completely.
- For the frosting, whip the heavy cream with powdered sugar and vanilla until soft peaks form.
- Once the cakes are cooled, spread a layer of frosting between the cakes, then frost the top and sides. Finally, dust with matcha powder before serving.
Savory Okonomiyaki Pancakes

Okonomiyaki pancakes are a delightful Japanese dish that combines a variety of ingredients into a savory pancake, making it both flavorful and filling. The name literally means ‘grilled as you like it’, which perfectly describes the versatility of this dish. You can customize it with different meats, seafood, vegetables, and toppings, appealing to everyone’s taste buds.
The pancakes have a crispy exterior and a soft, fluffy interior, offering a wonderful texture contrast. They are easy to make, making them a fun option for a casual meal or a weekend brunch with friends and family. Let’s dive into the recipe!
Ingredients
- 1 cup all-purpose flour
- 1/2 cup dashi stock (or water)
- 1 large egg
- 1 cup shredded cabbage
- 1/2 cup chopped green onions
- 1/2 cup cooked meat (like pork or shrimp)
- 1/4 cup tenkasu (tempura scraps), optional
- Vegetable oil for frying
- Okonomiyaki sauce, for drizzling
- Japanese mayonnaise, for drizzling
- Seaweed flakes and bonito flakes, for garnish
Instructions
- Mix the Batter: In a large bowl, whisk together the flour, dashi stock, and egg until smooth. Stir in the cabbage, green onions, and meat until well combined.
- Heat the Pan: Heat a non-stick skillet over medium heat and add a bit of vegetable oil to coat the bottom.
- Cook the Pancakes: Pour a ladleful of the batter into the pan, forming a round pancake about 1/2 inch thick. Cook for about 3-4 minutes until the bottom is golden brown, then carefully flip and cook for another 3-4 minutes on the other side.
- Repeat: Continue the process with the remaining batter, adding more oil to the pan as needed.
- Serve: Drizzle with okonomiyaki sauce and mayonnaise, then sprinkle with seaweed flakes and bonito flakes before serving. Enjoy your savory pancakes warm!
Satisfying Onigiri Rice Balls
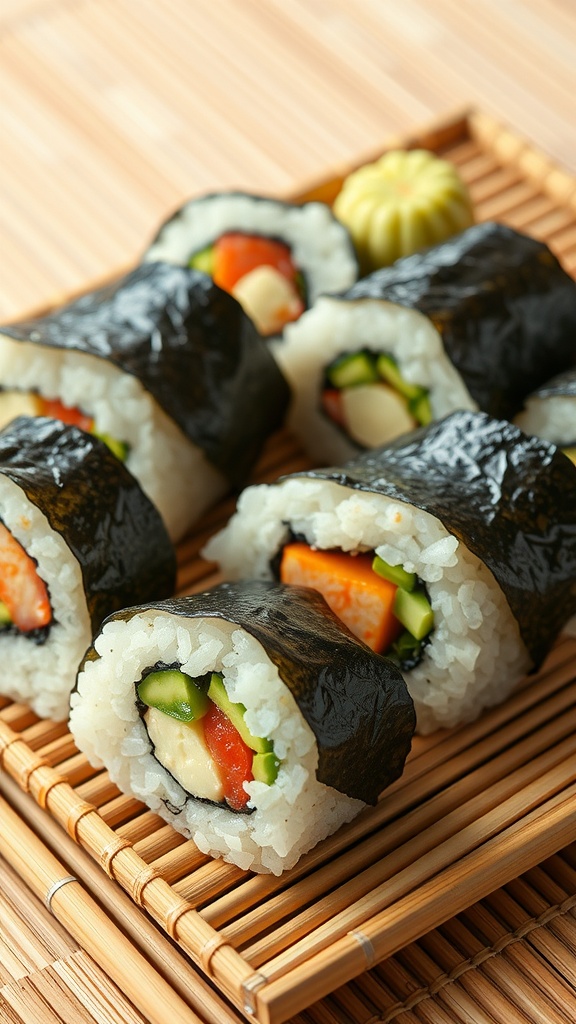
Onigiri, or Japanese rice balls, are delightful little snacks that pack a flavorful punch. These rice balls can be filled with various ingredients, making them versatile and fun to customize. They are often wrapped in nori (seaweed) and are perfect for lunchboxes or as a quick snack. The taste is a wonderful combination of the savory filling and slightly sticky rice, all wrapped up for easy eating.
🦈 As Seen on Shark Tank: These Kitchen Gadgets Are Flying Off the Shelves!




Souper Cubes 1 Cup Silicone Freezer Molds with Lids, Aqua, 2-Pack
(as of September 22, 2026 22:07 GMT +00:00 - More infoEatMeMaybe is a participant in the Amazon Services LLC Associates Program, an affiliate advertising program designed to provide a means for sites to earn commission fees by advertising and linking to the following web sites.)




The Perfect Pizza Pack™ - Reusable Pizza Storage Container with 5 Microwavable Serving Trays - BPA-F...
(as of September 22, 2026 22:07 GMT +00:00 - More infoEatMeMaybe is a participant in the Amazon Services LLC Associates Program, an affiliate advertising program designed to provide a means for sites to earn commission fees by advertising and linking to the following web sites.)


OTOTO Splatypus Jar Spatula for Scooping and Scraping - Unique Fun Cooking Kitchen Gadgets for Foodi...
(as of September 22, 2026 22:07 GMT +00:00 - More infoEatMeMaybe is a participant in the Amazon Services LLC Associates Program, an affiliate advertising program designed to provide a means for sites to earn commission fees by advertising and linking to the following web sites.)As an Amazon Associate, I may earn a commission from qualifying purchases — at no extra cost to you.
Preparing onigiri is simple and quick, making it an ideal option for busy days. With just a few ingredients, you can create a satisfying meal that’s both portable and delicious. Whether you choose to fill them with seasoned vegetables, fish, or even pickled plum, onigiri will always be a comforting choice.
Ingredients
- 2 cups Japanese short-grain rice
- 2 1/2 cups water
- Salt to taste
- 4 sheets of nori (seaweed)
- 1/2 cup cooked chicken, diced
- 1/2 cup cucumber, finely chopped
- 1/4 cup pickled plum (umeboshi), mashed
- Sesame seeds for garnish
Instructions
- Rinse the rice under cold water until the water runs clear. Drain well.
- In a rice cooker or pot, combine the rice and water. Cook according to your rice cooker instructions or bring to a boil, then cover and simmer for about 15 minutes until tender.
- Once the rice is cooked, let it sit for 10 minutes. Season with salt and mix gently.
- Moisten your hands with water and take a small portion of rice. Flatten it slightly and place your desired filling in the center.
- Shape the rice around the filling and form a triangle or ball. Wrap a strip of nori around the base for easier handling.
- Sprinkle with sesame seeds, if desired, and serve.
Flavorful Nasu Dengaku (Miso Eggplant)
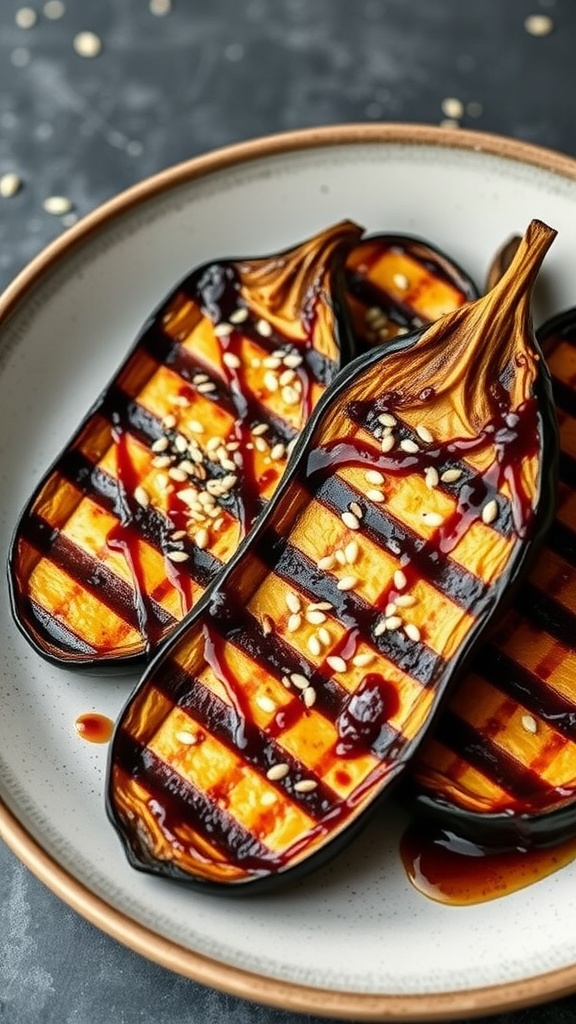
Nasu Dengaku is a delightful Japanese dish that features grilled or broiled eggplant topped with a savory miso glaze. The combination of the soft, creamy eggplant with the umami-rich miso creates a balance of flavors that is both satisfying and comforting. It’s a simple recipe that can be whipped up quickly, making it a great choice for a side dish or a light meal.
This dish is not only packed with flavor but also offers a unique twist on classic eggplant preparations. The caramelization from grilling or broiling enhances the natural sweetness of the eggplant, while the miso adds depth and richness. With just a few ingredients, you can enjoy Nasu Dengaku in no time!
Ingredients
- 2 medium-sized eggplants
- 1/4 cup white miso paste
- 2 tablespoons mirin
- 1 tablespoon sugar
- 1 tablespoon soy sauce
- 1 tablespoon sesame oil
- Sesame seeds for garnish
Instructions
- Prepare the Eggplants: Preheat your grill or broiler. Cut the eggplants in half lengthwise and score the flesh in a crisscross pattern to allow the glaze to seep in better.
- Make the Miso Glaze: In a small bowl, mix together the miso paste, mirin, sugar, soy sauce, and sesame oil until smooth.
- Grill the Eggplants: Place the eggplants cut side down on the grill or under the broiler for about 5-7 minutes until tender and slightly charred. Flip them over to skin side down.
- Add the Glaze: Brush the miso glaze generously over the cut side of the eggplants. Return them to the grill or broiler for another 2-3 minutes, allowing the glaze to caramelize.
- Serve: Remove from heat, sprinkle with sesame seeds, and enjoy warm!
Crispy Battered Fish with Rice
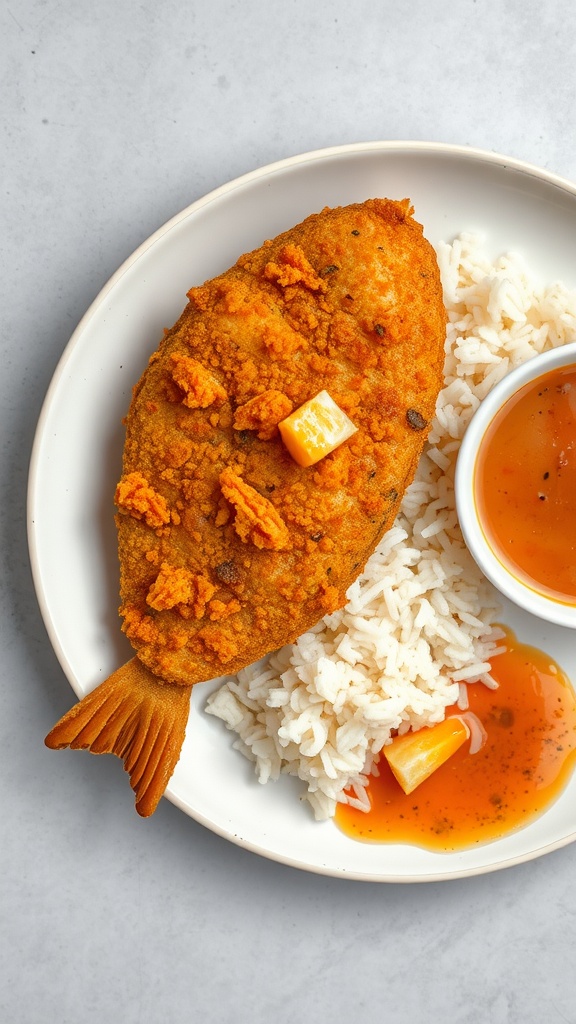
Crispy battered fish is a delightful dish that brings a satisfying crunch with every bite. The fish is covered in a light, crispy batter, making it a tasty and fun meal for everyone. Paired with fluffy rice, this dish is both filling and flavorful, perfect for a casual dinner or a special occasion.
This recipe is simple to make, even for beginners in the kitchen. You can easily customize the flavors by choosing your favorite type of fish and adjusting the seasoning to your liking. Serve it with a tangy dipping sauce for an extra boost of flavor that will have everyone coming back for seconds!
Ingredients
- 2 fillets of white fish (like tilapia or cod)
- 1 cup all-purpose flour
- 1 teaspoon baking powder
- 1 teaspoon salt
- 1 teaspoon black pepper
- 1 teaspoon garlic powder
- 1 cup cold water
- Oil for frying
- 2 cups cooked rice
- Your choice of dipping sauce
Instructions
- Prepare the Batter: In a bowl, mix the flour, baking powder, salt, pepper, and garlic powder. Gradually add cold water and whisk until smooth.
- Heat the Oil: In a deep pan, heat oil over medium-high heat until hot.
- Batter the Fish: Dip each fish fillet into the batter, ensuring it’s fully coated. Allow excess batter to drip off.
- Fry the Fish: Carefully place the battered fish into the hot oil. Fry until golden brown and crispy on both sides, about 3-4 minutes per side. Remove and drain on paper towels.
- Serve: Plate the crispy fish alongside cooked rice and your choice of dipping sauce for a delicious meal.
Zesty Yuzu Dressing for Salads
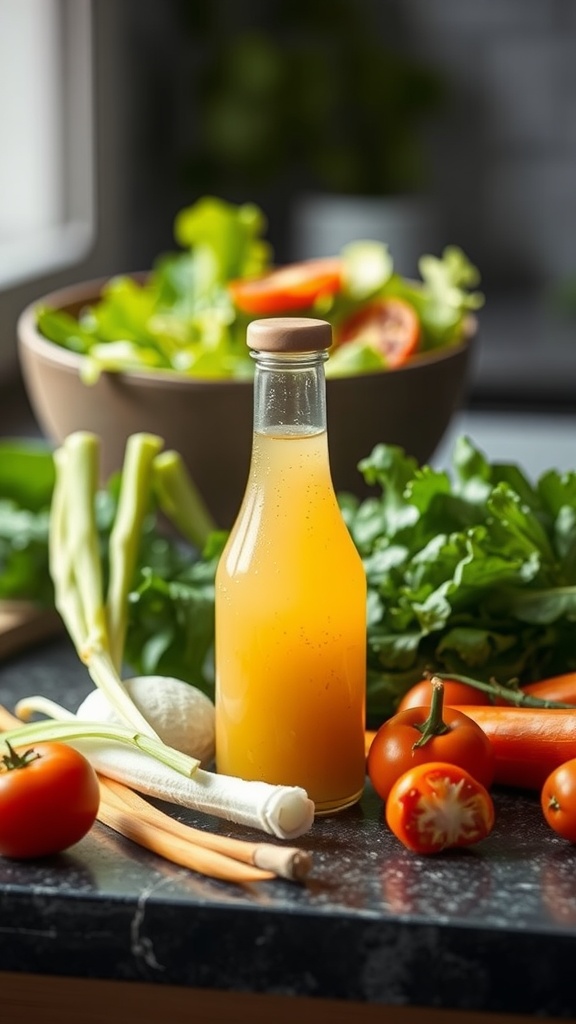
This zesty yuzu dressing is a refreshing twist to your salad game. With its bright citrus flavor, it adds a unique tang that elevates any mix of greens and veggies. Plus, it’s super easy to whip up with just a few ingredients!
Perfect for those looking to spice up their meals, this dressing is not only simple but also versatile. You can even use it as a marinade for grilled chicken or seafood. Give your salads a burst of flavor with this delightful dressing!
Ingredients
- 1/4 cup yuzu juice
- 1/4 cup olive oil
- 1 tablespoon soy sauce
- 1 teaspoon honey or maple syrup
- 1 teaspoon sesame oil
- Salt and pepper to taste
Instructions
- In a bowl, whisk together the yuzu juice, olive oil, soy sauce, and honey until well combined.
- Add the sesame oil, and season with salt and pepper according to your taste.
- Drizzle over your favorite salad and toss to coat. Enjoy!
Spicy Kimchi Fried Rice
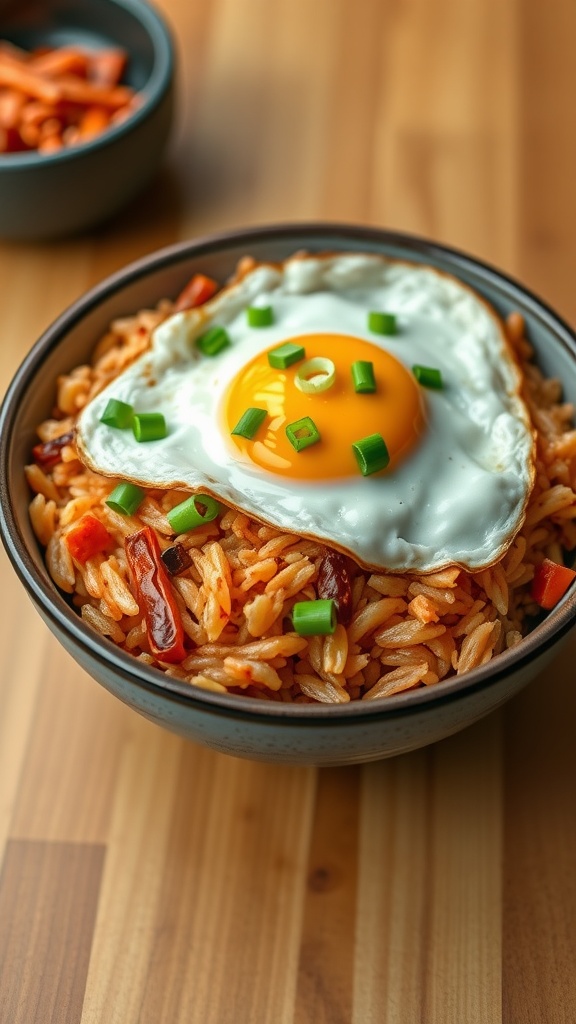
Spicy Kimchi Fried Rice is a delightful dish packed with flavor and warmth. It combines the tanginess of kimchi with the savory goodness of fried rice, making it a satisfying option for any meal. The spicy kick from the kimchi is balanced by the rich taste of soy sauce and the creaminess of a fried egg on top, creating a dish that’s both comforting and energizing.
This recipe is easy to whip up, making it perfect for busy weeknights or a casual weekend meal. With just a few ingredients, you can create a hearty dish that’s sure to please everyone at the table.
Ingredients
- 2 cups cooked rice (preferably day-old)
- 1 cup kimchi, chopped
- 1 tablespoon gochujang (Korean chili paste)
- 2 tablespoons soy sauce
- 2 tablespoons vegetable oil
- 2 green onions, sliced
- 1 small carrot, diced
- 1 egg
Instructions
- Heat vegetable oil in a large skillet over medium heat. Add diced carrot and sauté for a few minutes until softened.
- Add the chopped kimchi and continue to stir-fry for another 2-3 minutes, allowing the flavors to meld.
- Stir in the cooked rice, gochujang, and soy sauce. Mix thoroughly and cook for about 5 minutes, making sure the rice is heated through.
- In a separate pan, fry an egg sunny-side up to place on top of the fried rice.
- Serve the rice in bowls, topped with the fried egg and sprinkled with sliced green onions. Enjoy your delicious Spicy Kimchi Fried Rice!
Classic Japanese Cheesecake
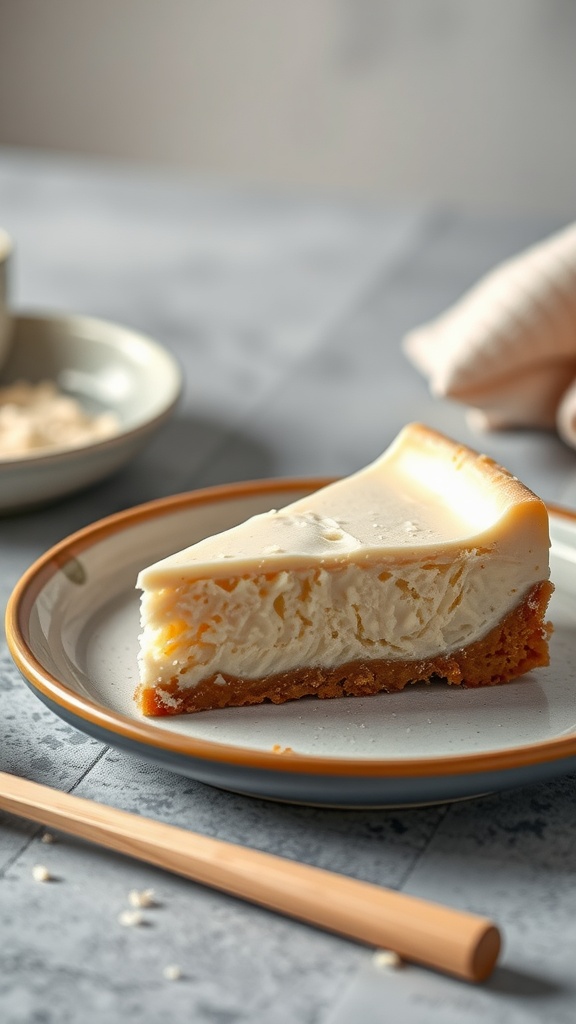
Classic Japanese cheesecake is a delightful dessert that combines the fluffiness of a soufflé with the creaminess of a traditional cheesecake. This unique treat features a light, airy texture and a subtly sweet flavor that makes it a perfect ending to any meal. It’s not overly rich, so you can easily enjoy a slice without feeling overwhelmed.
Making this cheesecake might seem daunting, but it’s surprisingly simple. With just a few basic ingredients and some careful technique, you can create a dessert that impresses everyone. Whether you’re a seasoned baker or trying your hand at cheesecakes for the first time, this recipe is sure to become a favorite.
Ingredients
- 1 cup cream cheese, softened
- 1/4 cup granulated sugar
- 1/4 cup milk
- 3 large eggs, separated
- 1/2 cup cake flour
- 1 tablespoon lemon juice
- 1/4 teaspoon salt
- 1 teaspoon vanilla extract
Instructions
- Preheat your oven to 320°F (160°C) and prepare a 7-inch round cake pan by greasing and lining the bottom with parchment paper.
- In a mixing bowl, combine the cream cheese, sugar, and milk. Use a hand mixer to blend until smooth and creamy.
- Add in the egg yolks, cake flour, lemon juice, and vanilla extract. Mix until well incorporated.
- In another bowl, beat the egg whites and salt until soft peaks form. Gradually add the remaining sugar and continue beating until stiff peaks form.
- Gently fold the egg whites into the cream cheese mixture, being careful not to deflate the batter.
- Pour the batter into the prepared pan, smoothing the top. Place the cake pan in a larger baking dish filled with water to create a water bath.
- Bake for about 60 minutes or until the top is lightly browned and a toothpick inserted comes out clean. Allow to cool in the pan for 10 minutes before transferring to a wire rack.
- Once cooled, chill the cheesecake in the refrigerator for at least 2 hours before slicing and serving.
Refreshing Matcha Latte
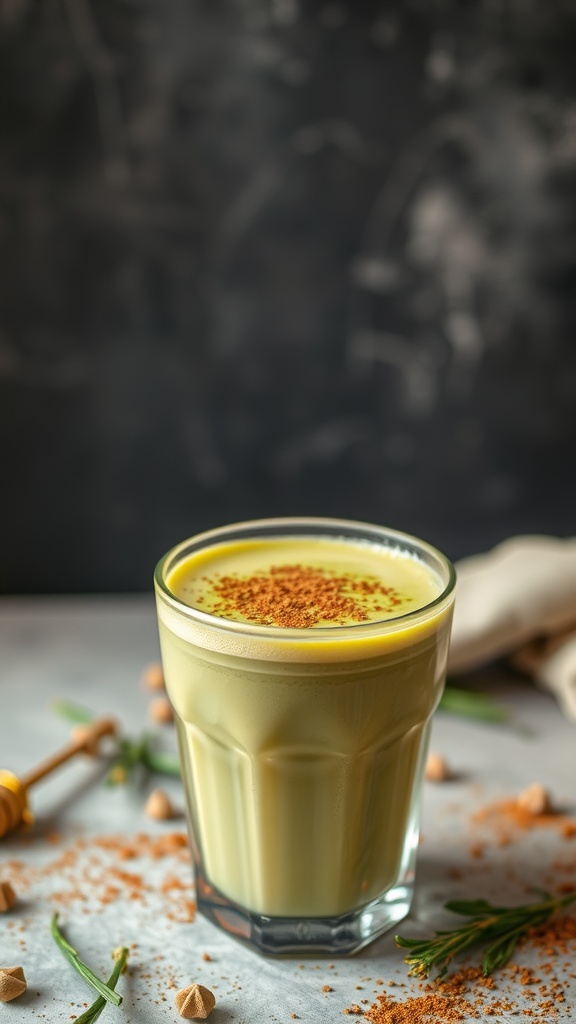
If you’re looking for a drink that combines a touch of zen with a burst of flavor, a matcha latte is the way to go. This vibrant green beverage has a unique earthy taste, perfectly balanced with creamy milk and a hint of sweetness. It’s simple to whip up, making it a great option for a quick morning boost or an afternoon treat.
Not only is it delicious, but matcha also offers a variety of health benefits, including antioxidants and a calm energy boost. You can customize it with different milk options and sweeteners to suit your taste, making it a versatile choice for any occasion.
Ingredients
- 1 teaspoon matcha powder
- 2 ounces hot water
- 1 cup milk (dairy or non-dairy)
- 1 tablespoon honey or sweetener of choice
- 1/4 teaspoon vanilla extract (optional)
Instructions
- Whisk the Matcha: In a small bowl, combine the matcha powder with hot water. Use a bamboo whisk or a frother to mix until smooth and frothy.
- Heat the Milk: In a small saucepan, gently heat the milk over medium heat until warm, but not boiling. Remove from heat.
- Sweeten the Mixture: Stir honey and vanilla extract into the warm milk until fully dissolved.
- Combine: Pour the matcha mixture into a glass, then slowly add the sweetened milk. Stir gently to combine.
- Serve: Optionally, top with a sprinkle of matcha powder or cinnamon for a touch of flair. Enjoy your refreshing matcha latte!
Traditional Japanese Pickles (Tsukemono)
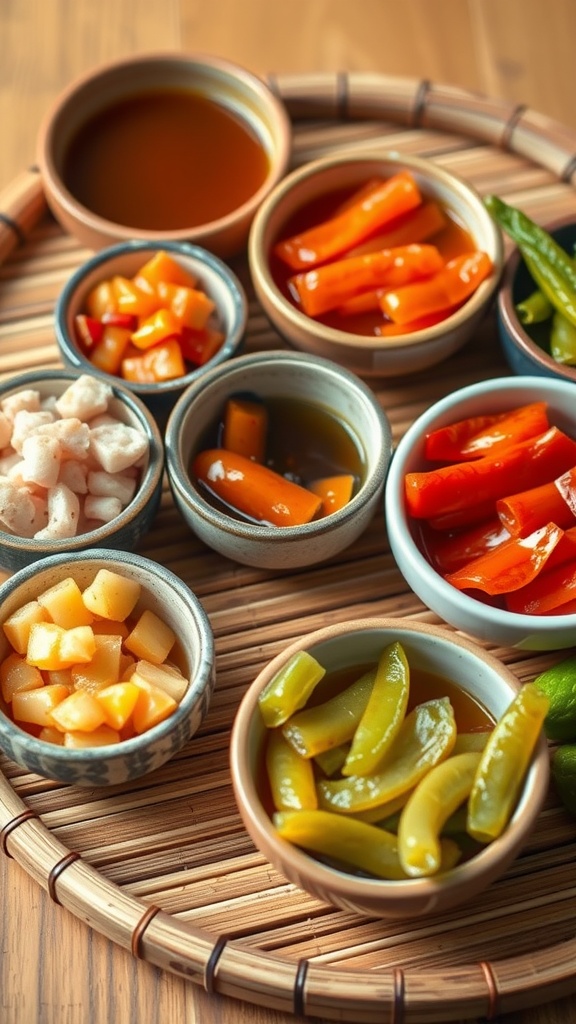
Tsukemono, or traditional Japanese pickles, are vibrant and flavorful side dishes that add a delightful crunch to any meal. These pickles can range from sweet to savory, often made from a variety of vegetables like cucumbers, radishes, and carrots. They are generally easy to prepare, making them a great addition to your culinary repertoire.
The taste of tsukemono is refreshing and tangy, which can complement the subtle flavors of rice or other dishes. Whether you are looking for a quick snack or a side to enhance your main course, these pickles offer a wonderful balance of flavors that can brighten up any plate.
Ingredients
- 2 cups cucumbers, sliced
- 1 cup daikon radish, julienned
- 1 cup carrots, cut into thin strips
- 1/2 cup salt
- 1/2 cup rice vinegar
- 1/4 cup sugar
- 1 tablespoon soy sauce
- 1 teaspoon sesame seeds (optional)
Instructions
- Prepare the Vegetables: Place the cucumbers, daikon radish, and carrots in a large bowl. Sprinkle salt over the vegetables and mix well. Let them sit for about 30 minutes to draw out excess moisture.
- Make the Pickling Liquid: In a separate bowl, whisk together rice vinegar, sugar, and soy sauce until the sugar is dissolved.
- Combine: After 30 minutes, rinse the salted vegetables under cold water and squeeze out any excess moisture. Place them in a clean jar and pour the pickling liquid over them, making sure they are fully submerged.
- Refrigerate: Seal the jar and refrigerate for at least 24 hours before serving. The pickles will develop richer flavors the longer they sit.
- Serve: Enjoy your homemade tsukemono as a side dish with rice, in sandwiches, or as a refreshing snack!
Braised Beef with Daikon
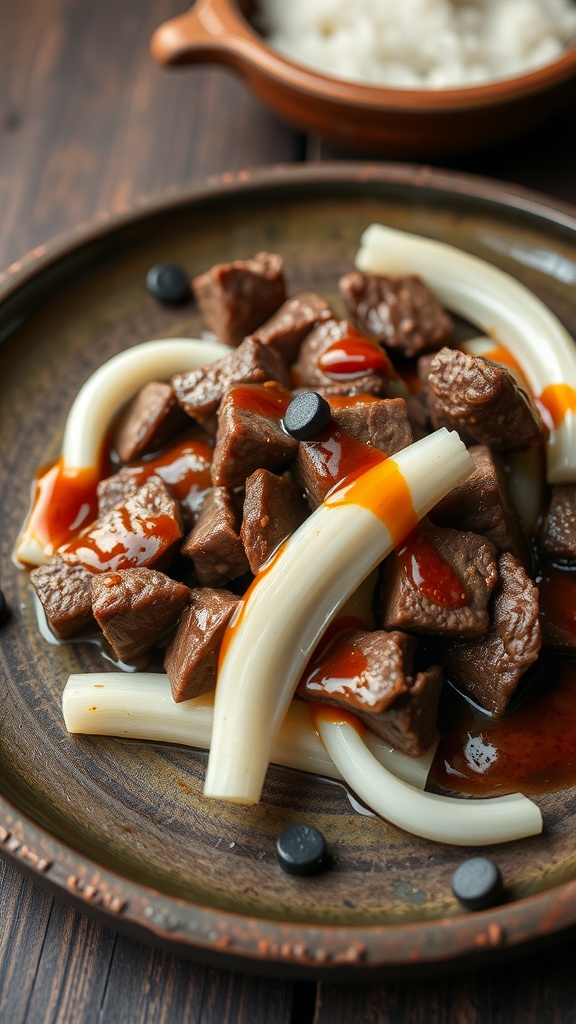
Braising beef with daikon is a delightful way to combine tender meat with the unique flavor of radish. This dish offers a rich, savory taste that balances perfectly with the subtle sweetness of the daikon. It’s a comforting meal that’s surprisingly simple to prepare, making it a great choice for both novice cooks and seasoned chefs alike.
The slow cooking process allows the beef to absorb all the delicious flavors from the broth, while the daikon becomes tender and adds an extra layer of taste. Serve this dish with a bowl of steamed rice for a complete meal that will warm you up from the inside out.
Ingredients
- 2 lbs beef chuck, cut into bite-sized pieces
- 1 medium daikon radish, peeled and sliced
- 4 cups beef broth
- 1 onion, chopped
- 4 cloves garlic, minced
- 1/4 cup soy sauce
- 2 tablespoons sake
- 1 tablespoon sugar
- 1 tablespoon vegetable oil
- Salt and pepper to taste
Instructions
- Brown the Beef: In a large pot, heat vegetable oil over medium-high heat. Add the beef and cook until browned on all sides. Remove the beef and set aside.
- Sauté the Aromatics: In the same pot, add chopped onion and minced garlic. Sauté for about 2-3 minutes until fragrant.
- Add the Ingredients: Return the beef to the pot. Pour in the beef broth, soy sauce, sake, and sugar. Season with salt and pepper.
- Simmer: Bring the mixture to a boil, then reduce the heat and let it simmer for about 1.5 to 2 hours. Add the sliced daikon during the last 30 minutes of cooking.
- Serve: Once the beef is tender and the daikon is cooked through, serve hot with steamed rice.
Nutty Black Sesame Soup
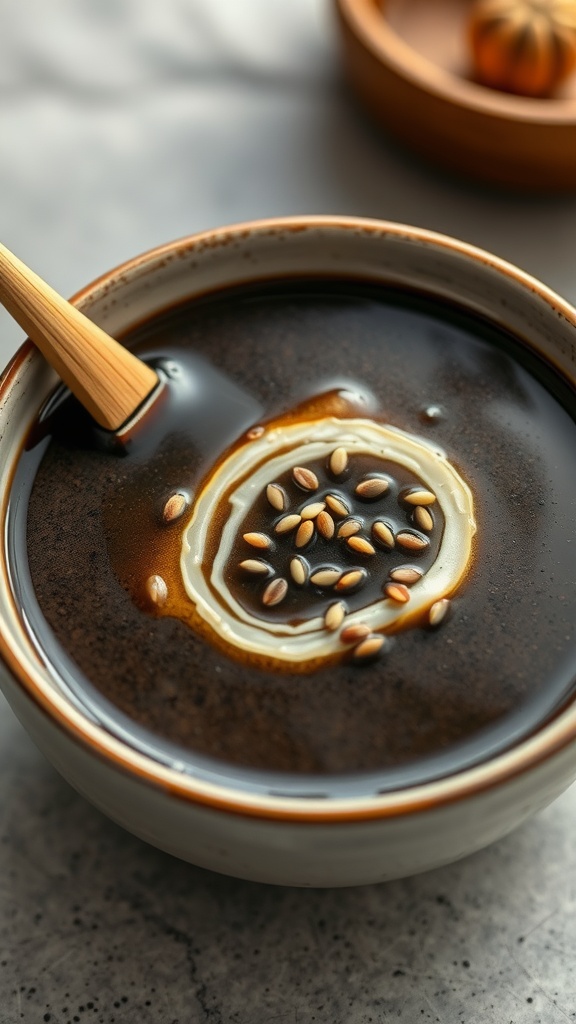
Nutty Black Sesame Soup is a delightful dish that brings warmth and comfort in every spoonful. Its rich, nutty flavor comes from ground black sesame seeds, which create a creamy texture that is both satisfying and slightly sweet. This soup is not only comforting but also simple to make, making it an ideal choice for a cozy evening meal or a refreshing dessert.
The balance of flavors and the creamy consistency make it a unique treat that can be enjoyed warm or chilled. Perfect for any occasion, this soup offers a taste of traditional Japanese cuisine that is both nutritious and delicious!
Ingredients
- 1 cup black sesame seeds
- 1/2 cup sugar (adjust to taste)
- 4 cups water
- 1/4 cup glutinous rice flour (optional, for thicker texture)
- A pinch of salt
- Chopped nuts or seeds for garnish (optional)
Instructions
- Toast the sesame seeds in a dry skillet over medium heat until fragrant, about 5 minutes. Remove from heat and allow to cool.
- Once cooled, blend the toasted sesame seeds with 1 cup of water until smooth to create a sesame paste.
- In a pot, combine the sesame paste with the remaining water and sugar. Stir well and bring to a gentle simmer.
- If using, mix the glutinous rice flour with a little water to create a slurry, then add it to the pot for a thicker consistency.
- Cook for about 10 minutes, stirring occasionally. Add a pinch of salt to enhance the flavor.
- Serve warm, garnished with chopped nuts or seeds if desired.
Grilled Salmon with Shio Koji
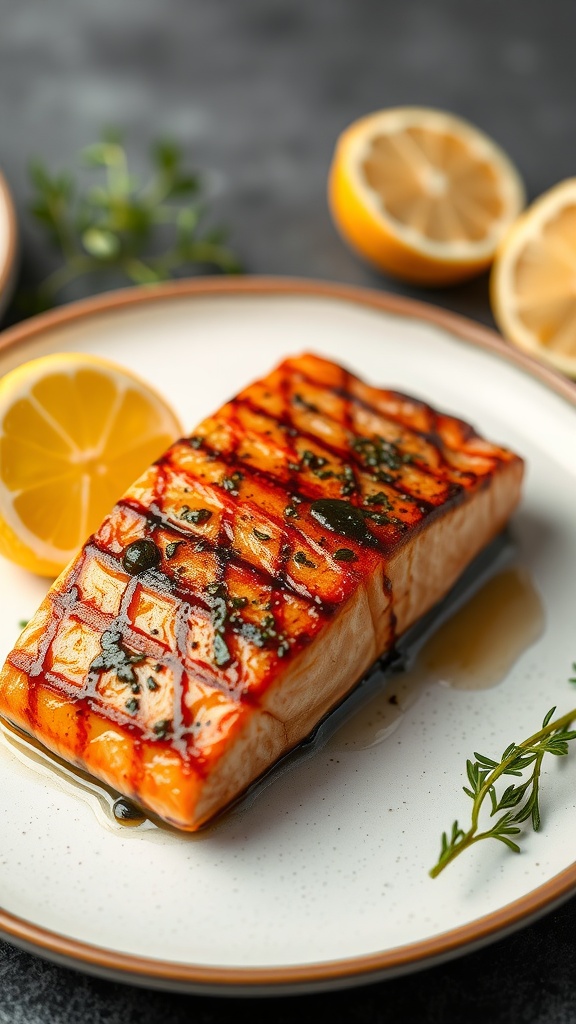
Grilled Salmon with Shio Koji is a delightful dish that highlights the natural flavors of the fish while adding a unique umami punch. Shio koji, a traditional Japanese marinade made from fermented rice, salt, and koji mold, tenderizes the salmon and infuses it with a subtle sweetness. The grilling process brings out a smoky flavor, making it both satisfying and delicious.
This recipe is straightforward enough for a weeknight dinner but special enough to impress guests. With just a few ingredients and simple steps, you can create a meal that feels both elegant and comforting.
Ingredients
- 4 salmon fillets
- 1/4 cup shio koji
- 1 tablespoon olive oil
- 1 teaspoon soy sauce
- 1/2 lemon, juiced
- Salt and pepper to taste
- Fresh herbs (like thyme or parsley) for garnish
Instructions
- Prepare the Marinade: In a bowl, mix shio koji, olive oil, soy sauce, and lemon juice. Season with salt and pepper as needed.
- Marinate the Salmon: Place the salmon fillets in a shallow dish or a resealable bag and pour the marinade over them. Let it marinate for at least 30 minutes in the refrigerator.
- Preheat the Grill: Heat your grill to medium-high. Make sure the grates are clean and lightly oiled to prevent sticking.
- Grill the Salmon: Remove the salmon from the marinade and place it on the grill. Cook for about 4-5 minutes per side, or until the salmon is cooked to your preference.
- Serve: Once cooked, remove from the grill and garnish with fresh herbs. Serve with lemon wedges on the side for extra flavor.
Flavorful Chawanmushi (Savory Custard)
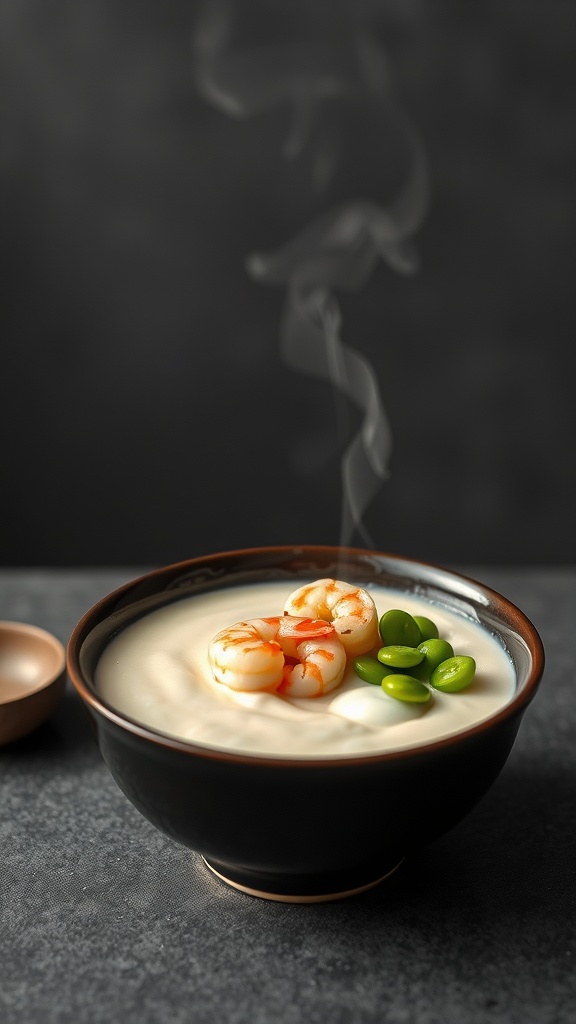
Chawanmushi is a delightful Japanese steamed egg custard that’s both comforting and versatile. The silky, savory custard melts in your mouth, offering a light yet satisfying taste experience. It’s a dish that’s perfect for any occasion, whether as an appetizer or a light meal.
Making chawanmushi is simpler than it might seem. With just a few key ingredients and some gentle steaming, you can create a dish that’s sure to impress. Enjoy the harmony of flavors with added ingredients like shrimp or mushrooms, making every bite a unique experience. Here’s how to whip up this tasty treat!
Ingredients
- 4 large eggs
- 2 cups dashi broth (or chicken broth)
- 1 tablespoon soy sauce
- 1 teaspoon mirin
- Salt to taste
- 4 cooked shrimp (peeled and deveined)
- 1/2 cup cooked edamame or peas
- Sliced shiitake mushrooms (optional)
- Chopped green onions for garnish
Instructions
- Prepare the Custard Mixture: In a bowl, whisk together the eggs, dashi broth, soy sauce, mirin, and a pinch of salt until smooth.
- Strain the Mixture: To achieve a silky texture, strain the egg mixture through a fine sieve into another bowl.
- Arrange Ingredients: Divide the shrimp, edamame, and mushrooms among four small cups or ramekins.
- Fill with Custard: Carefully pour the strained egg mixture over the arranged ingredients, leaving a little space at the top.
- Steam: Place the cups in a steamer or a pot with a steaming rack. Cover and steam for about 15-20 minutes, or until the custard is set but still wobbly.
- Garnish and Serve: Once cooked, remove from the steamer and let it cool slightly. Garnish with chopped green onions before serving warm.
Crunchy Shrimp Chips
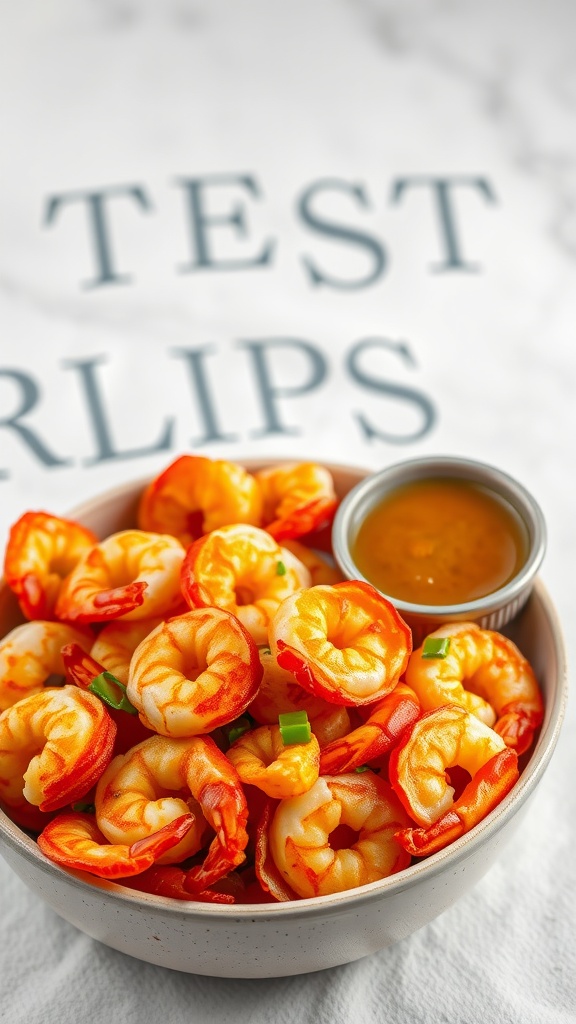
Crunchy shrimp chips are a delightful snack that perfectly combines the savory taste of shrimp with a satisfying crunch. These chips are light, crispy, and often have a subtle flavor that pairs well with a variety of dips. They make for a fun appetizer, perfect for parties or a casual movie night at home.
The recipe is quite simple and can be prepared in no time. With just a few ingredients, you can whip up a batch of these tasty snacks that everyone will love. Let’s dive into how to make your own crunchy shrimp chips!
Ingredients
- 1 cup shrimp (peeled and deveined)
- 1 cup tapioca flour
- 1/2 teaspoon salt
- 1/2 teaspoon garlic powder
- 1/4 teaspoon white pepper
- Water (as needed for dough consistency)
- Oil (for frying)
Instructions
- Prepare the Shrimp: In a food processor, blend the shrimp until they form a smooth paste.
- Make the Dough: In a mixing bowl, combine the shrimp paste, tapioca flour, salt, garlic powder, and white pepper. Gradually add water until you form a smooth, moldable dough.
- Shape the Chips: Roll the dough into logs about 1 inch in diameter. Wrap them in plastic wrap and steam for about 20-30 minutes until firm.
- Slice the Logs: Once cooled, remove the logs from the plastic wrap and slice them into thin chips.
- Fry the Chips: Heat oil in a frying pan over medium heat. Fry the shrimp chips in batches until they puff up and turn golden brown. Remove and drain on paper towels.
- Serve: Enjoy your crunchy shrimp chips plain or with your favorite dipping sauce!
Delightful Fruit Daifuku

Fruit Daifuku is a delightful Japanese treat that combines the chewy texture of mochi with fresh, juicy fruit. These sweet rice cakes are not only delicious but also visually appealing, making them a perfect dessert for gatherings or a fun snack at home. The blend of textures and flavors adds a refreshing twist, and best of all, they are quite simple to make!
Perfectly soft and slightly sticky, the mochi surrounds a variety of fruits, creating a light yet satisfying bite. You can customize the fillings based on your favorite fruits, whether it’s strawberries, blueberries, or even peaches. Let’s dive into making this sweet treat at home with an easy recipe!
Ingredients
- 1 cup sweet rice flour (mochi flour)
- 1/4 cup granulated sugar
- 1 cup water
- Fresh fruits (strawberries, blueberries, peaches, etc.)
- Potato starch (for dusting)
Instructions
- Prepare the Mochi: In a microwave-safe bowl, combine sweet rice flour, sugar, and water. Stir until smooth. Cover with plastic wrap and microwave for 1 minute. Stir, cover again, and microwave for another minute. Repeat this step for a total of 3 minutes until the mixture becomes thick and sticky.
- Cool the Mochi: Dust a clean surface with potato starch. Carefully transfer the mochi onto the surface and let it cool for a few minutes until it’s manageable.
- Shape the Mochi: Divide the mochi into small pieces (about the size of a golf ball). Flatten each piece into a disk using your hands. Make sure to keep them dusted with potato starch to prevent sticking.
- Add the Fruit: Place a piece of your chosen fruit in the center of each disk. Gently fold the edges over the fruit, pinching to seal it closed. Roll it lightly to create a smooth ball.
- Serve: Dust off any excess starch and place the Fruit Daifuku on a serving plate. Enjoy them fresh as a delightful treat!
Herbed Tofu Stir-Fry
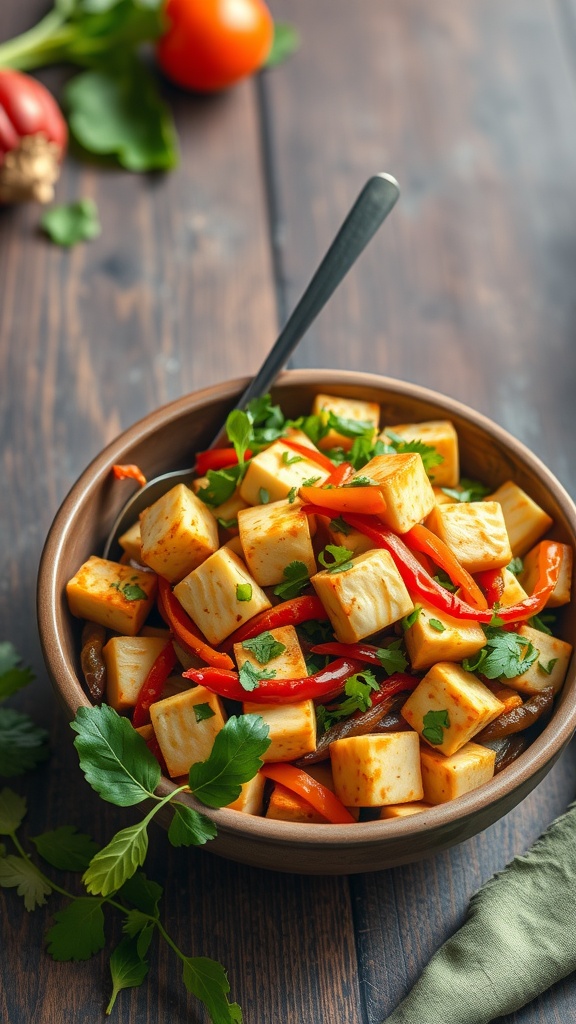
Herbed Tofu Stir-Fry is a delightful and nourishing dish that’s super easy to whip up. The combination of soft tofu and vibrant veggies creates a satisfying meal that’s light yet full of flavor. This recipe features fresh herbs that elevate the taste, making it a perfect choice for lunch or dinner.
With just a few simple ingredients, you can have a colorful and nutritious dish on the table in no time. Whether you’re a tofu lover or just looking to try something new, this stir-fry is a tasty way to incorporate more plant-based meals into your diet.
Ingredients
- 1 block of firm tofu, drained and cubed
- 1 red bell pepper, sliced
- 1 cup of broccoli florets
- 2 tablespoons soy sauce
- 1 tablespoon olive oil
- 2 cloves garlic, minced
- 1 teaspoon ginger, grated
- 1/4 cup fresh cilantro, chopped
- Salt and pepper to taste
Instructions
- Prepare the Tofu: Press the tofu to remove excess moisture, then cut it into cubes.
- Heat Oil: In a large skillet, heat the olive oil over medium heat.
- Cook Tofu: Add the cubed tofu and cook until golden brown on all sides, about 5-7 minutes. Remove from the skillet and set aside.
- Stir-Fry Vegetables: In the same skillet, add garlic, ginger, and sliced bell pepper. Sauté for 2-3 minutes, then add broccoli and a splash of water. Cook until the broccoli is tender yet crisp.
- Combine: Add the cooked tofu back into the skillet, drizzle with soy sauce, and stir to combine everything. Season with salt and pepper to taste.
- Serve: Garnish with chopped cilantro before serving. Enjoy your herbed tofu stir-fry!