
When it comes to packing lunch, cold options can be just as satisfying and delicious as their warm counterparts. Whether you’re at work, school, or on the go, there are plenty of easy and tasty cold lunch ideas that will keep your energy up and your taste buds happy. Let’s explore some quick and simple recipes that are perfect for a hassle-free midday meal!
Tuna Salad Lettuce Cups
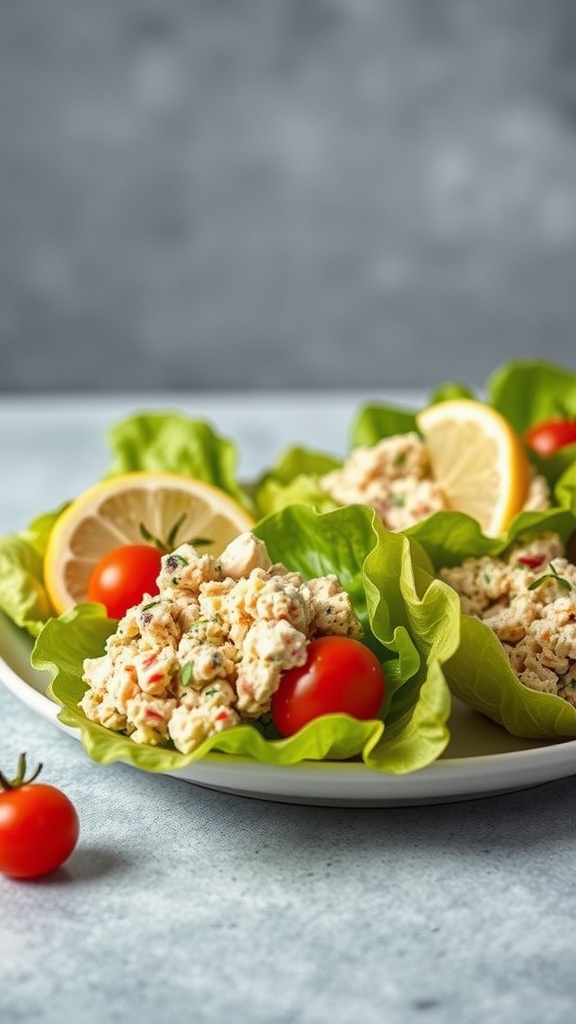
Tuna Salad Lettuce Cups are a refreshing and light option for lunch that packs a punch of flavor. This dish combines the savory taste of tuna with crisp lettuce, making it both satisfying and healthy. Plus, it’s incredibly easy to whip up, which makes it perfect for busy days.
The bright flavors of lemon and the crunch of fresh vegetables create a delightful contrast that’s sure to please your taste buds. Whether you’re at home or on the go, these lettuce cups are a fantastic choice for a cold lunch that feels indulgent without weighing you down.
Ingredients
- 1 can of tuna, drained
- 1/4 cup mayonnaise
- 1 tablespoon Dijon mustard
- 1/4 cup diced celery
- 1/4 cup diced red bell pepper
- 1 tablespoon fresh lemon juice
- Salt and pepper to taste
- 1 head of butter or romaine lettuce, leaves separated
- Cherry tomatoes for garnish
Instructions
- In a medium bowl, combine the drained tuna, mayonnaise, Dijon mustard, diced celery, diced red bell pepper, and lemon juice. Mix well.
- Season the mixture with salt and pepper to taste.
- Take a lettuce leaf and spoon some of the tuna salad onto it.
- Garnish with cherry tomatoes and a squeeze of lemon juice if desired.
- Serve immediately and enjoy your healthy and tasty lunch!
Hummus and Veggie Platter
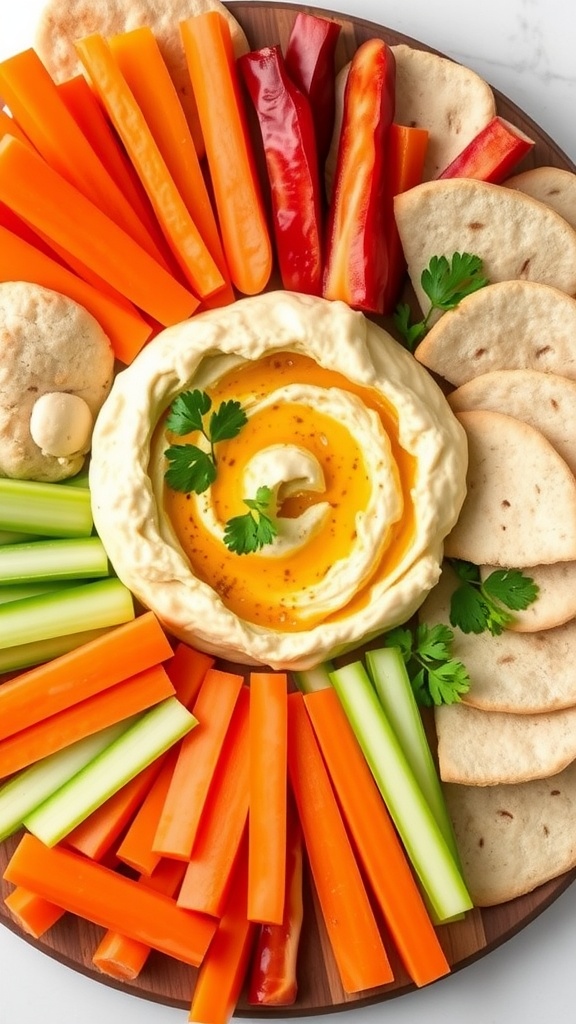
A hummus and veggie platter is a fun and colorful option for a cold lunch. This recipe brings together creamy hummus and an array of fresh vegetables, making it both tasty and healthy. With its variety of textures and flavors, it’s sure to satisfy your cravings while keeping things light and refreshing.
Making this platter is simple and quick. Just grab your favorite veggies, whip up some hummus if you’re feeling adventurous, or buy it pre-made. The best part is that you can customize it based on your preferences or what you have on hand. Let’s dive into the ingredients and instructions!
Ingredients
- 1 cup hummus (store-bought or homemade)
- 2 large carrots, cut into sticks
- 1 cucumber, sliced
- 1 red bell pepper, sliced
- 1 yellow bell pepper, sliced
- 1 cup cherry tomatoes
- 1 cup celery sticks
- Pita bread, cut into triangles
- 1 tablespoon olive oil (optional)
- Fresh herbs (like parsley) for garnish
Instructions
- Prepare the Vegetables: Wash and cut all the vegetables into bite-sized pieces. Arrange them in a colorful pattern on a serving platter.
- Prepare the Hummus: If making homemade hummus, blend together chickpeas, tahini, lemon juice, garlic, and olive oil until smooth. Season to taste with salt and pepper.
- Assemble the Platter: Place the hummus in the center of the platter. Surround it with the cut vegetables and pita triangles.
- Drizzle with Olive Oil: For an extra touch, drizzle a bit of olive oil over the hummus before serving.
- Garnish: Sprinkle fresh herbs on top to add a pop of color and flavor.
Greek Yogurt Parfait with Berries
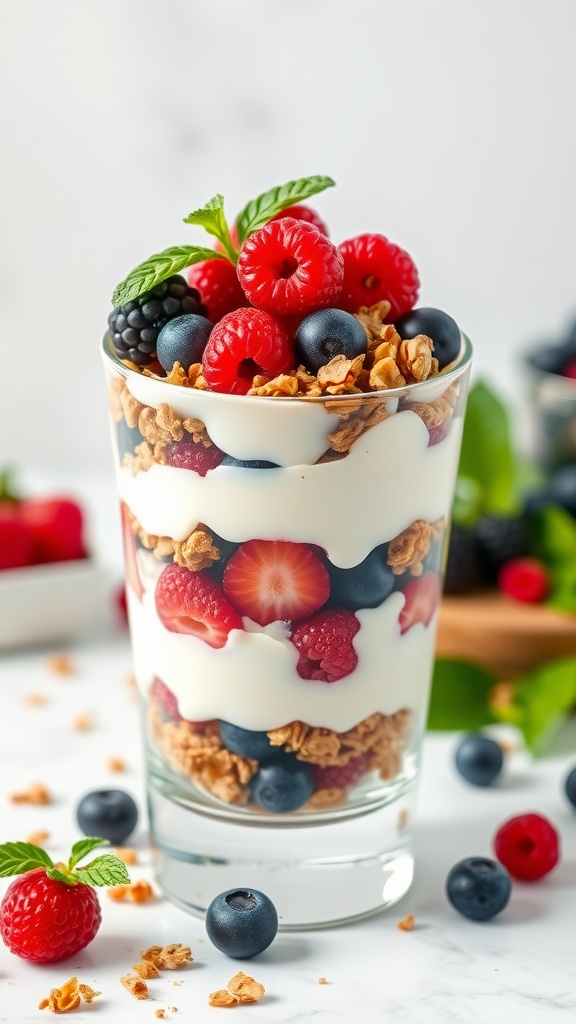
This Greek yogurt parfait is a delightful and refreshing choice for a cold lunch. Layered with creamy yogurt, vibrant berries, and crunchy granola, every bite offers a perfect mix of flavors and textures. It’s simple to make, requiring just a few ingredients and a couple of minutes of assembly.
The tartness of the yogurt complements the sweetness of the berries beautifully, while the granola adds a satisfying crunch. This parfait is not only delicious but also a nutritious option that can keep you energized throughout the day. Whether you’re enjoying it at home or packing it for a picnic, this is a delightful treat!
Ingredients
- 2 cups Greek yogurt
- 1 cup mixed berries (strawberries, blueberries, raspberries, blackberries)
- 1 cup granola
- 1 tablespoon honey (optional)
- Fresh mint leaves for garnish
Instructions
- In a glass or bowl, start by adding a layer of Greek yogurt.
- Next, add a layer of mixed berries on top of the yogurt.
- Sprinkle a layer of granola over the berries.
- Repeat the layers until the glass is filled, finishing with a layer of berries on top.
- If desired, drizzle honey over the top and garnish with fresh mint leaves.
- Enjoy immediately or cover and chill until ready to serve.
Chicken Caesar Salad Wraps
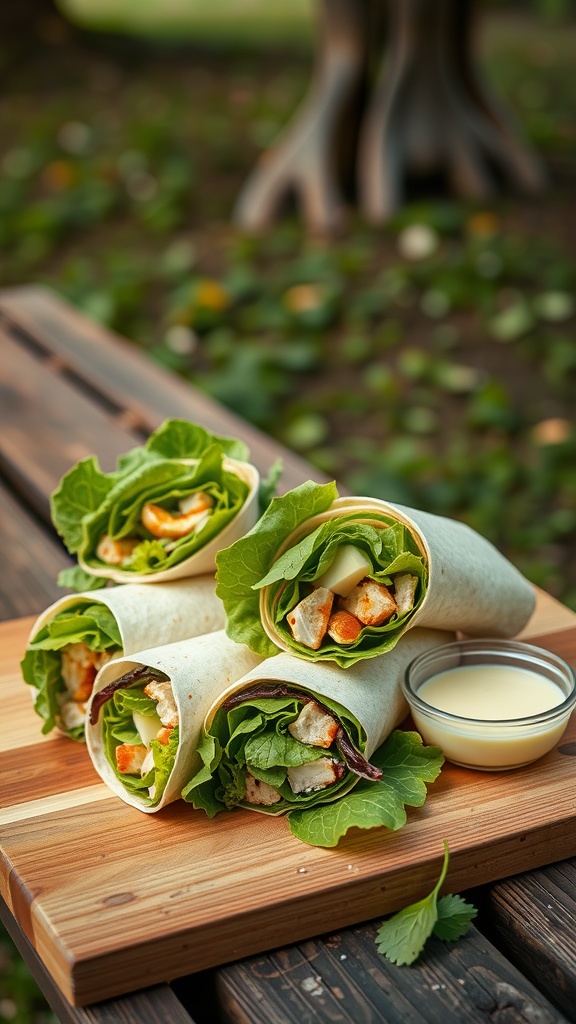
Chicken Caesar Salad Wraps are a delightful and uncomplicated lunch option that combines the classic flavors of a Caesar salad with the convenience of a wrap. With tender chicken, crisp romaine lettuce, and creamy Caesar dressing, every bite is packed with satisfying taste. These wraps are not only easy to make but also a refreshing choice for warm days or busy afternoons.
Perfect for a picnic or a quick meal at home, they can be prepared in just a matter of minutes. You can customize them by adding your favorite ingredients, making them versatile enough to suit anyone’s palate. Whether enjoyed on the go or at the kitchen table, these wraps are sure to please!
Ingredients
- 2 cups cooked chicken breast, diced
- 4 large tortillas or wraps
- 2 cups romaine lettuce, chopped
- 1/2 cup cherry tomatoes, halved
- 1/4 cup Caesar dressing
- 1/4 cup grated Parmesan cheese
- Freshly ground black pepper, to taste
Instructions
- In a large bowl, combine the diced chicken, chopped romaine lettuce, cherry tomatoes, and Parmesan cheese.
- Drizzle the Caesar dressing over the mixture and toss until everything is well coated.
- Lay the tortillas on a flat surface and evenly distribute the chicken Caesar mixture among them.
- Fold in the sides of the tortilla and roll it up tightly from the bottom to create a wrap.
- Cut the wraps in half, secure with toothpicks if needed, and serve immediately or pack for later.
Turkey and Avocado Wraps

Turkey and avocado wraps are a delightful and nutritious choice for a cold lunch. They boast a satisfying blend of flavors and textures, from the creamy avocado to the tender turkey. This recipe is not only simple to prepare but also versatile; you can customize the ingredients to suit your taste or what you have on hand.
These wraps are perfect for a quick lunch at home or on the go. The fresh ingredients keep the meal light but filling, making it a great option for anyone looking to eat healthier. Plus, you can whip them up in just a few minutes!
Ingredients
- 4 large tortillas
- 8 ounces sliced turkey breast
- 1 ripe avocado, sliced
- 1 cup baby spinach
- 1/2 cup shredded cheese (cheddar or your choice)
- 1/4 cup roasted red peppers, sliced
- Salt and pepper to taste
Instructions
- Lay the tortillas flat on a clean surface.
- Evenly distribute the sliced turkey over each tortilla.
- Add slices of avocado, baby spinach, cheese, and roasted red peppers on top of the turkey.
- Sprinkle with salt and pepper to taste.
- Starting from one end, carefully roll the tortilla tightly to enclose the filling.
- Slice each wrap in half and serve immediately, or wrap in foil for a lunch on the go.
Mediterranean Quinoa Salad with Chickpeas
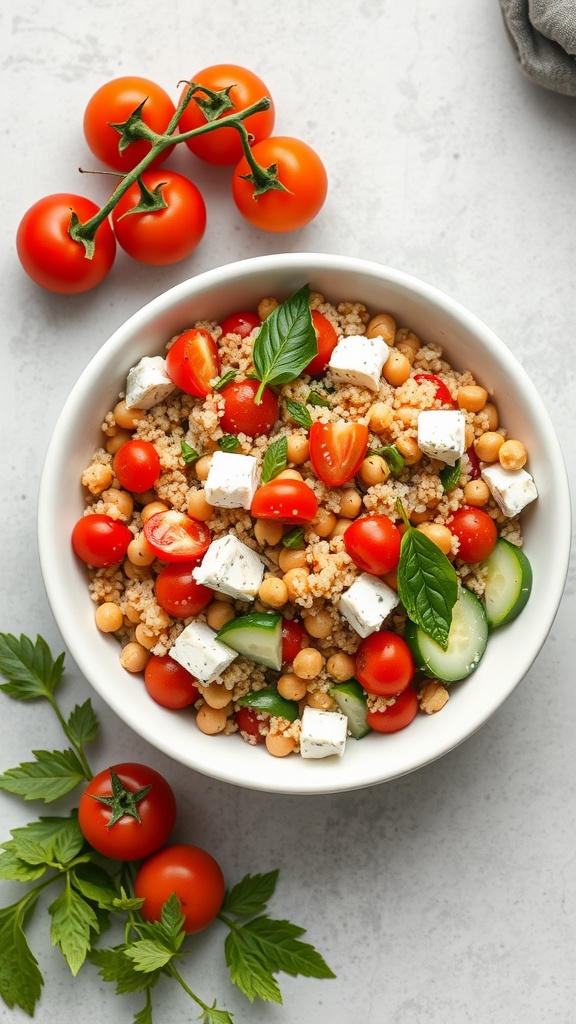
This Mediterranean Quinoa Salad with Chickpeas is a delightful mix of flavors and textures. It’s light, refreshing, and packed with nutrients, making it a fantastic option for a cold lunch. The combination of quinoa, chickpeas, and fresh vegetables creates a satisfying meal that is both filling and easy to prepare.
With the vibrant flavors of tomatoes, cucumbers, and herbs, this salad offers a taste of the Mediterranean right at your table. Plus, it comes together quickly, making it a convenient choice for busy days or meal prep. Now, let’s dive into the recipe!
Ingredients
- 1 cup quinoa
- 2 cups water
- 1 can (15 oz) chickpeas, drained and rinsed
- 1 cup cherry tomatoes, halved
- 1 cucumber, diced
- 1/2 cup feta cheese, cubed
- 1/4 cup fresh parsley, chopped
- 1/4 cup olive oil
- 2 tablespoons lemon juice
- Salt and pepper to taste
Instructions
- Cook the Quinoa: Rinse quinoa under cold water. In a medium saucepan, bring water to a boil, then add quinoa. Reduce heat to low, cover, and simmer for about 15 minutes until the water is absorbed. Fluff with a fork and let it cool.
- Mix the Salad: In a large bowl, combine cooked quinoa, chickpeas, cherry tomatoes, cucumber, feta cheese, and parsley.
- Dress the Salad: In a small bowl, whisk together olive oil, lemon juice, salt, and pepper. Drizzle over the salad and toss gently to combine.
- Serve and Enjoy: Enjoy the salad immediately or refrigerate for about 30 minutes to let the flavors meld. This dish is perfect for meal prep and can be stored in the fridge for a few days!
Sushi Rolls with Fresh Vegetables

Sushi rolls packed with fresh vegetables are a delightful cold lunch idea that’s both healthy and satisfying. They offer a refreshing taste, combining the crunch of various veggies with the subtle flavors of sushi rice and nori. Plus, they’re simple to make, making them perfect for an easy lunch at home or on the go.
You can customize these rolls with your favorite ingredients, ensuring every bite is delicious. The combination of textures and flavors will keep your lunch exciting and nutritious. Let’s dive into the recipe so you can create your own tasty sushi rolls!
Ingredients
- 2 cups sushi rice
- 2 1/2 cups water
- 1/4 cup rice vinegar
- 2 tablespoons sugar
- 1 teaspoon salt
- 4 sheets nori (seaweed)
- 1 cucumber, julienned
- 1 carrot, julienned
- 1 bell pepper, thinly sliced
- 1 avocado, sliced
- Soy sauce for dipping
Instructions
- Prepare the Sushi Rice: Rinse the sushi rice under cold water until the water runs clear. In a pot, combine the rinsed rice and water, then bring to a boil. Reduce heat, cover, and simmer for about 20 minutes until the rice is tender. Let it sit for 10 minutes off the heat.
- Season the Rice: In a small bowl, mix together rice vinegar, sugar, and salt until dissolved. Gently fold this mixture into the cooked rice, ensuring it’s evenly coated. Allow the rice to cool to room temperature.
- Assemble the Rolls: Place a sheet of nori on a bamboo rolling mat. With wet fingers, spread a thin layer of sushi rice over the nori, leaving a small border at the top. Lay your choice of julienned vegetables and avocado across the center of the rice.
- Roll It Up: Start from the bottom edge of the mat and carefully roll the nori away from you, applying gentle pressure. When you reach the exposed edge, wet it with water to seal the roll.
- Slice and Serve: Use a sharp knife to cut the roll into bite-sized pieces. Serve with soy sauce for dipping.
Caprese Pasta Salad
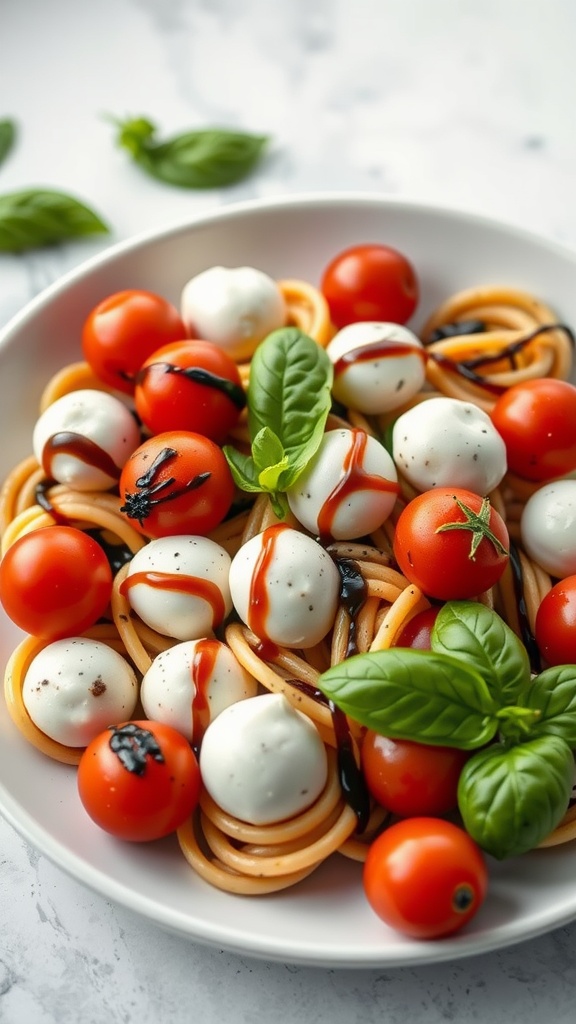
Caprese Pasta Salad is a refreshing twist on the classic Caprese salad, combining pasta with the vibrant flavors of fresh tomatoes, mozzarella, and basil. This dish is light, yet satisfying, making it a perfect choice for a cold lunch. With its colorful presentation and a simple combination of ingredients, it’s sure to brighten up your meal.
What sets this pasta salad apart is the delightful blend of flavors that come from the freshness of the ingredients. The juicy tomatoes pair beautifully with creamy mozzarella, while the basil adds a fragrant touch. Drizzled with a balsamic glaze, it’s a flavorful dish that’s easy to whip up, and it keeps well in the fridge for a few days, making it ideal for meal prep.
Ingredients
- 8 oz pasta (your choice)
- 1 cup cherry tomatoes, halved
- 8 oz mozzarella balls (bocconcini), drained
- 1/4 cup fresh basil leaves
- 1/4 cup olive oil
- 2 tablespoons balsamic vinegar
- Salt and pepper to taste
Instructions
- Cook the Pasta: In a large pot of salted boiling water, cook the pasta according to package instructions. Drain and let it cool.
- Mix Ingredients: In a large bowl, combine the cooled pasta, cherry tomatoes, mozzarella balls, and basil leaves.
- Add Dressing: In a small bowl, whisk together the olive oil, balsamic vinegar, salt, and pepper. Pour the dressing over the pasta salad and toss gently to combine.
- Chill: Allow the salad to sit in the fridge for at least 30 minutes to let the flavors meld.
- Serve: Give it a final toss before serving. Enjoy your refreshing Caprese Pasta Salad!
Cottage Cheese and Fruit Bowl

This Cottage Cheese and Fruit Bowl is a delightful and refreshing option for a cold lunch. It’s creamy, fruity, and oh-so-easy to make. Packed with protein from the cottage cheese and vitamins from the fruit, it’s a nutritious choice that satisfies your cravings without weighing you down.
Mix and match your favorite fruits for a personalized twist. Whether you’re at home or on the go, this lunch is quick to prepare and can be enjoyed in minutes. It’s a simple, delicious way to add more fruits to your diet!
Ingredients
- 1 cup cottage cheese
- 1/2 cup mixed berries (strawberries, blueberries, raspberries)
- 1/2 cup diced peaches or mango
- 1 tablespoon honey or maple syrup (optional)
- Fresh mint leaves for garnish
Instructions
- In a bowl, add the cottage cheese as the base.
- Top with mixed berries and diced peaches or mango for a burst of flavor.
- If desired, drizzle honey or maple syrup over the top for added sweetness.
- Garnish with fresh mint leaves to enhance the presentation and flavor.
- Enjoy immediately or refrigerate for a few hours for a chilled lunch option.
Buffalo Chicken Salad with Blue Cheese
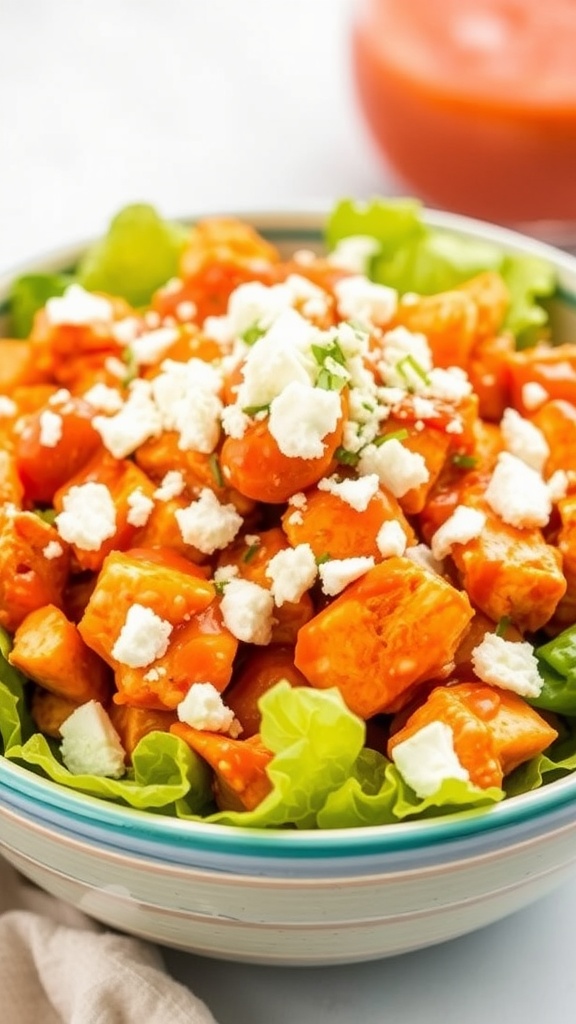
This Buffalo Chicken Salad is a delicious twist on a classic, blending tender chicken with zesty buffalo sauce and creamy blue cheese. It’s perfect for a cold lunch when you want something tasty yet easy to prepare.
With a balance of heat from the buffalo sauce and the coolness of the blue cheese, every bite is a flavorful experience. Plus, you can whip this up in no time, making it a great option for busy days!
Ingredients
- 2 cups cooked chicken, diced
- 1/2 cup buffalo sauce
- 1/2 cup blue cheese, crumbled
- 1/4 cup celery, diced
- 1/4 cup green onions, sliced
- 1/4 cup mayonnaise
- Salt and pepper to taste
- 4 cups lettuce leaves
Instructions
- In a large bowl, combine the diced chicken and buffalo sauce, mixing well to coat.
- Add the crumbled blue cheese, diced celery, and sliced green onions to the bowl. Stir gently to combine.
- In a separate small bowl, mix the mayonnaise with salt and pepper, then fold into the chicken mixture.
- Serve the salad on a bed of lettuce leaves for a fresh crunch.
- Enjoy immediately, or refrigerate for an hour to let the flavors meld together.
Egg Salad Sandwiches on Whole Grain Bread
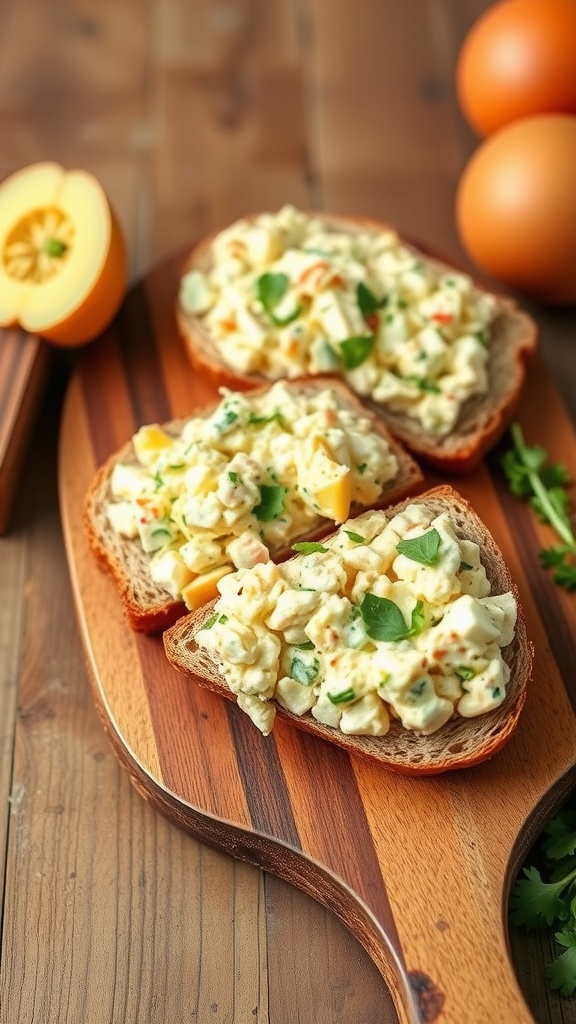
Egg salad sandwiches are a classic choice for a cold lunch that’s both satisfying and nutritious. The creamy texture of the egg salad paired with the hearty whole grain bread creates a delicious balance. This recipe is straightforward, making it a breeze to whip up for a picnic or a quick meal at home.
The flavors are simple yet comforting, with the savory taste of the eggs enhanced by mayonnaise and a hint of mustard. You can easily customize it with your favorite herbs or additional ingredients like diced celery or bell peppers for added crunch. Enjoy a light yet filling lunch with these delightful sandwiches!
Ingredients
- 6 large eggs
- 1/4 cup mayonnaise
- 1 teaspoon Dijon mustard
- 1 tablespoon fresh dill, chopped (or substitute with parsley)
- Salt and pepper to taste
- 4 slices of whole grain bread
- Lettuce leaves (optional)
Instructions
- Boil the Eggs: Place the eggs in a pot and cover with water. Bring to a boil, then reduce heat and simmer for 10-12 minutes. Remove from heat, cover, and let sit for another 5 minutes. Drain and cool in ice water.
- Prepare the Egg Salad: Once the eggs are cool, peel and chop them into small pieces. In a bowl, mix together the chopped eggs, mayonnaise, Dijon mustard, dill, salt, and pepper until well combined.
- Assemble the Sandwiches: Spread the egg salad evenly on two slices of whole grain bread. Add lettuce leaves if desired, then top with the remaining slices of bread.
- Serve: Cut the sandwiches in half and enjoy them fresh or store in the fridge for later!
Chickpea and Spinach Salad
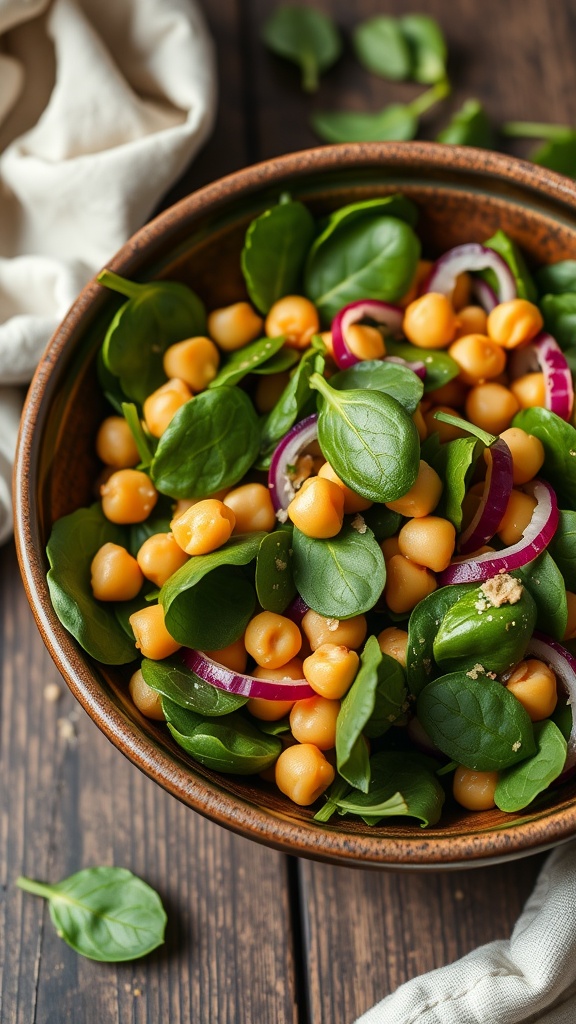
This Chickpea and Spinach Salad is a delightful mix of flavors and textures, perfect for a quick, healthy cold lunch. It combines the earthiness of chickpeas with the freshness of spinach, making it both satisfying and nourishing.
With just a few simple ingredients, this salad is not only easy to whip up but also packed with protein and vitamins. Toss in some red onion for a bit of crunch, and you have a refreshing meal that will keep you energized throughout the day.
Ingredients
- 1 can chickpeas, drained and rinsed
- 3 cups fresh spinach
- 1/2 red onion, thinly sliced
- 1 tablespoon olive oil
- 1 tablespoon lemon juice
- Salt and pepper to taste
- 1 teaspoon garlic powder (optional)
Instructions
- In a large bowl, combine the chickpeas, fresh spinach, and red onion.
- In a small bowl, whisk together the olive oil, lemon juice, garlic powder, salt, and pepper.
- Pour the dressing over the salad and toss gently to combine.
- Serve immediately or store in the fridge for a few hours before serving to allow the flavors to meld.
Fruit and Nut Energy Bites
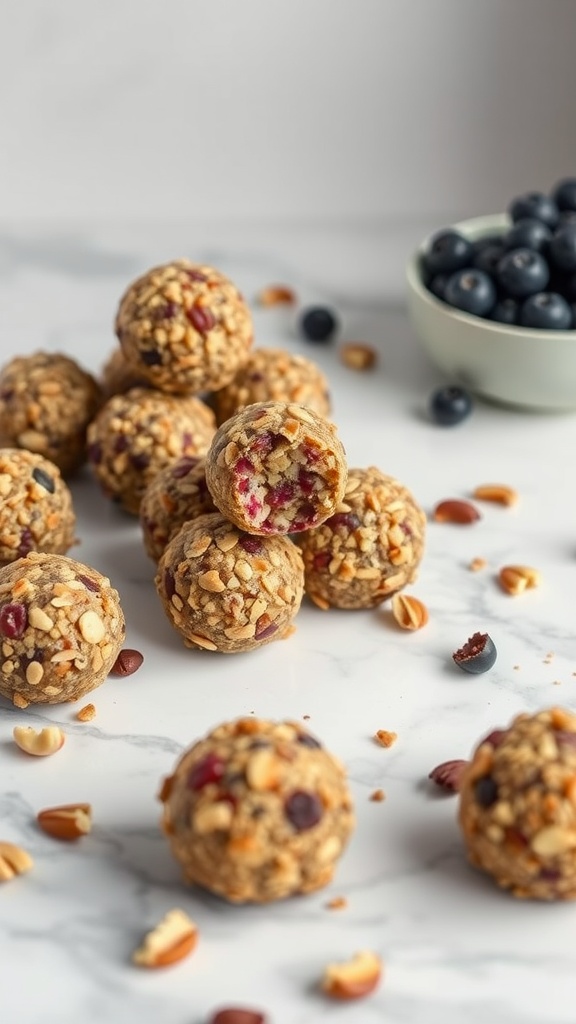
Fruit and nut energy bites are a delightful and nutritious snack perfect for a quick pick-me-up. They combine the natural sweetness of dried fruits with the crunchiness of nuts, offering a satisfying treat that’s easy to make. These bites are packed with energy and flavor, making them an ideal choice for busy days.
Making these energy bites is straightforward and requires no baking. You can customize the ingredients to suit your taste preferences, ensuring a delicious snack every time. They are perfect for lunchboxes, post-workout snacks, or just a nibble throughout the day!
Ingredients
- 1 cup rolled oats
- 1/2 cup nut butter (like almond or peanut butter)
- 1/3 cup honey or maple syrup
- 1/2 cup chopped nuts (such as almonds or walnuts)
- 1/2 cup dried fruits (like cranberries or apricots)
- 1/4 cup mini chocolate chips (optional)
- 1 teaspoon vanilla extract
Instructions
- Mix Ingredients: In a mixing bowl, combine rolled oats, nut butter, honey, chopped nuts, dried fruits, chocolate chips, and vanilla extract. Stir until everything is well combined.
- Form Bites: Using your hands, take small portions of the mixture and roll them into bite-sized balls. You can adjust the size based on your preference.
- Chill: Place the energy bites on a parchment-lined tray and refrigerate for at least 30 minutes to firm up.
- Store: Keep the energy bites in an airtight container in the fridge for up to a week, or freeze for longer storage.
Pasta Salad with Olives and Roasted Vegetables
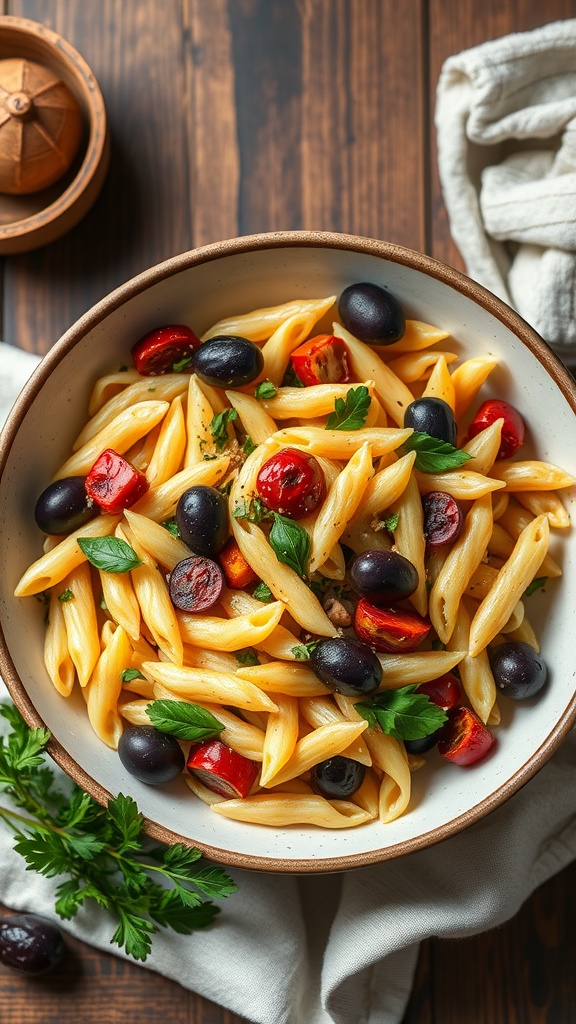
Pasta salad with olives and roasted vegetables is a delightful dish that balances flavors beautifully while being simple to prepare. The combination of al dente pasta, tangy olives, and sweet roasted vegetables creates a refreshing meal that is perfect for lunch or a light dinner.
This recipe is not only delicious, but it also offers plenty of room for customization. Feel free to add your favorite veggies or swap out olives for a different type if you prefer. It’s a great choice for meal prep or picnics, as it tastes even better after the flavors meld together in the fridge!
Ingredients
- 2 cups penne pasta
- 1 cup cherry tomatoes, halved
- 1 cup bell peppers, diced
- 1 cup black olives, pitted and halved
- 1/4 cup red onion, finely chopped
- 1/4 cup olive oil
- 2 tablespoons balsamic vinegar
- 1 teaspoon garlic powder
- Salt and pepper to taste
- Fresh parsley, chopped (for garnish)
Instructions
- Cook the Pasta: In a large pot, bring salted water to a boil. Add the penne pasta and cook according to package instructions until al dente. Drain and set aside to cool.
- Roast the Vegetables: Preheat your oven to 400°F (200°C). Place cherry tomatoes and bell peppers on a baking sheet, drizzle with olive oil, and sprinkle with salt and pepper. Roast for about 20 minutes until tender.
- Mix Ingredients: In a large bowl, combine the cooled pasta, roasted vegetables, olives, and red onion. In a separate bowl, whisk together olive oil, balsamic vinegar, garlic powder, salt, and pepper. Pour over the pasta mixture and toss gently to coat.
- Serve: Garnish with fresh parsley before serving. This salad can be served immediately or chilled in the fridge for a couple of hours for the flavors to deepen.
Salmon and Cream Cheese Wraps
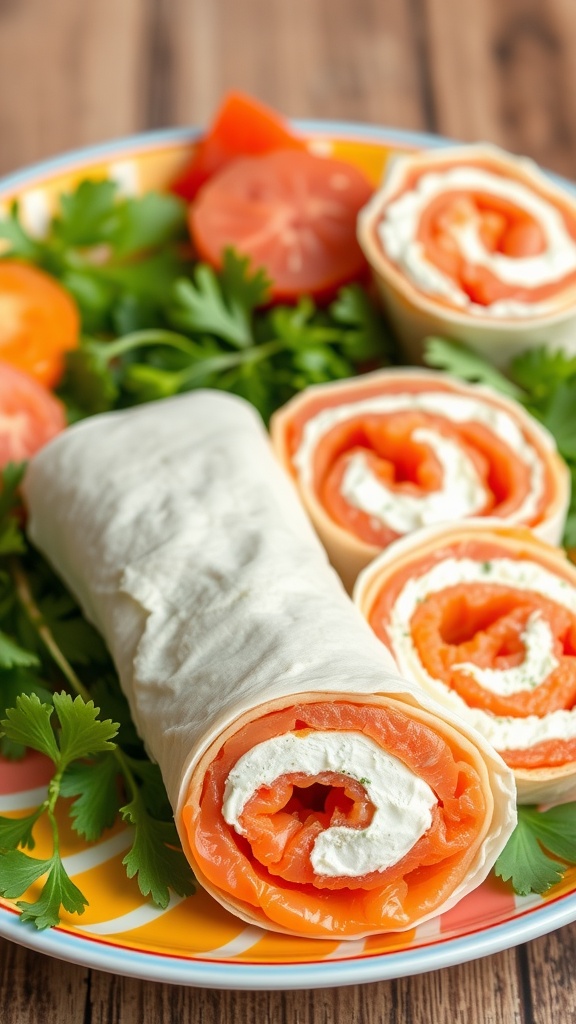
Salmon and cream cheese wraps are a delightful mix of flavors and textures that make for a refreshing cold lunch. With the smoothness of the cream cheese and the rich taste of salmon, each bite is satisfying and enjoyable. These wraps are also incredibly simple to prepare, making them a perfect choice for busy days.
In addition to being quick and easy, these wraps are versatile. You can customize them with various herbs or veggies to suit your taste. They are perfect for picnics, lunchboxes, or even as a light dinner option. Give them a try for a delicious and healthy meal!
🦈 As Seen on Shark Tank: These Kitchen Gadgets Are Flying Off the Shelves!


Souper Cubes 1 Cup Silicone Freezer Molds with Lids, Aqua, 2-Pack
(as of July 12, 2026 05:12 GMT +00:00 - More infoEatMeMaybe is a participant in the Amazon Services LLC Associates Program, an affiliate advertising program designed to provide a means for sites to earn commission fees by advertising and linking to the following web sites.)


The Perfect Pizza Pack™ - Reusable Pizza Storage Container with 5 Microwavable Serving Trays - BPA-F...
(as of July 12, 2026 05:12 GMT +00:00 - More infoEatMeMaybe is a participant in the Amazon Services LLC Associates Program, an affiliate advertising program designed to provide a means for sites to earn commission fees by advertising and linking to the following web sites.)


OTOTO Splatypus Jar Spatula for Scooping and Scraping - Unique Fun Cooking Kitchen Gadgets for Foodi...
(as of July 12, 2026 05:12 GMT +00:00 - More infoEatMeMaybe is a participant in the Amazon Services LLC Associates Program, an affiliate advertising program designed to provide a means for sites to earn commission fees by advertising and linking to the following web sites.)As an Amazon Associate, I may earn a commission from qualifying purchases — at no extra cost to you.
Ingredients
- 4 large tortillas or wraps
- 8 ounces cream cheese, softened
- 8 ounces smoked salmon
- 1 tablespoon capers (optional)
- 1 tablespoon fresh dill, chopped
- 1 cup mixed greens
Instructions
- Spread cream cheese evenly over each tortilla or wrap.
- Layer smoked salmon over the cream cheese, adding capers and dill if desired.
- Place a handful of mixed greens at one end of the wrap.
- Tightly roll the wrap from the filled end, ensuring all ingredients are secure inside.
- Slice into bite-sized pieces and serve immediately or refrigerate for later.
Roasted Red Pepper and Feta Dip
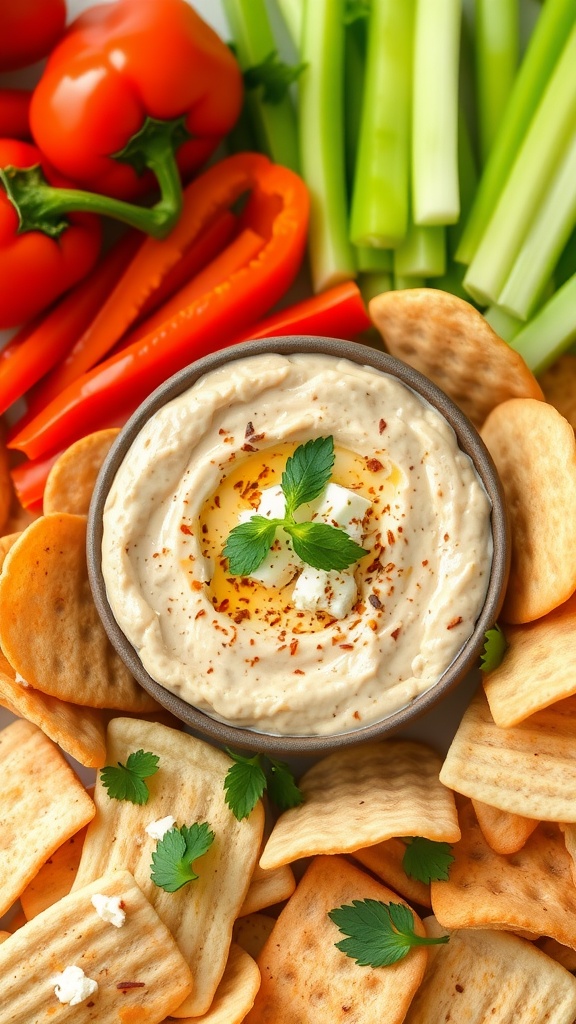
This roasted red pepper and feta dip is a delightful blend of flavors that brings a tasty twist to your lunch routine. Creamy, tangy, and just a little bit smoky, this dip is incredibly easy to whip up, making it a perfect choice for a cold lunch. Pair it with fresh veggies, pita chips, or crackers for a satisfying snack that can be enjoyed anytime.
Not only is it simple to make, but it’s also a crowd-pleaser! The combination of roasted red peppers and feta cheese creates a rich, savory flavor that pairs wonderfully with crunchy dippers. Whether you’re packing it for a picnic or enjoying it at home, this dip is bound to impress.
Ingredients
- 1 cup roasted red peppers, drained
- 1 cup feta cheese, crumbled
- 1/4 cup cream cheese, softened
- 2 tablespoons olive oil
- 1 tablespoon lemon juice
- 1 clove garlic, minced
- 1/2 teaspoon black pepper
- 1/4 teaspoon red pepper flakes (optional)
Instructions
- Blend the Ingredients: In a food processor, combine the roasted red peppers, feta cheese, cream cheese, olive oil, lemon juice, minced garlic, black pepper, and red pepper flakes. Pulse until smooth and creamy.
- Taste and Adjust: After blending, taste the dip and adjust seasoning if needed. You can add more lemon juice or spices according to your preference.
- Chill: Transfer the dip to a serving bowl and refrigerate for at least 30 minutes. This allows the flavors to meld together.
- Serve: Enjoy the dip with fresh veggies, pita chips, or your favorite crackers. It’s perfect for any gathering or just a simple lunch!
Zucchini Noodles with Pesto

This Zucchini Noodles with Pesto recipe brings a fresh, vibrant taste that’s perfect for a cold lunch. The noodles are light and flavorful, making them a great alternative to traditional pasta. Plus, it’s super easy to whip up, which means you can enjoy a healthy meal without spending a lot of time in the kitchen.
The combination of fresh zucchini, pesto, and juicy cherry tomatoes creates a delightful dish that’s both satisfying and refreshing. Whether you’re meal prepping or just looking for a quick bite, this recipe is a handy option that’s sure to please.
Ingredients
- 2 medium zucchinis
- 1 cup fresh basil pesto
- 1 cup cherry tomatoes, halved
- 1/4 cup pine nuts, toasted
- Salt and pepper, to taste
Instructions
- Spiralize the Zucchini: Using a spiralizer, create long noodles from the zucchinis. If you don’t have one, you can use a vegetable peeler to create thin strips.
- Mix with Pesto: In a large bowl, combine the zucchini noodles with the basil pesto. Toss until the noodles are well coated.
- Add Tomatoes and Nuts: Gently fold in the cherry tomatoes and toasted pine nuts. Season with salt and pepper to taste.
- Serve: Enjoy immediately as a refreshing cold lunch or pack it for later!
Bean Salad with Corn and Avocado
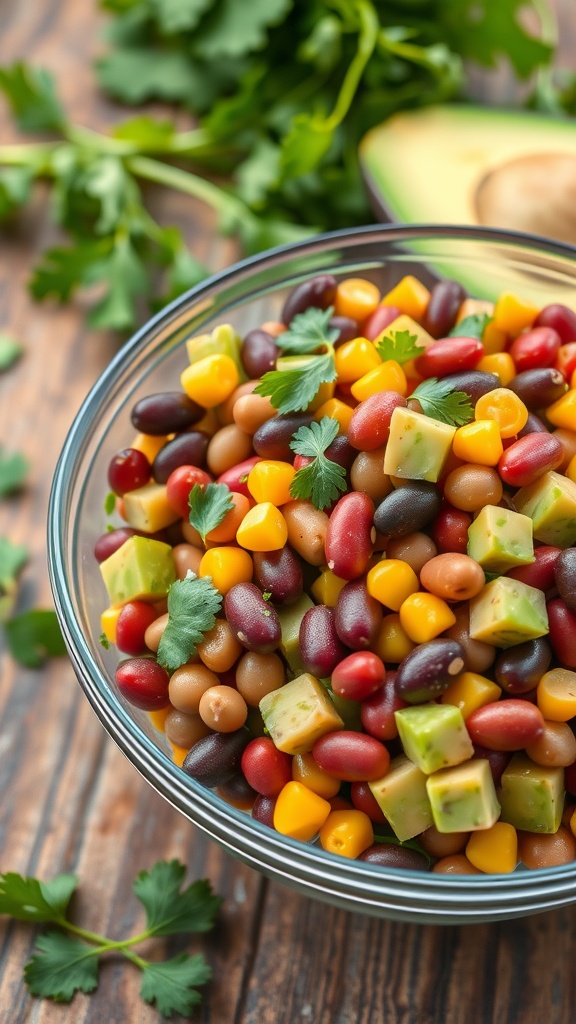
This Bean Salad with Corn and Avocado is a delightful combination of flavors and textures that makes for a refreshing cold lunch. The creaminess of the avocado pairs beautifully with the crunchy corn and hearty beans, creating a dish that’s both satisfying and nutritious. Plus, it’s super easy to whip up, making it perfect for busy days.
The bright colors of this salad not only make it appealing to the eye but also pack a punch in terms of nutrients. With a mix of protein-rich beans and healthy fats from the avocado, this salad keeps you full and energized throughout the day. Enjoy it on its own, or use it as a filling for wraps or sandwiches!
Ingredients
- 1 can black beans, rinsed and drained
- 1 can kidney beans, rinsed and drained
- 1 can pinto beans, rinsed and drained
- 1 cup corn, fresh or canned
- 1 avocado, diced
- 1/4 cup red onion, finely chopped
- 1/4 cup fresh cilantro, chopped
- Juice of 2 limes
- 2 tablespoons olive oil
- Salt and pepper to taste
Instructions
- In a large mixing bowl, combine the black beans, kidney beans, pinto beans, and corn.
- Add the diced avocado, red onion, and cilantro to the bowl, gently tossing everything together.
- In a small bowl, whisk together the lime juice, olive oil, salt, and pepper.
- Pour the dressing over the salad and toss gently to combine. Adjust seasoning if necessary.
- Let the salad sit for about 10 minutes to allow the flavors to meld, then serve chilled or at room temperature.
Stuffed Bell Peppers with Quinoa and Black Beans
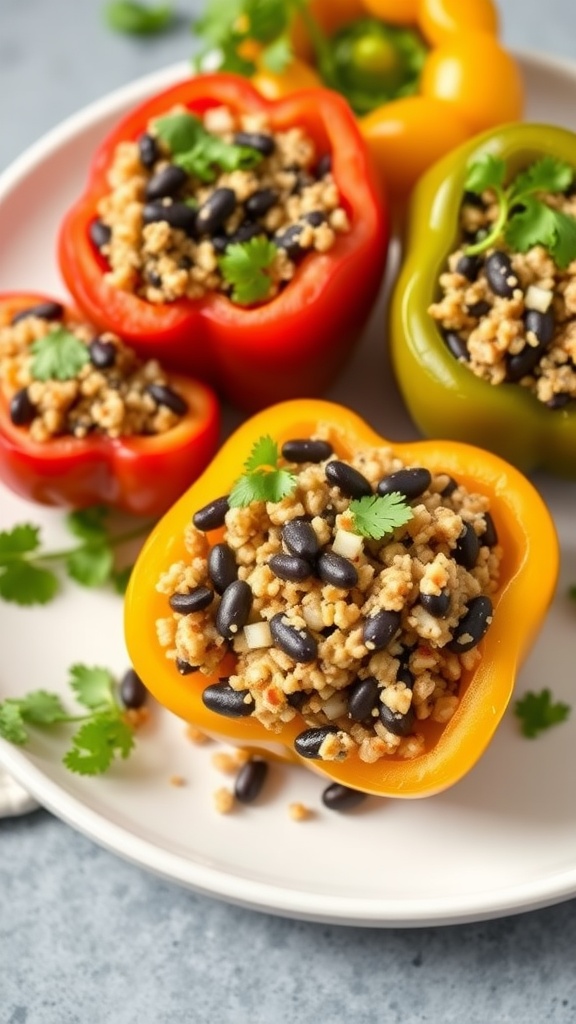
Stuffed bell peppers are a colorful and nutritious option for a cold lunch. They are filled with a delightful mixture of quinoa and black beans, providing a satisfying taste and texture. This dish is not only easy to prepare, but it also packs a punch of flavor from spices and fresh herbs.
These stuffed peppers can be made ahead of time, making them a convenient choice for meal prep. Enjoy them chilled or at room temperature, and you’ll have a tasty and healthy meal ready to go!
Ingredients
- 4 large bell peppers (any color)
- 1 cup cooked quinoa
- 1 can black beans, rinsed and drained
- 1 small onion, diced
- 1 cup corn (frozen or fresh)
- 2 cloves garlic, minced
- 1 teaspoon cumin
- 1 teaspoon chili powder
- Salt and pepper to taste
- Cilantro for garnish
Instructions
- Preheat your oven to 375°F (190°C) and prepare a baking dish.
- Cut the tops off the bell peppers and remove the seeds. Place them in the baking dish upright.
- In a large bowl, mix the cooked quinoa, black beans, onion, corn, garlic, cumin, chili powder, salt, and pepper until well combined.
- Spoon the quinoa mixture into each bell pepper, packing it in gently.
- Bake in the oven for about 25-30 minutes, or until the peppers are tender.
- Garnish with fresh cilantro before serving, and enjoy your delicious stuffed peppers!
Mixed Green Salad with Apples and Walnuts

This Mixed Green Salad with Apples and Walnuts is a fresh and zesty option for a cold lunch. The combination of crisp greens and sweet apple slices brings a delightful crunch, while the walnuts add a satisfying nuttiness. It’s not only refreshing but also quick to prepare, making it a great choice for busy days.
The flavors in this salad balance perfectly, creating a light yet filling meal that’s perfect for any lunch. You can easily customize it with your favorite dressing or additional toppings. Enjoy this wholesome dish that’s as nutritious as it is delicious!
Ingredients
- 4 cups mixed salad greens
- 1 large apple, thinly sliced
- 1 cup walnuts, toasted
- 1/4 cup crumbled feta cheese (optional)
- 1/4 cup balsamic vinaigrette
- Salt and pepper to taste
Instructions
- Prepare the Greens: In a large salad bowl, add the mixed salad greens. Make sure they are well washed and dried.
- Add the Apples: Layer the thinly sliced apples over the greens.
- Incorporate the Walnuts: Sprinkle the toasted walnuts on top for added crunch.
- Optional Cheese: If desired, add crumbled feta cheese for extra flavor.
- Dress the Salad: Drizzle balsamic vinaigrette over the salad and toss gently to combine everything evenly. Season with salt and pepper to taste.
- Serve: Enjoy immediately, or refrigerate for up to an hour before serving for a chilled option.
Savory Oatmeal with Spinach and Egg
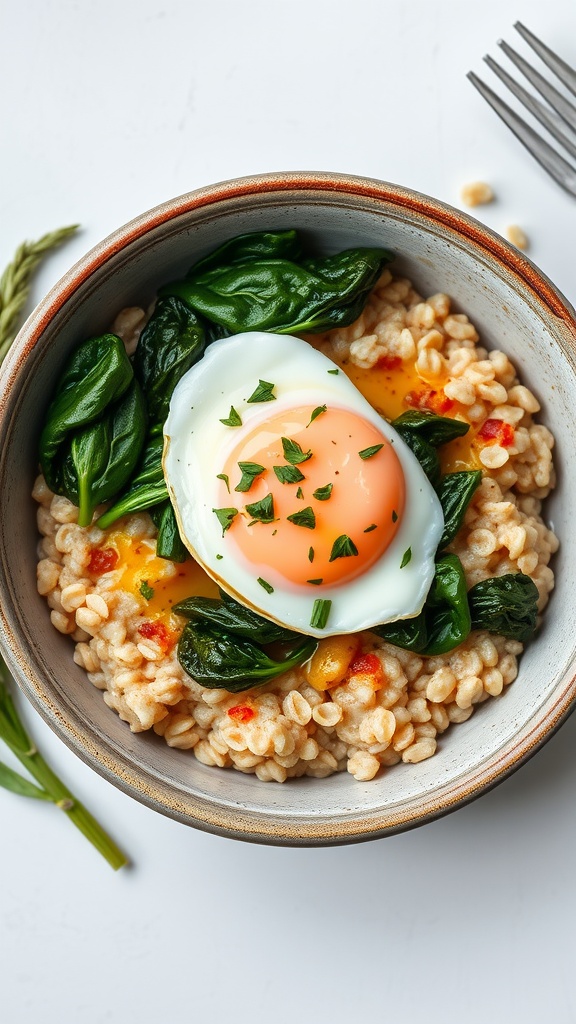
This savory oatmeal dish combines the creaminess of oats with the vibrant flavors of spinach and a perfectly cooked egg. It’s a delightful meal that feels both hearty and refreshing, making it an excellent choice for lunch. The contrast of the soft oatmeal with the slightly wilted spinach and the runny egg yolk creates a satisfying bite that’s nourishing and delicious.
What’s great about this recipe is its simplicity. You can whip it up in just a few minutes, making it perfect for busy days. Plus, it’s versatile—you can easily customize it by adding your favorite spices or toppings. Enjoy this warm bowl of goodness as a cold lunch option, and watch as it becomes a staple in your meal prep rotation!
Ingredients
- 1 cup rolled oats
- 2 cups water or vegetable broth
- 2 cups fresh spinach
- 2 eggs
- Salt and pepper to taste
- 1 tablespoon olive oil
- Optional toppings: chili flakes, avocado, or cheese
Instructions
- Cook the Oats: In a saucepan, bring the water or vegetable broth to a boil. Stir in the rolled oats and a pinch of salt. Reduce heat to low and let simmer for about 5 minutes, stirring occasionally, until the oats are creamy.
- Prepare the Spinach: In a separate pan, heat the olive oil over medium heat. Add the spinach and sauté until just wilted, about 2-3 minutes.
- Cook the Eggs: In the same pan, crack the eggs and cook them to your liking—sunny-side up or over-easy works well!
- Assemble the Dish: Once the oats are cooked, divide them into bowls. Top each bowl with wilted spinach and a cooked egg. Season with salt, pepper, and any optional toppings you desire.
Pita Bread with Tzatziki Sauce

Pita bread with tzatziki sauce is a refreshing and light meal that’s perfect for a cold lunch. The warm, fluffy pita serves as a delightful vessel for the cool, creamy tzatziki, which is made from yogurt, cucumber, and a hint of garlic. This combination offers a balance of flavors that is both satisfying and simple to prepare.
Making this dish is straightforward, making it ideal for busy days or picnics. You can serve it as a dip or fill the pita with various toppings like grilled vegetables or meats for added texture and flavor. Enjoy this easy recipe for a tasty and healthy lunch!
Ingredients
- 4 pita breads
- 1 cup Greek yogurt
- 1 medium cucumber, grated
- 2 cloves garlic, minced
- 1 tablespoon olive oil
- 1 tablespoon fresh dill or mint, chopped
- Salt and pepper to taste
- Lemon juice (optional, to taste)
Instructions
- Prepare the Tzatziki: In a bowl, combine the Greek yogurt, grated cucumber, minced garlic, olive oil, and herbs. Mix well and season with salt and pepper. If desired, add a squeeze of lemon juice for extra freshness.
- Warm the Pita: Heat the pita breads in a toaster or on a skillet until warm and slightly toasted.
- Assemble: Cut the pita in half to create pockets or serve them open. Fill or dip them in the tzatziki sauce as desired.
- Serve: Enjoy your pita bread with tzatziki with additional toppings or as a standalone snack!
Veggie Sushi Burritos
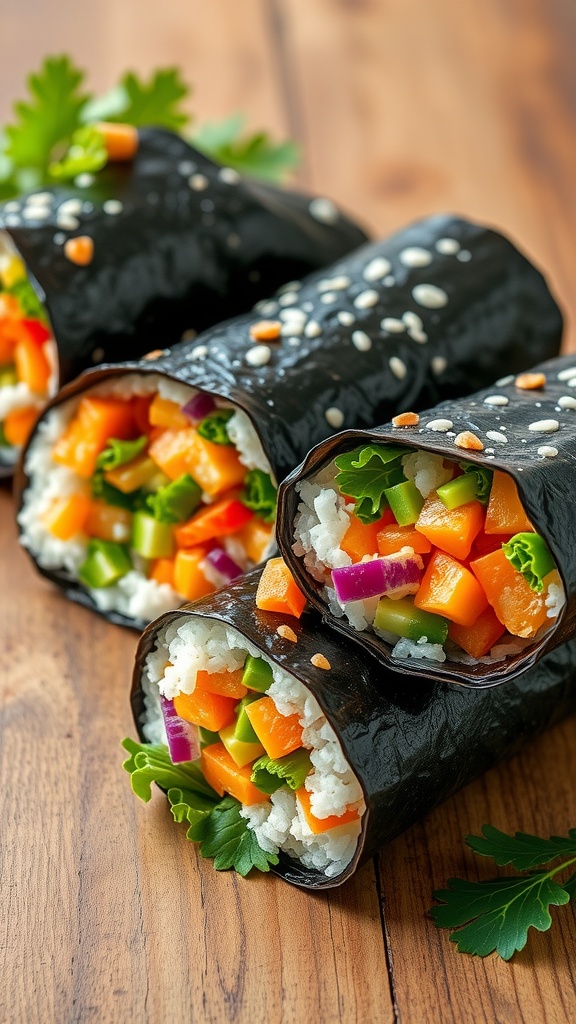
Veggie sushi burritos are a fun and fresh twist on traditional sushi rolls. Packed with vibrant vegetables and flavors, these burritos offer a crunchy and satisfying bite. They’re not just delicious but also simple to prepare, making them a perfect choice for a quick lunch or on-the-go snack.
Using a variety of colorful veggies, like carrots, cucumbers, and peppers, you can customize your sushi burrito to suit your taste. Wrapped in seaweed and filled with fluffy rice, they deliver a delightful mix of textures and flavors that are sure to brighten any lunch break.
Ingredients
- 2 cups sushi rice, cooked and cooled
- 4 sheets nori (seaweed)
- 1 cup carrots, julienned
- 1 cup cucumber, julienned
- 1 cup bell peppers, diced
- 1/2 cup red cabbage, shredded
- 1 avocado, sliced
- 1/4 cup cilantro, chopped
- 1 tablespoon soy sauce (optional)
- Sesame seeds for garnish
Instructions
- Prepare the Rice: Start by cooking the sushi rice according to package instructions. Once cooked, let it cool to room temperature.
- Assemble the Burrito: Place a sheet of nori on a clean surface. Evenly spread a portion of rice over the nori, leaving about 1 inch at the top. Layer your vegetables and cilantro on the rice.
- Roll it Up: Carefully roll the nori from the bottom, tucking in the filling as you go. Continue rolling until you reach the edge. Moisten the top edge with a little water to seal the burrito.
- Slice and Serve: Cut the burrito in half, sprinkle with sesame seeds, and serve with soy sauce if desired. Enjoy your refreshing veggie sushi burrito!
Barley Salad with Roasted Carrots
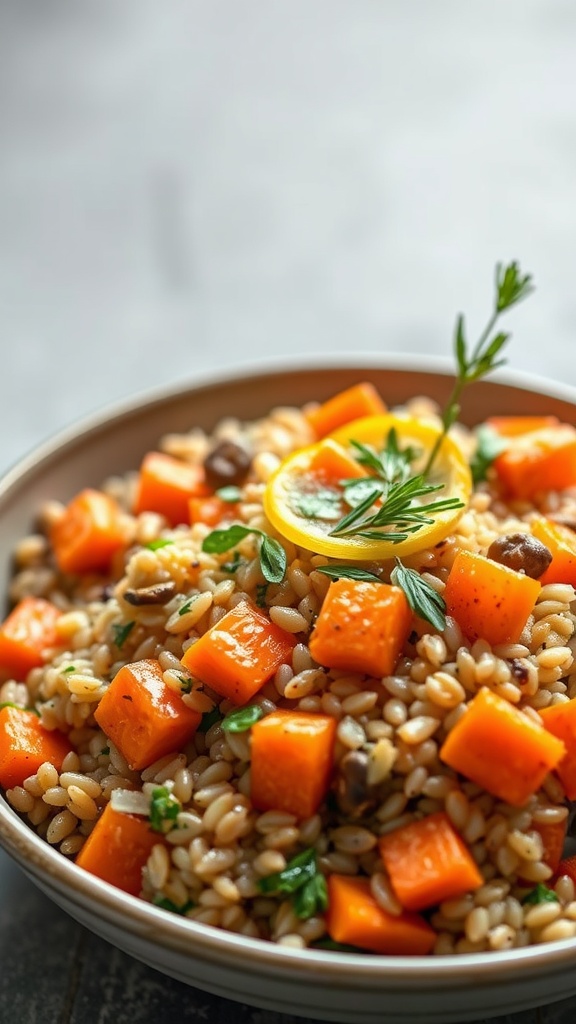
Barley salad with roasted carrots is a light and refreshing dish that hits all the right notes. The chewy texture of barley pairs beautifully with the sweet, caramelized flavor of roasted carrots, making it a satisfying and nutritious option for a cold lunch. Plus, it’s easy to prepare, perfect for meal prepping for the week.
This salad is not only filling but also packed with vitamins and fiber, making it a healthy choice. The addition of fresh herbs and a zesty dressing enhances the flavors, creating a delightful combination that will keep you coming back for more. Try this recipe for your next lunch outing!
Ingredients
- 1 cup pearl barley
- 2 large carrots, peeled and diced
- 2 tablespoons olive oil
- 1 teaspoon salt
- 1/2 teaspoon black pepper
- 1/4 cup chopped fresh parsley
- 1/4 cup chopped fresh mint
- 1 lemon, juiced
- 1/4 cup feta cheese, crumbled (optional)
Instructions
- Preheat your oven to 400°F (200°C).
- Cook the barley according to package instructions until tender. Drain and let cool.
- On a baking sheet, toss the diced carrots with olive oil, salt, and pepper. Roast for 20-25 minutes until golden and tender.
- In a large bowl, combine the cooked barley, roasted carrots, parsley, and mint.
- Drizzle with lemon juice and toss to combine. If using, sprinkle feta cheese on top before serving.
Cucumber Sandwiches with Cream Cheese
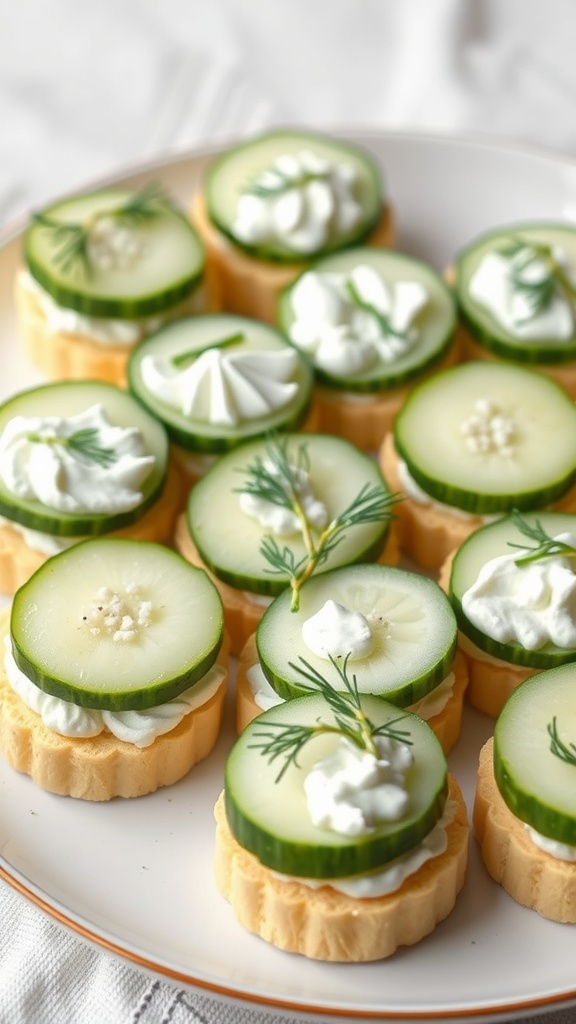
Cucumber sandwiches with cream cheese are a refreshing and light option for a cold lunch. They combine the crunch of fresh cucumbers with the creamy texture of cream cheese, making them both satisfying and easy to prepare. These sandwiches are perfect for a quick bite, picnics, or even as a fancy addition to a brunch spread.
Not only are they simple to make, but they also look delightful on a plate. The balance of flavors and textures brings a delightful crunch, and the creaminess complements the fresh taste of cucumbers. It’s a delightful way to enjoy a light meal!
Ingredients
- 1 large cucumber
- 8 ounces cream cheese, softened
- 2 tablespoons fresh dill, chopped
- 1 teaspoon lemon juice
- Salt and pepper to taste
- 1 package of crackers or bread slices
Instructions
- Prepare the Cream Cheese: In a bowl, mix the softened cream cheese, fresh dill, lemon juice, salt, and pepper until well combined.
- Slice the Cucumber: Wash the cucumber and slice it thinly, creating rounds that are about 1/4 inch thick.
- Assemble the Sandwiches: Spread a layer of the cream cheese mixture onto each cracker or bread slice. Top with a cucumber slice.
- Garnish: Add an extra sprinkle of dill on top of the cucumber if desired.
- Chill: Place the assembled sandwiches in the refrigerator for about 30 minutes to allow the flavors to meld.
- Serve: Enjoy your cucumber sandwiches as a refreshing cold lunch!
Marinated Vegetable Medley
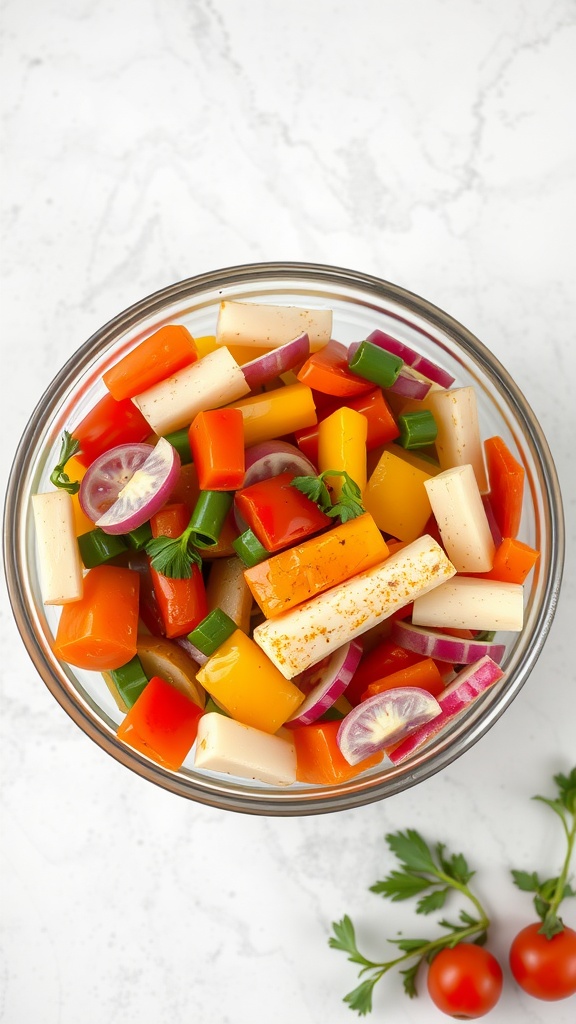
This marinated vegetable medley is a refreshing and vibrant addition to any lunch. Bursting with flavor from a variety of colorful veggies, it’s a simple and healthy option that can be prepared in no time. The tangy marinade enhances the natural sweetness of the vegetables, making each bite a delightful experience.
Perfect for meal prepping or as a quick side dish, this recipe showcases fresh produce and can easily be customized to your taste. Plus, it’s a great way to add more vegetables to your day. Here’s how to make it:
Ingredients
- 1 cup bell peppers (red, yellow, green), chopped
- 1 cup cucumber, diced
- 1/2 cup red onion, thinly sliced
- 1 cup cherry tomatoes, halved
- 1/4 cup fresh parsley, chopped
- 1/4 cup olive oil
- 3 tablespoons apple cider vinegar
- 1 teaspoon garlic powder
- Salt and pepper to taste
Instructions
- Mix the Marinade: In a small bowl, whisk together olive oil, apple cider vinegar, garlic powder, salt, and pepper.
- Combine the Vegetables: In a large bowl, add the chopped bell peppers, cucumber, red onion, cherry tomatoes, and parsley.
- Pour and Toss: Drizzle the marinade over the vegetables and toss well to ensure everything is evenly coated.
- Chill: Cover the bowl and refrigerate for at least 30 minutes to allow the flavors to meld.
- Serve: Enjoy this vibrant medley chilled as a side dish or as part of your cold lunch.
Vegetable and Cheese Quesadillas
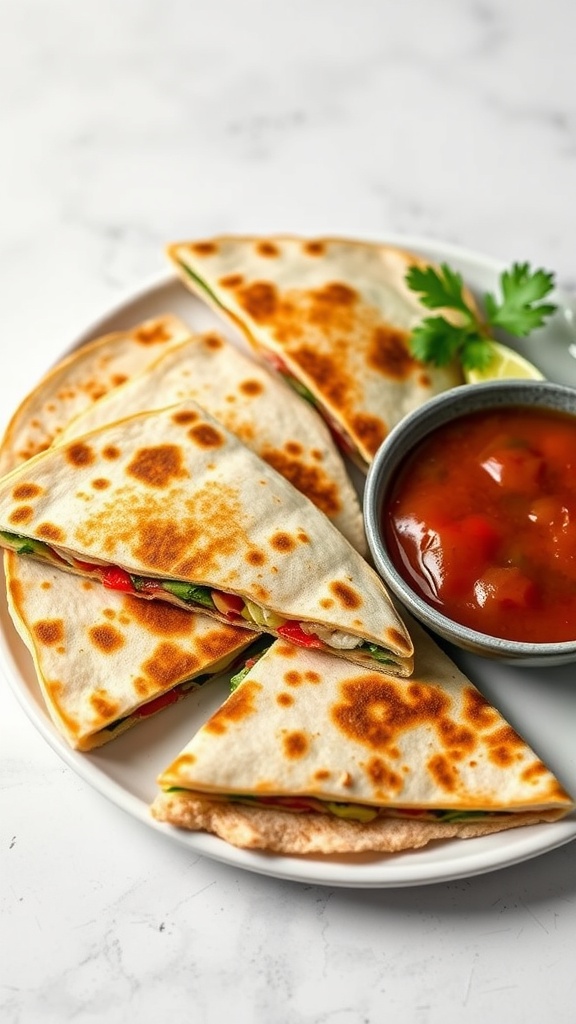
Vegetable and cheese quesadillas are a delightful option for a cold lunch, combining crispy tortillas with a variety of fresh vegetables and gooey cheese. They are easy to make and can be customized based on your favorite ingredients, making them a fun and versatile choice. The blend of flavors offers a satisfying and refreshing bite that pairs perfectly with your favorite dipping sauce.
This recipe allows you to enjoy a tasty and nutritious meal without spending hours in the kitchen. Plus, they can be made ahead of time and enjoyed cold or at room temperature, making them ideal for lunches on the go or picnics.
Ingredients
- 4 large flour tortillas
- 1 cup shredded cheese (cheddar, mozzarella, or your favorite blend)
- 1 bell pepper, sliced
- 1 small zucchini, sliced
- 1 cup fresh spinach leaves
- 1 tablespoon olive oil
- 1 teaspoon cumin
- Salt and pepper to taste
- Salsa, for dipping
Instructions
- Heat olive oil in a skillet over medium heat. Add the sliced bell pepper and zucchini, and sauté for about 5-7 minutes until softened. Stir in spinach, cumin, salt, and pepper, and cook for an additional minute until the spinach wilts.
- Lay one tortilla flat in the skillet. Sprinkle half of the cheese on one half of the tortilla, add the sautéed vegetables, and then top with the remaining cheese. Fold the tortilla over to create a half-moon shape.
- Cook for 3-4 minutes on each side until the tortilla is golden brown and the cheese is melted. Remove from heat and let cool slightly.
- Slice the quesadilla into wedges and serve with salsa for dipping. You can enjoy them warm or let them cool completely for a perfect cold lunch option.
Roasted Chickpeas with Herbs
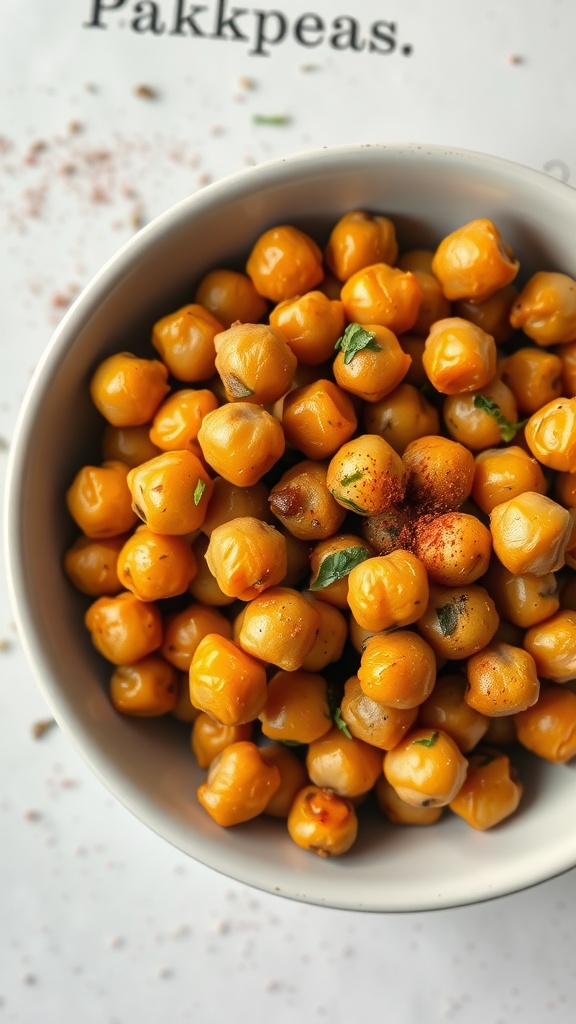
Roasted chickpeas are a delightful snack that packs a punch of flavor and crunch. They are simple to prepare and work perfectly as a cold lunch option. Seasoned with a mix of herbs, these chickpeas offer a savory taste that’s both satisfying and nutritious.
These crunchy bites not only provide a great source of protein but also add a refreshing twist to your lunch. Enjoy them on their own or toss them into salads for some extra texture. Here’s how to whip them up!
Ingredients
- 1 can (15 oz) chickpeas, drained and rinsed
- 2 tablespoons olive oil
- 1 teaspoon garlic powder
- 1 teaspoon paprika
- 1/2 teaspoon salt
- 1/2 teaspoon black pepper
- 1 tablespoon fresh parsley, chopped
- 1 tablespoon fresh rosemary, chopped
Instructions
- Preheat the oven to 400°F (200°C).
- Pat the chickpeas dry with a paper towel to remove excess moisture.
- In a bowl, toss the chickpeas with olive oil, garlic powder, paprika, salt, and pepper until evenly coated.
- Spread the chickpeas in a single layer on a baking sheet.
- Bake for 20-25 minutes, shaking the pan halfway through, until they are golden brown and crispy.
- Remove from the oven and immediately sprinkle with fresh parsley and rosemary. Let cool before serving.
Antipasto Skewers with Meat and Cheese

Antipasto skewers bring a delightful blend of flavors and textures to your cold lunch repertoire. With a mix of cured meats, cheeses, and vibrant veggies, these skewers are easy to assemble and perfect for any occasion. The combination of savory, creamy, and tangy elements makes each bite a little celebration.
Not only do they taste great, but they also look appealing on a plate. You can customize them based on your preferences, making them versatile for different tastes. Whether you’re packing a lunch for work or hosting a casual gathering, these skewers are sure to be a hit!
Ingredients
- 1 cup cherry tomatoes
- 1 cup mozzarella balls
- 1 cup black olives
- 8 oz salami, sliced
- 8 oz prosciutto, sliced
- 1 cup bell peppers, cut into bite-sized pieces
- Fresh basil leaves
- Wooden skewers
Instructions
- Prepare the Skewers: Take a wooden skewer and start layering the ingredients. Begin with a cherry tomato, followed by a mozzarella ball, a black olive, a slice of salami, a piece of bell pepper, and then a basil leaf. Repeat until the skewer is filled, leaving some space at the ends for easy handling.
- Repeat: Continue this process until all ingredients are used up. Aim for a good mix of flavors and colors on each skewer.
- Serve: Arrange the skewers on a platter and enjoy them fresh. They can also be drizzled with a bit of olive oil or balsamic vinegar for added flavor.
Rice Paper Rolls with Shrimp
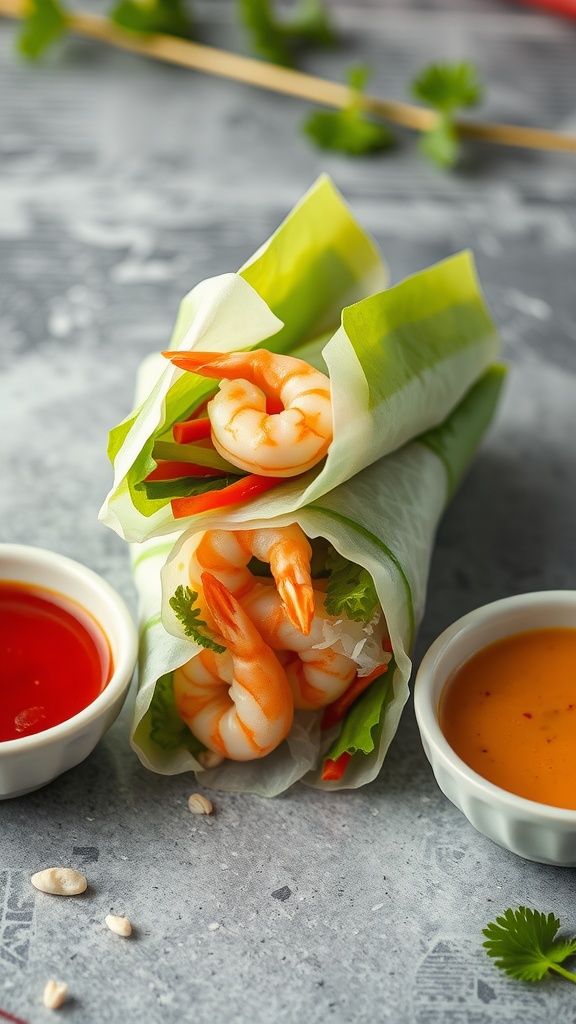
Rice paper rolls with shrimp are a light and refreshing option for lunch. They feature delicate rice paper wrappers filled with shrimp, crisp vegetables, and fresh herbs. The combination of flavors is bright and satisfying, making these rolls a delightful choice for a cold meal. Plus, they are simple to make and perfect for meal prep!
These rolls are not only visually appealing but also versatile. You can customize the fillings to include your favorite veggies or even swap shrimp for another protein. Paired with a tangy dipping sauce, they offer a burst of flavor in every bite. Enjoy them as a quick lunch or a snack on the go!
Ingredients
- 8 rice paper wrappers
- 12 cooked shrimp, peeled and deveined
- 1 cup lettuce leaves, shredded
- 1/2 cup carrots, julienned
- 1/2 cup cucumber, julienned
- 1/4 cup fresh cilantro leaves
- 1/4 cup fresh mint leaves
- Soy sauce or peanut dipping sauce, for serving
Instructions
- Prepare the Filling: Gather all your ingredients and have them ready for assembly.
- Soften the Rice Paper: Fill a shallow dish with warm water. Dip one rice paper wrapper into the water for about 10-15 seconds until it softens. Lay it flat on a clean surface.
- Add the Fillings: Place a few shrimp, some lettuce, carrots, cucumber, cilantro, and mint at the bottom third of the rice paper.
- Roll the Wrapper: Fold the sides of the rice paper over the filling, then tightly roll it up from the bottom to the top, creating a tight roll. Repeat with remaining wrappers and fillings.
- Serve: Cut the rolls in half if desired, and serve with soy sauce or peanut dipping sauce for a delicious lunch option.


Tetrick
I just like the helpful information you supply in your articles. I will bookmark your weblog and test again here regularly. I am quite certain I’ll be told lots of new stuff right right here! Best of luck for the following!