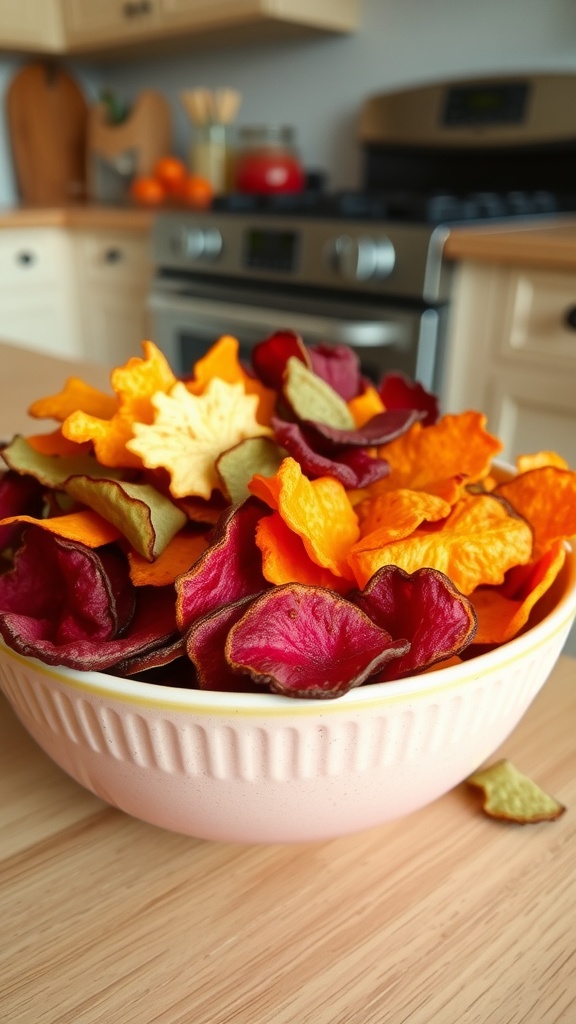
Looking for some fun and tasty snack ideas to spice up your day? Whether you’re in the mood for something sweet, savory, or a little crunchy, there’s a world of delicious options waiting for you. Let’s dive into some quick and easy snacks that will satisfy your cravings and keep you fueled for whatever comes next!
Creamy Avocado Toast
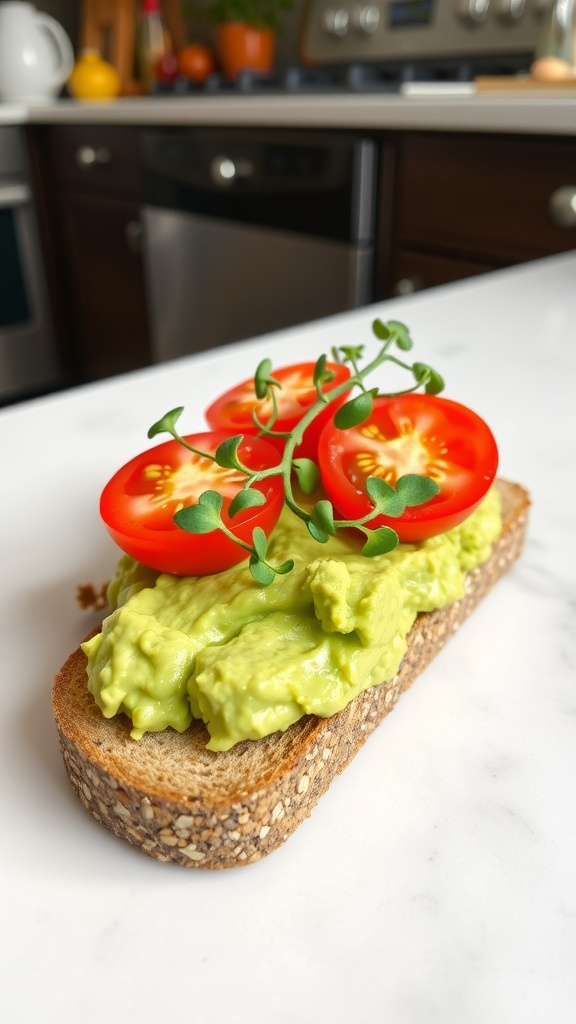
Creamy avocado toast is a delightful and nutritious snack that’s incredibly simple to whip up. The smooth texture of ripe avocado paired with a sprinkle of seasoning creates a deliciously rich flavor. This recipe is not only tasty but also packed with healthy fats, making it a satisfying choice for any time of the day.
To make it even better, you can add your favorite toppings like cherry tomatoes, microgreens, or a dash of red pepper flakes for a bit of spice. It’s a versatile dish that you can customize to fit your taste and mood!
Ingredients
- 2 ripe avocados
- 4 slices of whole grain bread
- Salt and pepper, to taste
- 1 tablespoon lemon juice
- Cherry tomatoes, halved
- Microgreens or arugula, for garnish
Instructions
- Toast the bread slices until golden brown.
- In a bowl, mash the avocados with lemon juice, salt, and pepper until creamy.
- Spread the avocado mixture evenly over the toasted bread.
- Top with halved cherry tomatoes and garnish with microgreens.
- Serve immediately and enjoy your delightful avocado toast!
Savory Cheese and Crackers
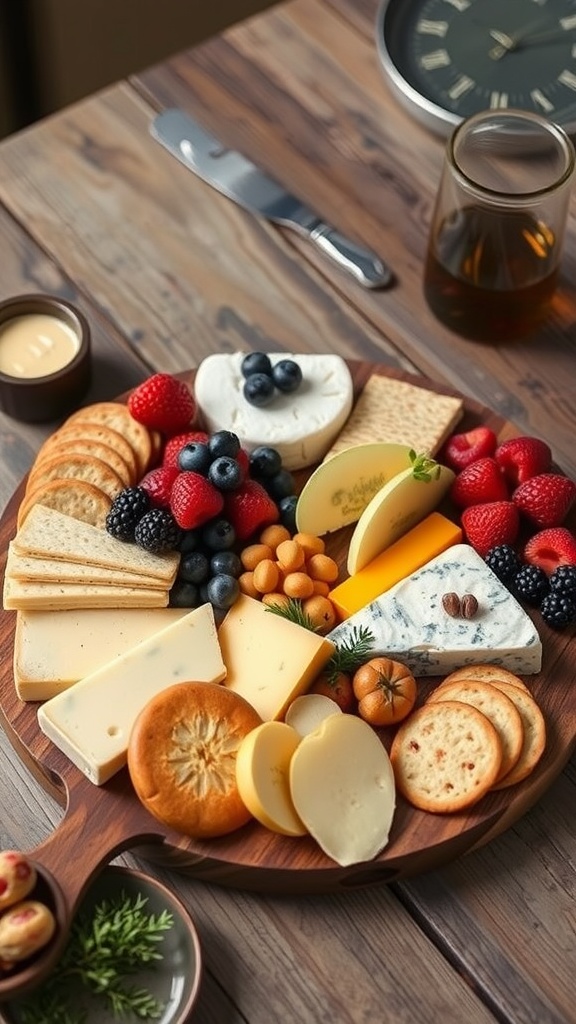
Cheese and crackers make for a delightful snack that’s both simple and satisfying. With a variety of cheeses and crunchy crackers, you can create a platter that’s perfect for any occasion. Whether you’re enjoying a cozy night in or entertaining friends, this combination offers a burst of flavors that everyone will love.
The creamy richness of the cheese pairs wonderfully with the crunch of your favorite crackers, making each bite a treat. You can mix and match different types of cheese, from sharp cheddar to creamy brie, along with an array of fruits and nuts for added texture and taste.
Ingredients
- 1 cup assorted cheeses (cheddar, brie, gouda)
- 1 box of assorted crackers (water crackers, whole grain, buttery)
- 1/2 cup fresh berries (strawberries, blueberries)
- 1/4 cup nuts (almonds, walnuts)
- 1 small bowl of honey or jam
- Fresh herbs for garnish (optional)
Instructions
- Prepare the Platter: Arrange the assorted cheeses on a large serving board or platter. Cut larger cheeses into bite-sized pieces for easy serving.
- Add Crackers: Place the crackers around the cheeses, leaving some space for the additional toppings.
- Incorporate Fruits and Nuts: Scatter fresh berries and nuts throughout the platter for color and texture.
- Serve with Honey or Jam: Include a small bowl of honey or jam in the center for a sweet contrast to the savory flavors.
- Garnish: If desired, add fresh herbs to enhance the presentation.
Homemade Trail Mix
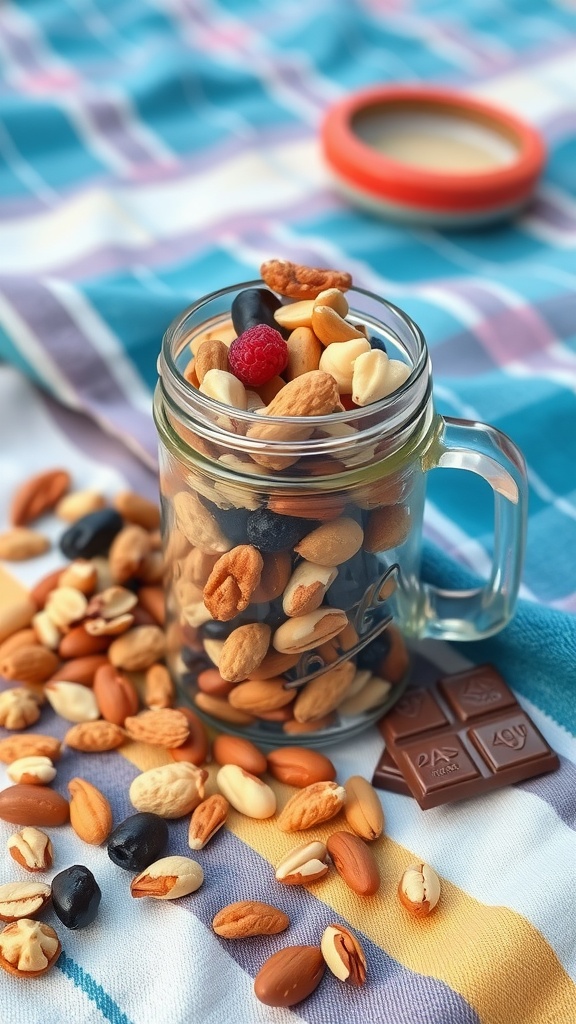
Homemade trail mix is a fun and tasty snack that you can easily customize to suit your taste. It’s a delightful blend of nuts, seeds, dried fruits, and sometimes a hint of chocolate, creating a balance of savory and sweet flavors. Not only is it simple to make, but it’s also perfect for on-the-go snacking, whether you’re heading to the gym, going for a hike, or just need a quick energy boost during your day.
Making your own trail mix lets you choose your favorite ingredients, ensuring you pack in the nutrition while keeping it delicious. You can experiment with various combinations based on what you have at home or what you enjoy most. Here’s a simple recipe to get you started!
Ingredients
- 1 cup almonds
- 1 cup cashews
- 1 cup walnuts
- 1 cup dried cranberries
- 1 cup dark chocolate chips
- 1/2 cup sunflower seeds
- 1/2 cup pumpkin seeds
- 1 teaspoon cinnamon (optional)
Instructions
- Mix Ingredients: In a large bowl, combine all the nuts, seeds, dried cranberries, and chocolate chips. If you like, sprinkle cinnamon over the mix for added flavor.
- Store: Transfer the trail mix into an airtight container or jar to keep it fresh. You can also portion it into snack-sized bags for convenience.
- Enjoy: Grab a handful whenever you need a quick snack or energy boost throughout your day!
Spicy Sriracha Popcorn

Looking for a snack that packs a punch? Spicy Sriracha popcorn combines the classic crunch of popcorn with a zesty kick from Sriracha sauce, making it a fun and flavorful treat. This recipe is super simple to whip up, perfect for movie nights or just when you want something different.
The heat from the Sriracha blends beautifully with the buttery popcorn, creating a delightful balance of flavors. Plus, you can easily adjust the spice level to suit your taste. Let’s dive into how you can make this spicy snack at home!
Ingredients
- 1/2 cup popcorn kernels
- 2 tablespoons vegetable oil
- 3 tablespoons unsalted butter, melted
- 2-3 tablespoons Sriracha sauce (adjust to taste)
- Salt to taste
- Optional: sprinkle of garlic powder or paprika
Instructions
- Pop the Corn: In a large pot, heat the vegetable oil over medium heat. Add a few popcorn kernels and cover the pot. Once they pop, add the remaining kernels and cover again, shaking the pot occasionally to prevent burning.
- Prepare the Sauce: While the popcorn pops, mix the melted butter with Sriracha sauce in a small bowl. You can add garlic powder or paprika for extra flavor if you’d like.
- Combine: Once the popcorn is finished popping, remove it from heat and transfer it to a large bowl. Drizzle the Sriracha butter over the popcorn and toss until evenly coated.
- Season: Taste and sprinkle with salt as needed. Enjoy your spicy snack!
Mini Caprese Skewers
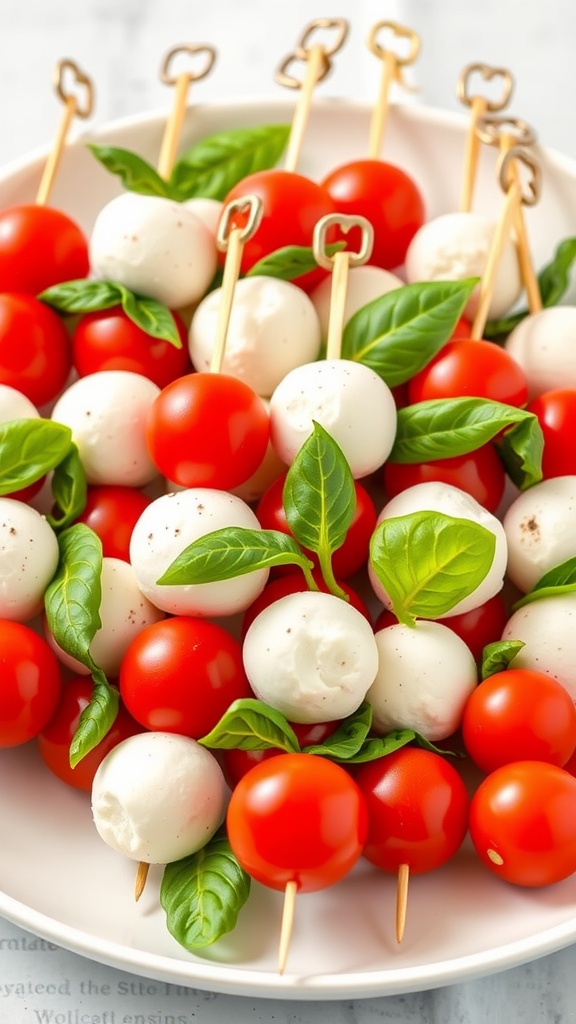
Mini Caprese Skewers are a delightful and refreshing snack that combines the classic flavors of fresh tomatoes, mozzarella, and basil. This easy-to-make appetizer adds a burst of color and taste to any gathering, making it a popular choice for parties or picnics. The sweetness of the tomatoes pairs perfectly with the creamy mozzarella, while the fragrant basil adds a herby touch, ensuring each bite is a flavorful experience.
These skewers are not just tasty but also simple to assemble. With just a few ingredients and minimal prep time, they’re a go-to solution for anyone looking to whip up a crowd-pleasing treat. Plus, their bite-sized nature makes them easy to enjoy without the need for utensils.
Ingredients
- 1 pint cherry tomatoes
- 8 oz fresh mozzarella balls
- Fresh basil leaves
- Balsamic glaze (optional)
- Salt and pepper to taste
- Skewers or toothpicks
Instructions
- Prepare the Skewers: Start by rinsing the cherry tomatoes and fresh basil leaves. If necessary, cut the mozzarella balls in half.
- Assemble the Skewers: Take a skewer or toothpick and thread a cherry tomato, followed by a basil leaf, then a mozzarella ball. Repeat as desired, leaving some space at the end for easy handling.
- Season: Once all ingredients are assembled, sprinkle with salt and pepper to taste. Drizzle with balsamic glaze for added flavor, if desired.
- Serve: Arrange the skewers on a serving platter and enjoy immediately or refrigerate until ready to serve.
Zesty Hummus with Veggies
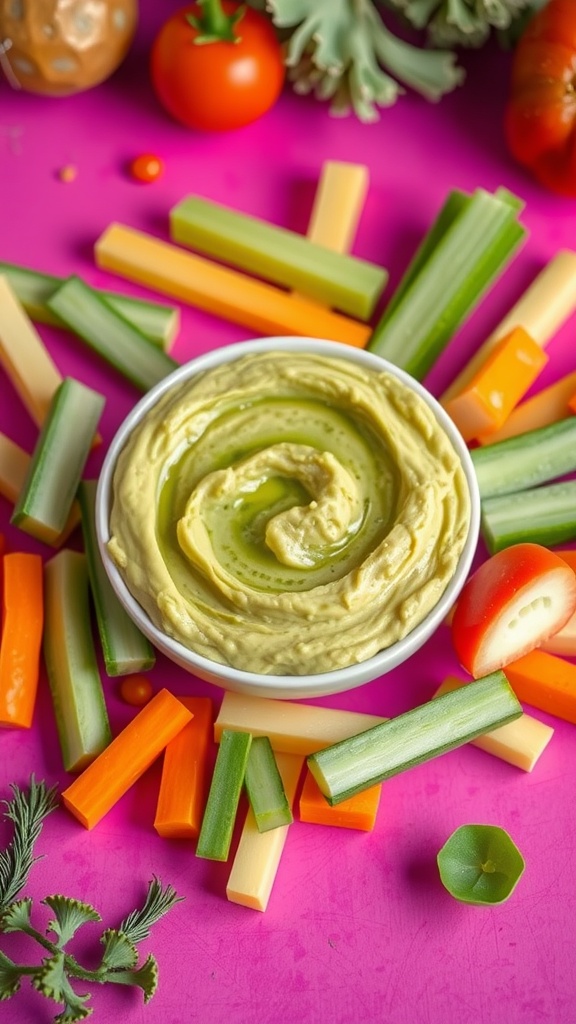
Zesty hummus is a flavorful dip that’s perfect for any snack time. It combines the creamy texture of chickpeas with a kick of citrus and spices, making it a tasty option for both casual munching and entertaining guests. Plus, it’s super easy to whip up, requiring just a few simple ingredients.
This vibrant hummus pairs wonderfully with an array of fresh veggies, allowing for a healthy and satisfying snack. Whether you’re dipping crunchy carrots, refreshing cucumbers, or sweet bell peppers, each bite is a delightful combination of flavors and textures.
Ingredients
- 1 can (15 oz) chickpeas, drained and rinsed
- 1/4 cup tahini
- 2 tablespoons olive oil
- 2 tablespoons lemon juice
- 1 garlic clove, minced
- 1/2 teaspoon ground cumin
- Salt and pepper to taste
- Veggies for dipping (carrots, cucumbers, bell peppers, celery)
Instructions
- Blend Ingredients: In a food processor, combine chickpeas, tahini, olive oil, lemon juice, garlic, and ground cumin. Blend until smooth.
- Season: Taste the hummus and add salt and pepper according to your preference. If you like a thinner consistency, add a bit of water and blend again.
- Serve: Spoon the hummus into a bowl, drizzle with a little extra olive oil if desired, and serve with fresh veggies for dipping.
Sweet Banana Oatmeal Bites
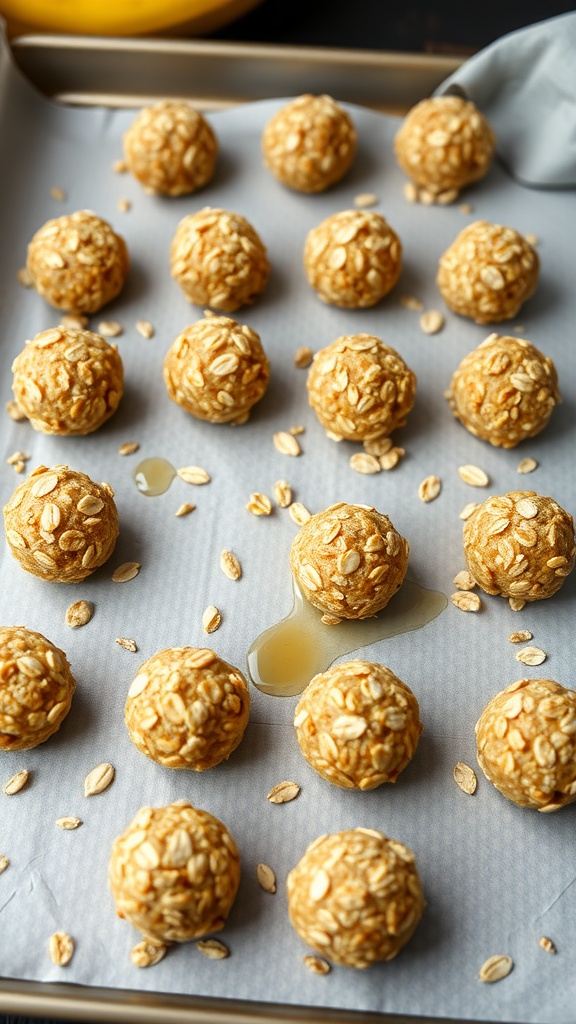
If you’re looking for a quick and wholesome snack, Sweet Banana Oatmeal Bites are a delightful choice. These little energy bites are naturally sweetened with ripe bananas, making them a tasty treat that you can enjoy any time of the day. Packed with oats, they provide a satisfying chewiness that keeps you feeling full and energized.
Not only are these bites simple to make, but they also require minimal ingredients. Just mix, roll, and enjoy! They’re perfect for breakfast on the go or a midday pick-me-up. Plus, they can be easily customized with your favorite add-ins like nuts or chocolate chips!
Ingredients
- 2 ripe bananas, mashed
- 1 cup rolled oats
- 1/4 cup almond butter (or any nut butter)
- 1/4 cup honey or maple syrup
- 1/2 teaspoon vanilla extract
- 1/4 teaspoon salt
- Optional: 1/4 cup chocolate chips or chopped nuts
Instructions
- Combine Ingredients: In a mixing bowl, mash the ripe bananas. Add the rolled oats, almond butter, honey (or maple syrup), vanilla extract, and salt. Stir until everything is well combined.
- Add Optional Ingredients: If you’re using chocolate chips or chopped nuts, fold them into the mixture now.
- Form Bites: Using your hands, scoop out small portions of the mixture and roll them into balls about 1 inch in diameter. Place them on a lined baking sheet.
- Chill: Refrigerate the bites for at least 30 minutes to help them firm up.
- Enjoy: Take them out of the fridge and enjoy your sweet banana oatmeal bites! Store any leftovers in an airtight container in the refrigerator.
Savory Roasted Chickpeas
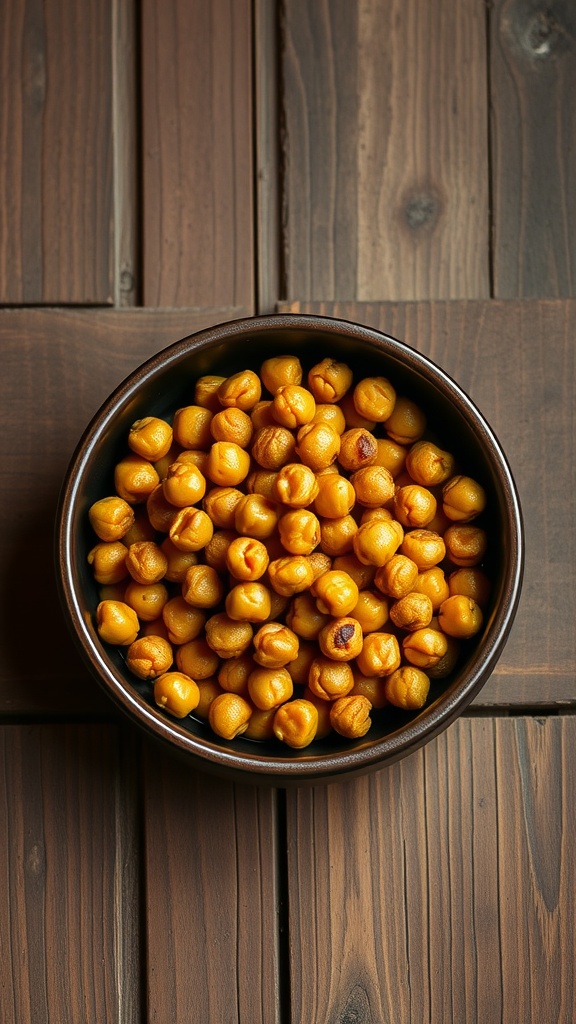
Roasted chickpeas make for a delightful snack that’s both crunchy and satisfying. They are simple to prepare, requiring just a few ingredients and minimal effort. With a savory flavor profile, these little bites are perfect for munching at any time of the day.
The chickpeas are seasoned and roasted until crispy, providing a light and healthy alternative to traditional snacks. You can customize the seasoning to suit your taste, making them as spicy or as mild as you prefer. Enjoy them by the handful, or sprinkle them on salads for added texture!
Ingredients
- 1 can (15 oz) chickpeas, drained and rinsed
- 1 tablespoon olive oil
- 1 teaspoon garlic powder
- 1 teaspoon paprika
- 1/2 teaspoon cumin
- Salt and pepper to taste
Instructions
- Preheat the oven to 400°F (200°C).
- Pat the chickpeas dry with a paper towel. This helps them get crispy.
- In a bowl, toss the chickpeas with olive oil, garlic powder, paprika, cumin, salt, and pepper until evenly coated.
- Spread the chickpeas on a baking sheet in a single layer.
- Roast for 25-30 minutes, shaking the pan halfway through, until they are golden and crispy.
- Let them cool slightly before enjoying!
Stuffed Mini Peppers

Stuffed mini peppers are a delightful snack that combines the sweetness of colorful peppers with a creamy filling. They are not only tasty but also easy to prepare, making them a perfect choice for gatherings or a light meal at home.
The crunchy texture of the peppers contrasts beautifully with the smooth filling, creating a satisfying bite. You can customize the stuffing to include your favorite herbs, cheeses, or even proteins, adding a personal touch to this simple recipe.
Ingredients
- 12 mini bell peppers (red, yellow, or orange)
- 1 cup cream cheese, softened
- 1/2 cup shredded cheese (cheddar or mozzarella)
- 1/4 cup chopped fresh chives
- 1 tablespoon garlic powder
- Salt and pepper to taste
Instructions
- Prepare the Peppers: Preheat your oven to 375°F (190°C). Cut the tops off the mini bell peppers and remove the seeds.
- Make the Filling: In a bowl, mix together the softened cream cheese, shredded cheese, chives, garlic powder, salt, and pepper until well combined.
- Stuff the Peppers: Spoon the filling into each mini pepper, packing it in gently.
- Bake: Arrange the stuffed peppers on a baking sheet and bake for 15-20 minutes until the peppers are tender and the filling is slightly golden.
- Serve: Let cool slightly before serving. Enjoy these delightful snacks warm or at room temperature!
Peanut Butter Apple Slices
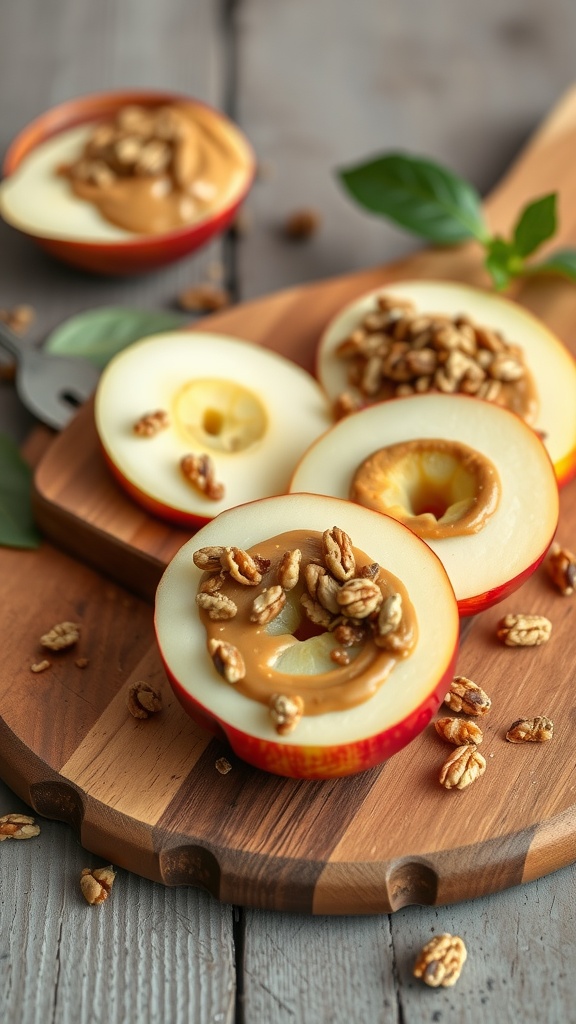
Peanut butter apple slices are a simple and tasty snack that combines sweet, crisp apples with creamy peanut butter. This combo not only satisfies your cravings but also provides a healthy dose of fiber and protein. It’s a quick treat that you can whip up in just a few minutes!
The crunchiness of the apples pairs wonderfully with the smoothness of peanut butter, making each bite a delightful blend of textures. Topped with a sprinkle of nuts or granola, these slices become even more satisfying and nutritious. Whether you’re looking for a midday snack or a fun after-school treat, this recipe is sure to please!
Ingredients
- 1 large apple (any variety)
- 1/4 cup peanut butter
- 1/4 cup granola or chopped nuts
Instructions
- Slice the apple into rounds, removing the core from each slice.
- Spread a layer of peanut butter on each apple slice.
- Sprinkle granola or chopped nuts on top of the peanut butter.
- Enjoy immediately, or pack them up for a snack later!
Crispy Kale Chips
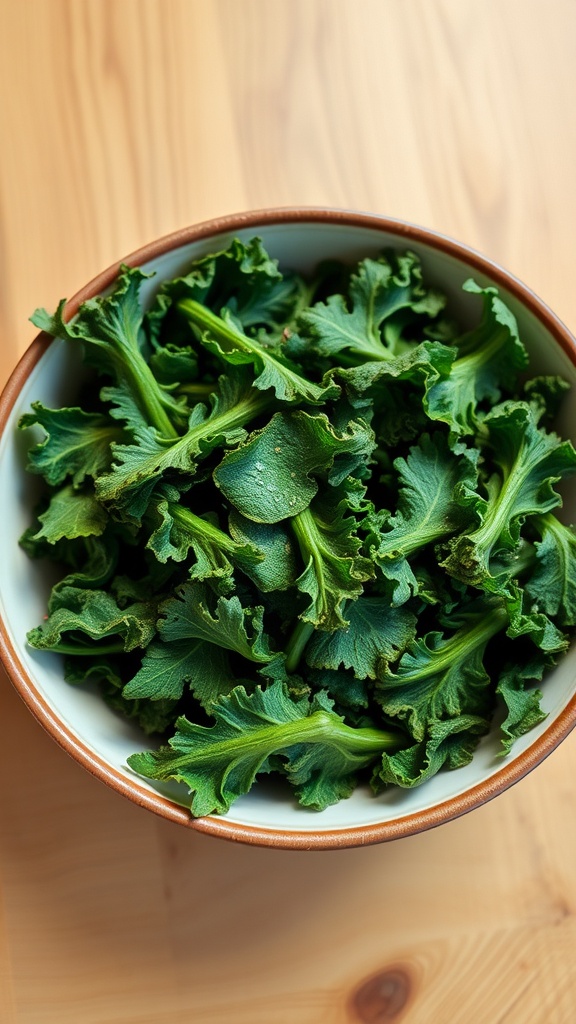
Crispy kale chips are a delightful and healthy alternative to traditional snacks. They offer a satisfying crunch and a savory flavor that keeps you coming back for more. Best of all, making them at home is super easy and requires minimal ingredients!
These chips are not only tasty but also packed with nutrients, making them a guilt-free option for snacking. You can season them however you like, from simple sea salt to zesty spices, allowing for a personalized touch. Let’s dive into how to make your own crispy kale chips!
Ingredients
- 1 bunch of kale
- 1 tablespoon olive oil
- 1/2 teaspoon salt
- 1/2 teaspoon garlic powder (optional)
- 1/2 teaspoon paprika (optional)
Instructions
- Preheat your oven to 350°F (175°C).
- Wash and thoroughly dry the kale, removing the tough stems and tearing the leaves into bite-sized pieces.
- In a large bowl, toss the kale with olive oil, ensuring each piece is lightly coated.
- Sprinkle salt and any additional seasonings over the kale and toss again.
- Spread the kale in a single layer on a baking sheet.
- Bake for about 10-15 minutes, or until the chips are crispy and lightly browned. Keep an eye on them to prevent burning.
- Remove from the oven and let cool before serving. Enjoy your crispy kale chips as a delicious snack!
Sweet Potato Fries
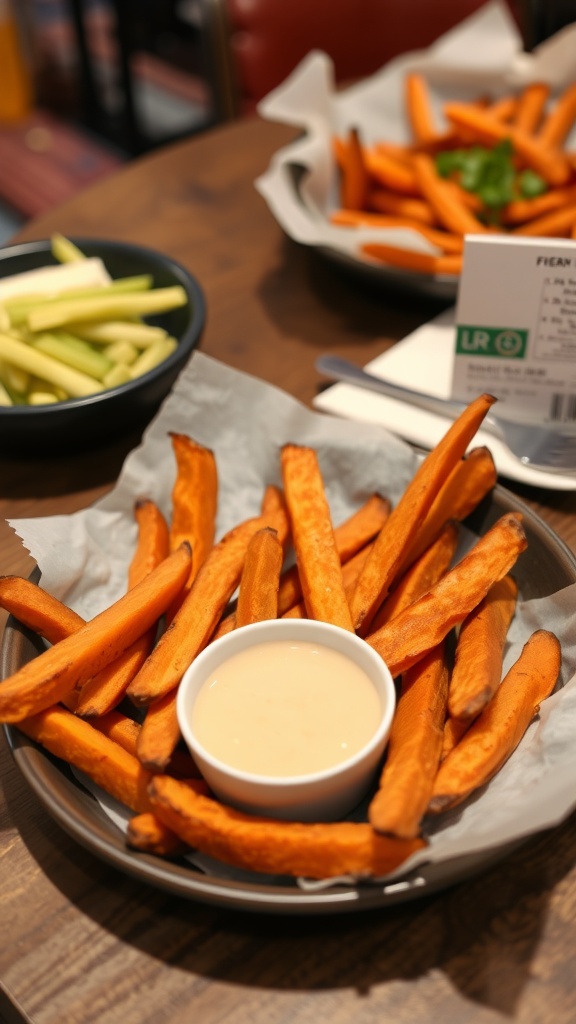
Sweet potato fries are a delicious and healthier alternative to regular fries. Their natural sweetness pairs perfectly with a variety of dipping sauces, making them a tasty snack or side dish. Plus, they are super easy to make at home, which means you can enjoy a fresh batch anytime you crave something savory and satisfying.
The texture is crispy on the outside while remaining soft and fluffy on the inside. With just a few simple ingredients and steps, you can whip these up in no time. They are perfect for gatherings, movie nights, or just a quick snack to munch on!
Ingredients
- 2 large sweet potatoes
- 2 tablespoons olive oil
- 1 teaspoon paprika
- 1 teaspoon garlic powder
- Salt and pepper to taste
Instructions
- Preheat your oven to 425°F (220°C).
- Wash and peel the sweet potatoes. Cut them into thin strips, aiming for uniform sizes for even cooking.
- In a large bowl, toss the sweet potato strips with olive oil, paprika, garlic powder, salt, and pepper until well coated.
- Spread the fries in a single layer on a baking sheet lined with parchment paper.
- Bake for 25-30 minutes, flipping halfway through, until they are golden and crispy.
- Serve hot with your favorite dip or sauce!
Yogurt Parfaits with Granola
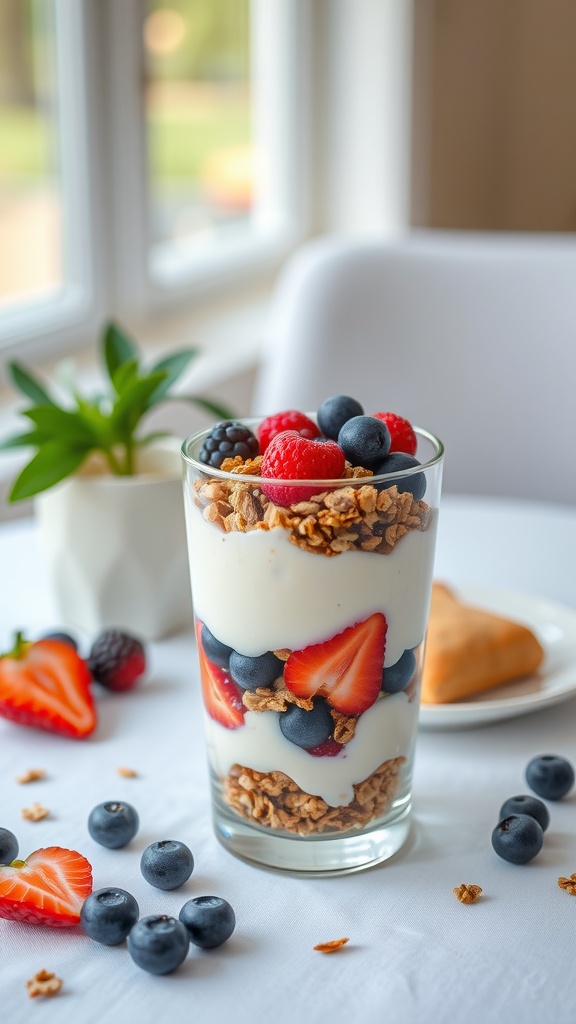
Yogurt parfaits are a delightful snack that combines creamy yogurt, crunchy granola, and fresh fruits. They offer a refreshing balance of flavors and textures, making them a perfect choice for breakfast or a midday treat. Not only are they simple to prepare, but they also make for a visually appealing dish that everyone will love.
This recipe is versatile and can be customized with your favorite fruits and yogurt types. You can choose between plain, flavored, or even plant-based yogurts to suit your taste. The combination of sweet and tart fruits with the nutty crunch of granola creates a satisfying and nourishing snack that can be enjoyed any time of the day.
Ingredients
- 2 cups yogurt (any flavor)
- 1 cup granola
- 1 cup mixed berries (strawberries, blueberries, raspberries)
- 1 tablespoon honey or maple syrup (optional)
- Fresh mint leaves for garnish (optional)
Instructions
- Prepare your Ingredients: Wash the berries thoroughly and slice the strawberries if needed.
- Layer the Parfait: In a glass or bowl, start with a layer of yogurt at the bottom. Add a layer of granola followed by a layer of mixed berries.
- Repeat Layers: Continue layering until the glass is filled, ending with a layer of yogurt and topping it with more berries and granola.
- Drizzle Honey: If desired, drizzle honey or maple syrup over the top for added sweetness.
- Garnish: Add a few mint leaves for a fresh touch, and enjoy your yogurt parfait!
Tzatziki Dip with Pita Chips
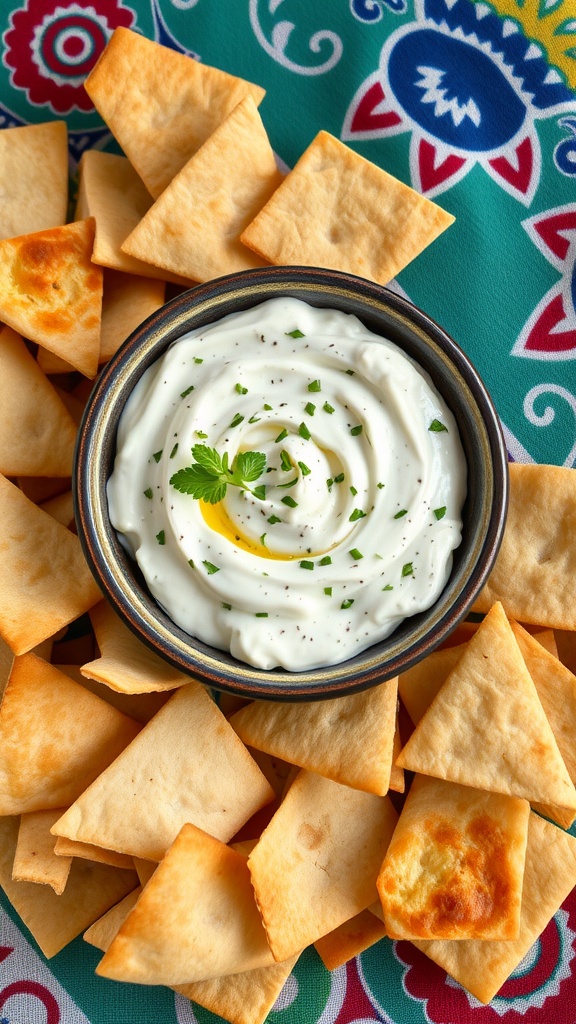
Tzatziki dip is a refreshing blend of yogurt, cucumbers, garlic, and herbs, making it a delightful addition to any snack platter. Its cool and tangy flavor pairs perfectly with crispy pita chips, creating a delicious contrast that’s hard to resist. Plus, this dip is super simple to whip up, making it an easy go-to for gatherings or cozy nights in.
This dip not only adds a burst of flavor but also brings a healthy touch to your snacking. It’s light yet satisfying, perfect for dipping or spreading. With just a few ingredients, you can create a snack that impresses without much effort.
Ingredients
- 1 cup Greek yogurt
- 1 cucumber, grated and drained
- 2 cloves garlic, minced
- 1 tablespoon olive oil
- 1 tablespoon fresh dill, chopped
- 1 tablespoon fresh lemon juice
- Salt and pepper to taste
- Pita bread, cut into triangles
Instructions
- Prepare the Tzatziki: In a mixing bowl, combine the Greek yogurt, grated cucumber, minced garlic, olive oil, dill, and lemon juice. Stir well until all the ingredients are evenly mixed.
- Season: Add salt and pepper to taste, adjusting the seasoning as you prefer. Let the dip chill in the refrigerator for at least 30 minutes for the flavors to meld.
- Prepare the Pita Chips: Preheat your oven to 350°F (175°C). Arrange the pita triangles on a baking sheet, drizzle with olive oil, and sprinkle with salt. Bake for about 10-12 minutes until golden and crispy.
- Serve: Once the tzatziki is chilled and the pita chips are crispy, serve them together for a delightful snack experience.
Savory Cheese Quesadilla Wedges
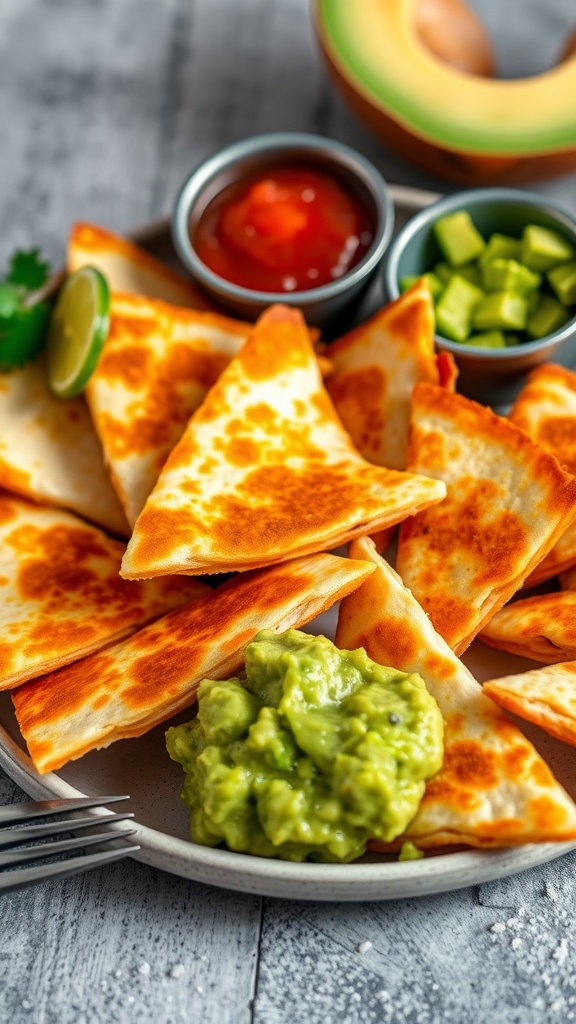
Quesadilla wedges are a delightful and cheesy snack that anyone can whip up in no time. With a crispy exterior and melty cheese inside, they bring a satisfying combination of textures and flavors that is hard to resist. The best part? They are incredibly easy to make, making them a go-to option for a quick bite or a party platter.
Pair these wedges with your favorite dips, like guacamole or salsa, and you have a snack that’s both comforting and crowd-pleasing. They can be customized with extra ingredients like veggies or meats, but the classic cheese version will always hit the spot. So, let’s dive into how to create these tasty quesadilla wedges!
Ingredients
- 4 flour tortillas
- 2 cups shredded cheese (cheddar, Monterey Jack, or a blend)
- 1 tablespoon olive oil or butter
- Optional: chopped bell peppers, onions, or cooked chicken
- Salt and pepper to taste
Instructions
- Heat a large skillet over medium heat and add olive oil or butter.
- Place one tortilla in the skillet and sprinkle half of the cheese evenly over it. If using, add any optional ingredients like veggies or chicken.
- Top with another tortilla and cook for about 3-4 minutes, until the bottom tortilla is golden brown.
- Carefully flip the quesadilla and cook for an additional 3-4 minutes until the other side is also golden and the cheese is melted.
- Remove from the skillet and let it cool for a minute before cutting into wedges. Serve with guacamole, salsa, or any dip you like!
Nutty Energy Bites
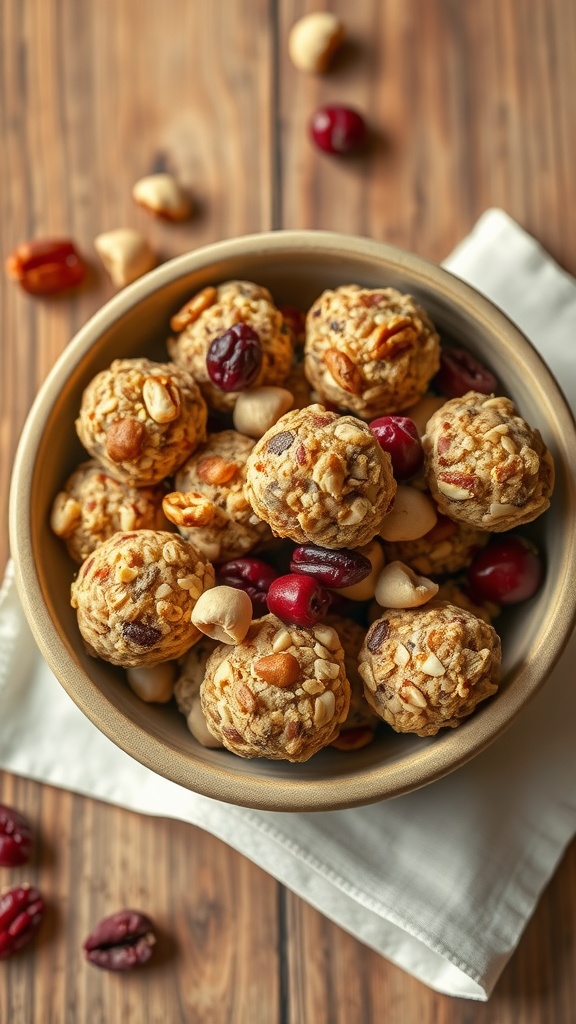
Nutty energy bites are a delicious and satisfying snack that packs a punch of flavor and nutrition. These little balls are chewy, nutty, and slightly sweet, making them the perfect on-the-go treat. They’re super easy to whip up, requiring just a few ingredients and no baking at all!
Whether you’re looking for a pre-workout boost or a mid-afternoon pick-me-up, these bites are a great option. You can customize them to your liking, adding in your favorite nuts, seeds, or dried fruits for extra flavor and texture.
Ingredients
- 1 cup rolled oats
- 1/2 cup nut butter (peanut, almond, or cashew)
- 1/3 cup honey or maple syrup
- 1/2 cup mixed nuts (chopped)
- 1/4 cup dried fruit (raisins, cranberries, or apricots)
- 1/4 cup chocolate chips (optional)
- 1 tablespoon chia seeds (optional)
Instructions
- Mix Ingredients: In a large bowl, combine rolled oats, nut butter, honey or maple syrup, and your choice of nuts and dried fruits. Stir until well combined.
- Add Extras: If using, fold in chocolate chips and chia seeds for added texture and nutrition.
- Form Bites: With your hands, take small portions of the mixture and roll them into bite-sized balls.
- Chill: Place the energy bites on a baking sheet lined with parchment paper. Refrigerate for at least 30 minutes to firm up.
- Store: Once set, transfer them to an airtight container and store in the fridge for up to a week.
Cucumber Sandwiches
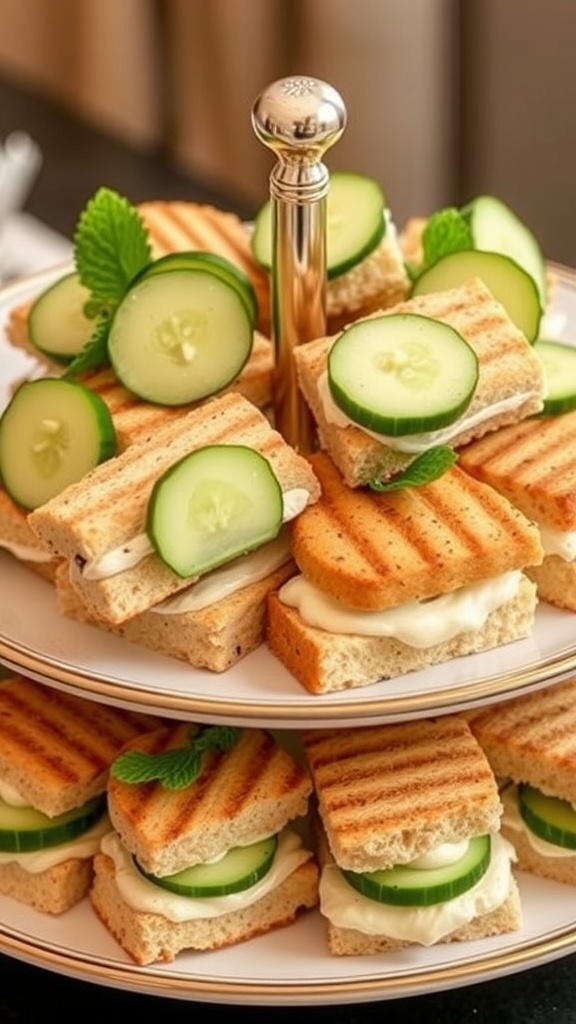
Cucumber sandwiches are light, refreshing snacks that are perfect for a casual gathering or an afternoon tea. They offer a delightful crunch with the coolness of cucumber paired with a creamy filling, making them a lovely treat that’s easy to prepare.
These sandwiches are not only simple to make, but they also bring a lovely touch to any table. The combination of soft bread, crisp cucumber slices, and a spread of your choice creates a delightful flavor that everyone will enjoy.
Ingredients
- 8 slices of white or whole wheat bread
- 1/2 cup cream cheese, softened
- 1 tablespoon fresh dill, chopped (or 1 teaspoon dried dill)
- 1/2 teaspoon garlic powder
- 1/4 teaspoon salt
- 1 cucumber, thinly sliced
Instructions
- Prepare the Spread: In a bowl, mix cream cheese, dill, garlic powder, and salt until well combined.
- Assemble the Sandwiches: Spread a generous layer of the cream cheese mixture on one side of each slice of bread.
- Add Cucumber: Place cucumber slices evenly over half of the bread slices, then top with the remaining slices, cream cheese side down.
- Cut and Serve: Trim the crusts off the sandwiches for a neat look, then cut them into quarters or halves. Arrange on a platter and enjoy!
Savory Spinach and Feta Pinwheels
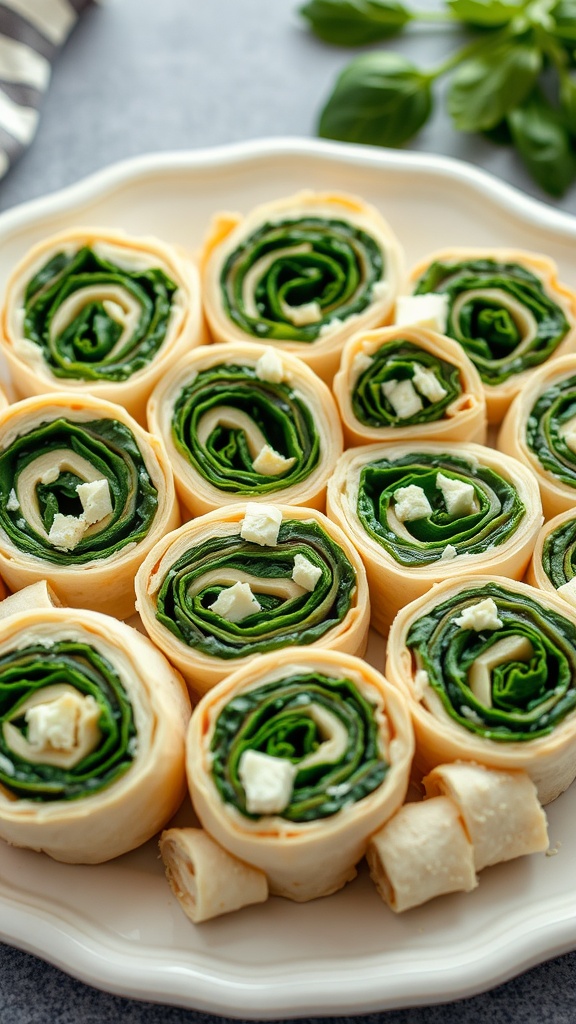
These savory spinach and feta pinwheels are a delightful snack that’s both fresh and satisfying. With the earthy taste of spinach paired with the creamy tang of feta cheese, these bite-sized treats are sure to please anyone who takes a bite. Plus, they are easy to whip up, making them a perfect choice for parties or a quick snack at home.
Not only are they simple to prepare, but these pinwheels also offer a healthy option that doesn’t skimp on flavor. You can enjoy them as is or serve them with your favorite dip. They’re perfect for gatherings or just a fun afternoon snack!
🦈 As Seen on Shark Tank: These Kitchen Gadgets Are Flying Off the Shelves!




Souper Cubes 1 Cup Silicone Freezer Molds with Lids, Aqua, 2-Pack
(as of September 22, 2026 22:07 GMT +00:00 - More infoEatMeMaybe is a participant in the Amazon Services LLC Associates Program, an affiliate advertising program designed to provide a means for sites to earn commission fees by advertising and linking to the following web sites.)




The Perfect Pizza Pack™ - Reusable Pizza Storage Container with 5 Microwavable Serving Trays - BPA-F...
(as of September 22, 2026 22:07 GMT +00:00 - More infoEatMeMaybe is a participant in the Amazon Services LLC Associates Program, an affiliate advertising program designed to provide a means for sites to earn commission fees by advertising and linking to the following web sites.)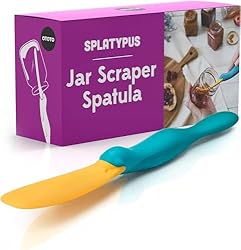


OTOTO Splatypus Jar Spatula for Scooping and Scraping - Unique Fun Cooking Kitchen Gadgets for Foodi...
(as of September 22, 2026 22:07 GMT +00:00 - More infoEatMeMaybe is a participant in the Amazon Services LLC Associates Program, an affiliate advertising program designed to provide a means for sites to earn commission fees by advertising and linking to the following web sites.)As an Amazon Associate, I may earn a commission from qualifying purchases — at no extra cost to you.
Ingredients
- 4 large tortillas (whole wheat or spinach)
- 2 cups fresh spinach, chopped
- 1 cup feta cheese, crumbled
- 1/2 cup cream cheese, softened
- 1/4 cup sun-dried tomatoes, chopped (optional)
- 1 tablespoon olive oil
- Salt and pepper to taste
Instructions
- Prepare the Filling: In a bowl, mix the chopped spinach, feta cheese, cream cheese, and sun-dried tomatoes. Add olive oil and season with salt and pepper to taste.
- Assemble the Pinwheels: Spread a generous amount of the spinach and feta mixture evenly over each tortilla. Roll tightly from one edge to the other.
- Slice and Serve: Once rolled, slice each tortilla into bite-sized pinwheels. Arrange them on a serving platter and enjoy!
Chocolate-Covered Pretzels

Chocolate-covered pretzels are a delightful snack that combines sweet and salty flavors in each bite. The crunchy pretzels are coated in smooth chocolate, often enhanced with colorful sprinkles for a fun touch. This treat is not only delicious but also super easy to make, making it a fantastic choice for parties or a simple indulgence at home.
Whether you’re looking for a quick snack or a fun activity with kids, chocolate-covered pretzels are perfect. They can be customized with different types of chocolate and toppings, letting you get creative. Just melt the chocolate, dip the pretzels, and let them set—it’s that simple!
Ingredients
- 2 cups pretzel twists
- 1 cup chocolate chips (milk, dark, or white)
- 1 tablespoon coconut oil (optional, for smoothness)
- Sprinkles (optional, for decoration)
Instructions
- Melt the Chocolate: In a microwave-safe bowl, combine chocolate chips and coconut oil. Microwave in 30-second intervals, stirring in between, until fully melted and smooth.
- Dip the Pretzels: Hold each pretzel by one end and dip it into the melted chocolate, coating it halfway. Allow the excess to drip off.
- Add Sprinkles: Before the chocolate sets, sprinkle your favorite toppings over the chocolate-coated pretzels.
- Set the Pretzels: Place the dipped pretzels on a parchment-lined baking sheet. Let them cool at room temperature or refrigerate until the chocolate hardens.
- Enjoy: Once set, serve your chocolate-covered pretzels and watch them disappear!
Fruit and Nut Bars
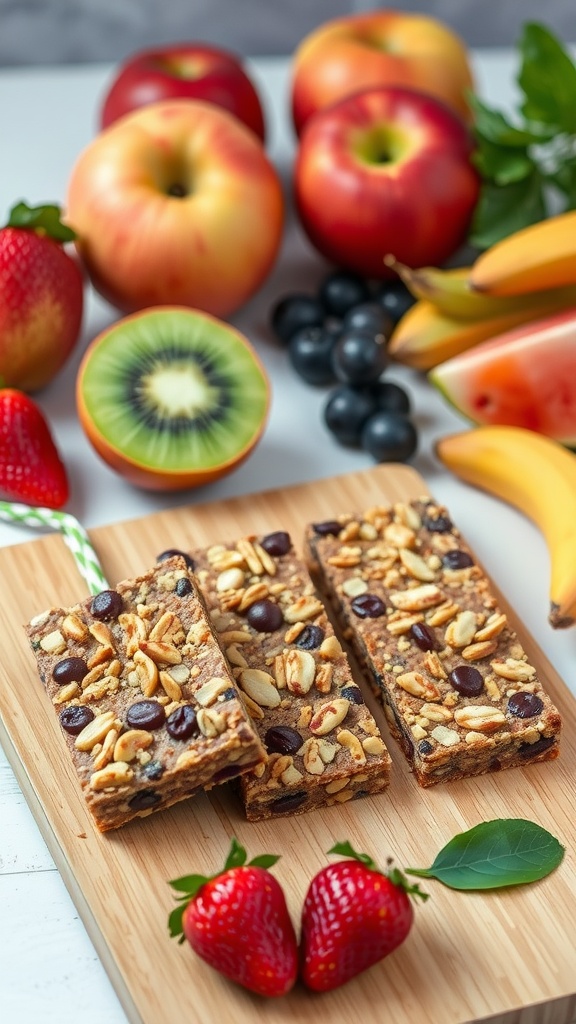
Fruit and nut bars are a delightful snack that combines the natural sweetness of dried fruits with the crunch of nuts, creating a satisfying treat for any time of day. These bars are not only tasty but also packed with energy, making them perfect for a quick pick-me-up or a post-workout snack. Plus, they are easy to make at home, allowing you to customize them with your favorite ingredients.
With a chewy texture and a hint of richness from the nuts, these bars are a simple way to enjoy healthy snacking. They can be made in advance and stored for a week, so you’ll have a nutritious option ready whenever hunger strikes!
Ingredients
- 1 cup mixed nuts (almonds, walnuts, pecans)
- 1 cup dried fruits (like apricots, cranberries, raisins)
- 1 cup rolled oats
- 1/2 cup honey or maple syrup
- 1/4 cup nut butter (peanut or almond)
- 1/2 teaspoon vanilla extract
- 1/2 teaspoon cinnamon (optional)
- 1/4 cup chocolate chips (optional)
Instructions
- Preheat the oven to 350°F (175°C) and line a baking pan with parchment paper.
- In a large bowl, combine the mixed nuts, dried fruits, and rolled oats.
- In a small saucepan, heat the honey (or maple syrup) and nut butter over low heat, stirring until melted and smooth. Remove from heat and stir in the vanilla extract and cinnamon.
- Pour the nut butter mixture over the dry ingredients and mix well until everything is combined. If using, fold in the chocolate chips.
- Spread the mixture evenly in the prepared baking pan and press down firmly.
- Bake for about 20-25 minutes, or until the edges are golden. Allow to cool completely before slicing into bars.
Baked Zucchini Fries
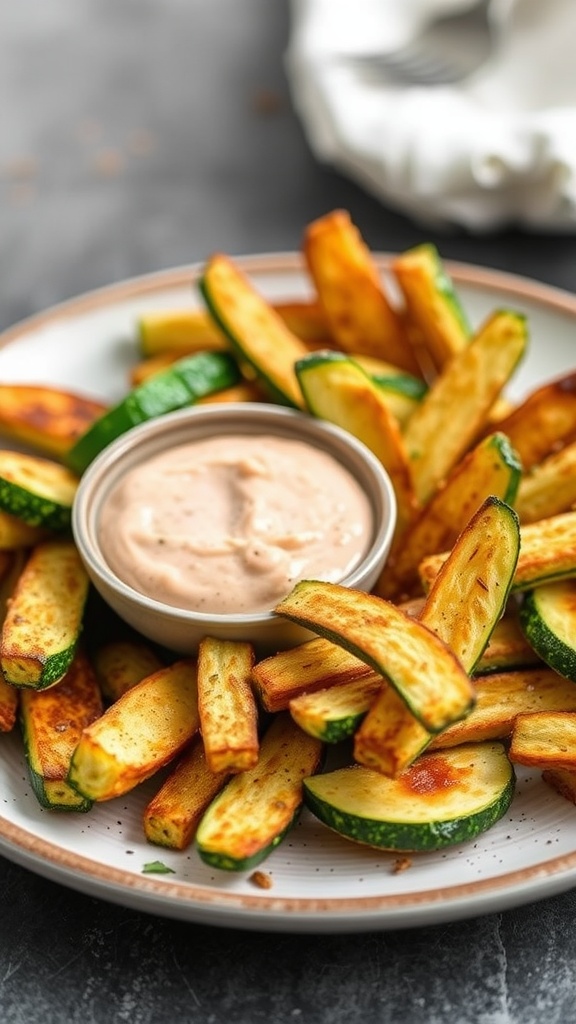
Baked zucchini fries are a fun and tasty way to enjoy veggies. They offer a crispy texture and a savory flavor that makes them a delightful snack or side dish. Plus, they are simple to whip up and healthier than traditional fries, making them a guilt-free option for satisfying your cravings.
These zucchini fries are not only delicious but also customizable. You can experiment with different seasonings to find your favorite flavor combination. Whether you’re looking for a quick snack or a side for your dinner, these fries are sure to please.
Ingredients
- 2 medium zucchinis
- 1 cup breadcrumbs (panko or regular)
- 1/2 cup grated Parmesan cheese
- 1 teaspoon garlic powder
- 1 teaspoon Italian seasoning
- 1/2 teaspoon salt
- 1/4 teaspoon black pepper
- 2 large eggs
- Cooking spray or olive oil
Instructions
- Preheat the oven to 425°F (220°C) and line a baking sheet with parchment paper.
- Cut the zucchinis into fry-sized strips. Make sure they are evenly sized for even cooking.
- In a shallow bowl, mix together the breadcrumbs, Parmesan cheese, garlic powder, Italian seasoning, salt, and pepper.
- In another bowl, beat the eggs. Dip each zucchini strip into the egg, then coat it in the breadcrumb mixture, pressing lightly to adhere.
- Place the coated zucchini fries on the prepared baking sheet. Lightly spray them with cooking spray or drizzle with olive oil for extra crispiness.
- Bake for 20-25 minutes, flipping halfway through, until golden brown and crisp. Serve warm with your favorite dipping sauce.
Pesto Tortellini Skewers
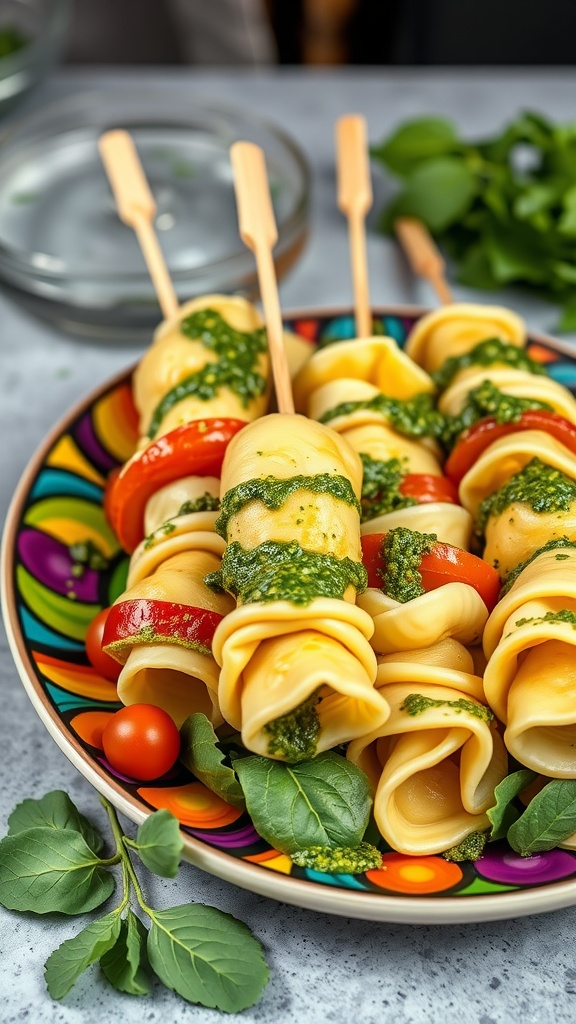
Pesto tortellini skewers are a delightful and vibrant snack that perfectly blends the rich flavors of pesto with the comforting taste of pasta. These skewers are not only visually appealing but also incredibly easy to make, making them an ideal choice for gatherings or a fun family dinner. With the savory notes of pesto and the creaminess of tortellini, each bite offers a burst of deliciousness that is sure to impress.
Combining cooked tortellini with fresh vegetables like cherry tomatoes and bell peppers adds a refreshing crunch, while the added drizzle of pesto ties everything together. Perfect for dipping or enjoying on their own, these skewers are a fun and simple way to elevate your snack game.
Ingredients
- 12 oz cheese tortellini
- 1/2 cup basil pesto
- 1 cup cherry tomatoes
- 1 bell pepper, cut into chunks
- Fresh basil leaves
- Salt and pepper, to taste
- Skewers
Instructions
- Cook the Tortellini: Bring a large pot of salted water to a boil. Add the tortellini and cook according to package instructions until al dente. Drain and rinse with cold water.
- Prepare the Skewers: On each skewer, start by adding a tortellini, followed by a cherry tomato, a piece of bell pepper, and another tortellini. Repeat until the skewer is filled, leaving some space at the end for handling.
- Add Pesto: Drizzle the skewers with basil pesto, and sprinkle with salt and pepper to taste.
- Serve: Arrange the skewers on a platter and garnish with fresh basil leaves. Enjoy them immediately or chill them for a refreshing snack later!
Chili Lime Mango Slices
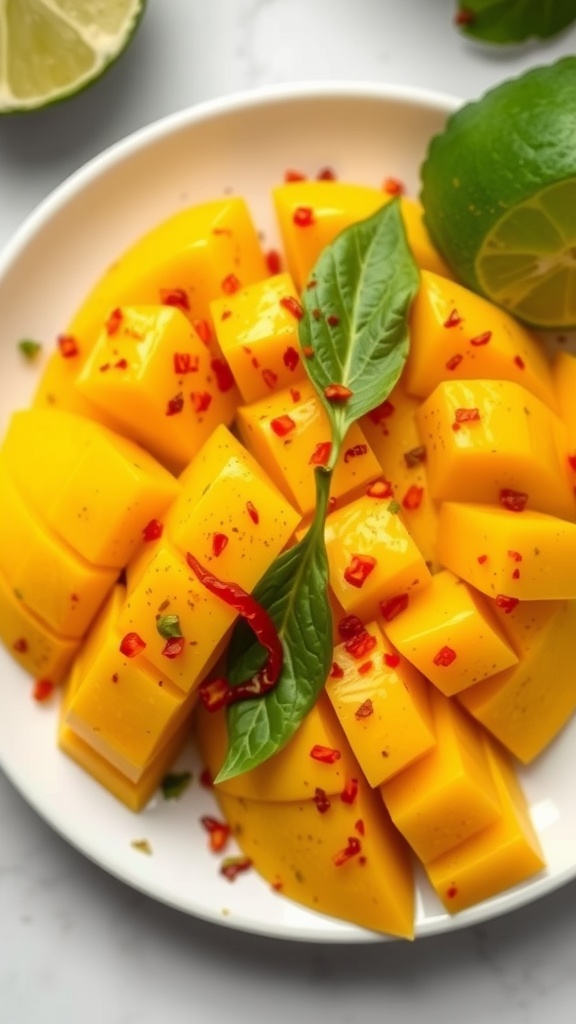
Chili lime mango slices are a vibrant, zesty snack that perfectly blend sweet and spicy flavors. This easy-to-make recipe is a delightful way to enjoy fresh mango, enhanced with a tangy kick from lime and a hint of heat from chili. It’s a refreshing treat that’s perfect for warm days or as a unique appetizer for gatherings.
The combination of juicy mango, tart lime juice, and the subtle heat from chili creates a burst of flavor that’s both satisfying and invigorating. Plus, it comes together in just a few minutes, making it a breeze to whip up whenever you need a delicious snack.
Ingredients
- 2 ripe mangoes, peeled and sliced
- 1 lime, juiced
- 1 teaspoon chili powder
- 1/2 teaspoon salt
- Fresh cilantro or mint leaves for garnish (optional)
Instructions
- Prepare the Mango: Start by peeling the mangoes and slicing them into thin wedges or bite-sized pieces.
- Mix the Dressing: In a small bowl, combine the lime juice, chili powder, and salt. Stir until well mixed.
- Toss and Serve: Drizzle the chili-lime mixture over the mango slices and gently toss to coat evenly. Garnish with fresh cilantro or mint leaves if desired.
- Enjoy: Serve immediately and enjoy the sweet, spicy, and tangy flavors!
Chocolate Banana Smoothie
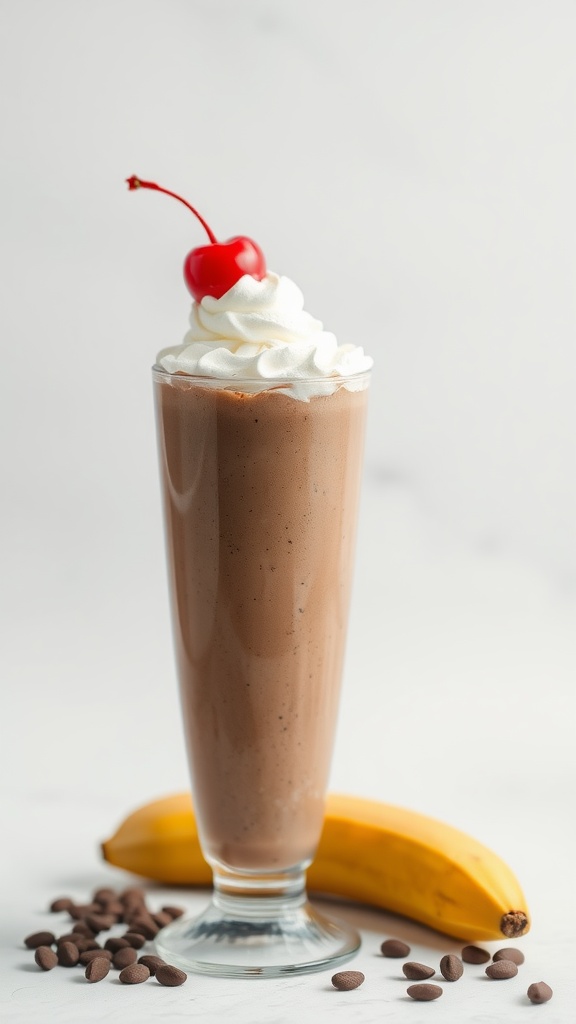
If you’re in the mood for a sweet treat that’s also easy to whip up, this Chocolate Banana Smoothie is just the thing. Combining the creamy flavors of ripe bananas with rich cocoa, this smoothie is both satisfying and delicious. Plus, it’s a quick recipe that requires minimal effort and ingredients!
This smoothie is perfect for breakfast, an afternoon snack, or even a dessert. The blend of chocolate and banana creates a flavor that feels indulgent, while still being packed with nutrients. You’ll love how refreshing and energizing it is!
Ingredients
- 2 ripe bananas
- 1 cup milk (dairy or non-dairy)
- 2 tablespoons cocoa powder
- 1 tablespoon honey or maple syrup (optional)
- 1/2 teaspoon vanilla extract
- 1 cup ice cubes
Instructions
- In a blender, combine the ripe bananas, milk, cocoa powder, honey (if using), and vanilla extract.
- Add the ice cubes and blend until smooth and creamy.
- Taste and adjust sweetness if needed by adding more honey or syrup.
- Pour into a glass and enjoy immediately!
Egg Salad Lettuce Wraps
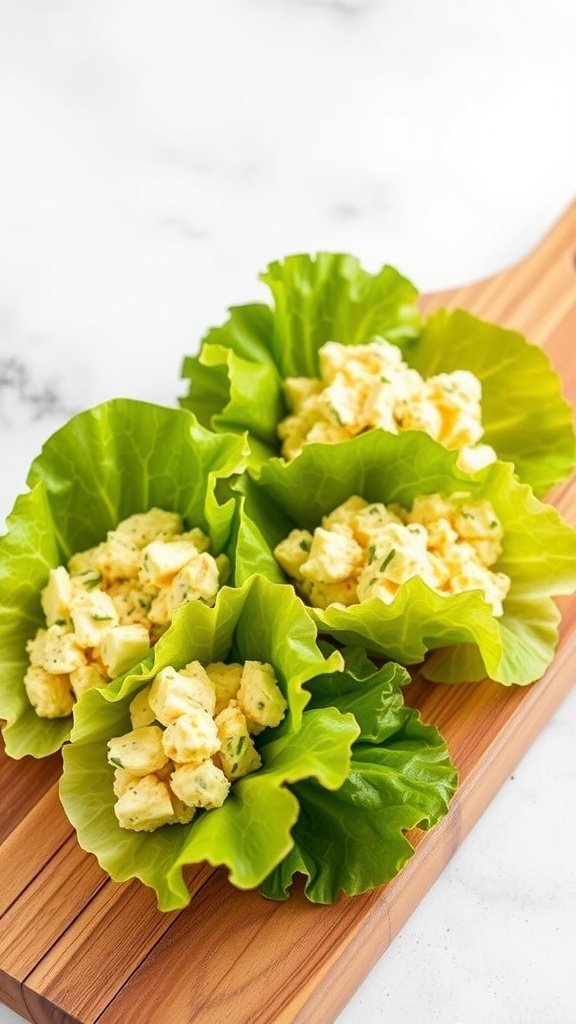
Egg salad lettuce wraps are a light and satisfying snack that bring together the creaminess of egg salad and the crisp freshness of lettuce. This dish is perfect for those looking for a healthy alternative to traditional sandwiches, offering a delightful crunch with every bite.
With just a few ingredients and minimal preparation, you can whip up these wraps in no time. The combination of eggs, mayonnaise, and seasonings creates a rich flavor that pairs wonderfully with the refreshing lettuce. Whether you’re enjoying them as a snack or a light meal, these wraps are sure to please!
Ingredients
- 4 hard-boiled eggs, chopped
- 1/4 cup mayonnaise
- 1 teaspoon Dijon mustard
- 1 tablespoon fresh chives, chopped
- Salt and pepper to taste
- 1 head of lettuce (such as romaine or butter lettuce)
Instructions
- In a medium bowl, combine the chopped hard-boiled eggs, mayonnaise, Dijon mustard, and fresh chives. Mix until well combined.
- Add salt and pepper to taste, adjusting the seasoning as necessary.
- Carefully separate the lettuce leaves, washing and drying them as needed.
- Scoop a generous amount of egg salad into each lettuce leaf, folding it gently like a taco.
- Serve immediately and enjoy your fresh, tasty wraps!
Rice Cake Toppers
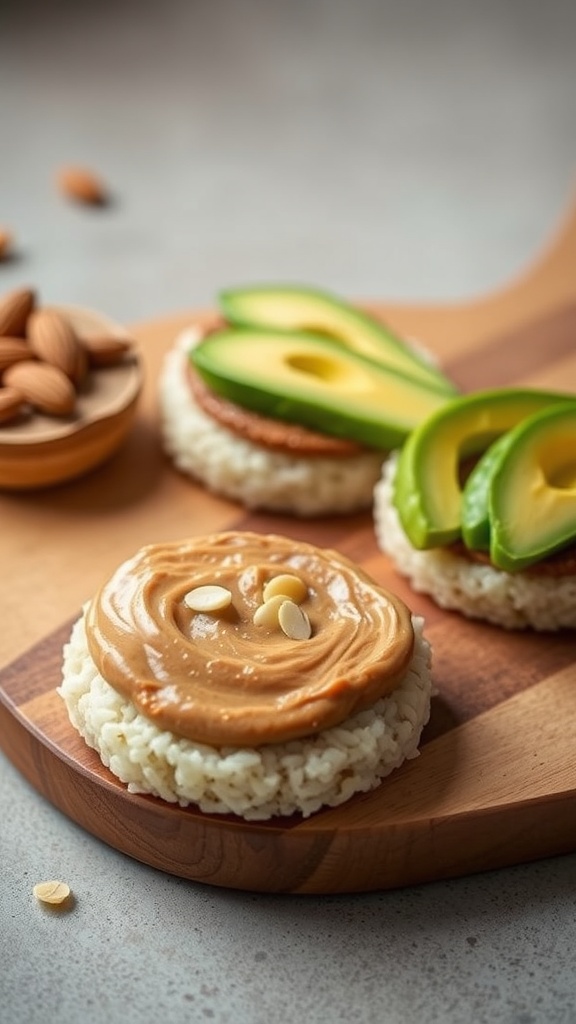
Rice cake toppers are a fun and versatile way to enjoy a healthy snack. They provide a satisfying crunch and can be topped with a variety of delicious ingredients, making them a great option for any time of day. Whether you prefer sweet or savory, these toppers are easy to prepare and full of flavor.
Combining textures and tastes is simple with rice cakes. You can spread nut butter with slices of fresh fruit for a sweet treat or layer on avocado and a sprinkle of salt for something savory. The possibilities are endless, allowing you to customize each rice cake to match your cravings!
Ingredients
- 4 rice cakes
- 1 ripe avocado, sliced
- 1/2 cup peanut butter or almond butter
- 1/4 cup almond slices
- 1 teaspoon honey (optional)
- Pinch of salt
- Fresh fruit (like banana or apple slices, optional)
Instructions
- Prepare the Base: Start by placing the rice cakes on a clean surface or plate.
- Spread the Nut Butter: Take your favorite nut butter and spread a generous layer over each rice cake.
- Add Toppings: For a savory option, layer on sliced avocado and a pinch of salt. For a sweet treat, add fresh fruit slices and a drizzle of honey.
- Finish with Nuts: Sprinkle almond slices on top for added crunch and nutrition.
- Enjoy: Serve immediately and enjoy your delicious rice cake toppers!
Fruit Skewers with Yogurt Dip
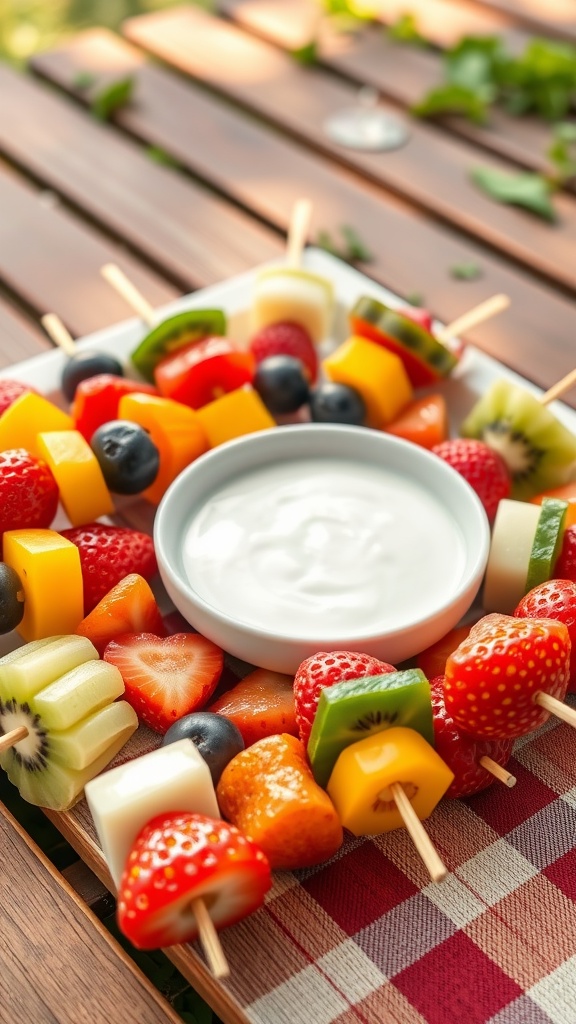
Fruit skewers are a delightful and colorful way to enjoy a variety of fresh fruits, all while being easy to prepare. They offer a refreshing taste that combines sweetness and a hint of tartness, making them perfect for any occasion. Paired with a creamy yogurt dip, these skewers become an inviting snack that’s not only healthy but also fun to eat.
Making fruit skewers is a simple process that allows for creativity. You can choose your favorite fruits, cut them into bite-sized pieces, and assemble them on skewers. The yogurt dip can be customized with honey or vanilla for an extra touch of flavor. This snack is great for picnics, parties, or just a casual afternoon at home.
Ingredients
- 1 cup strawberries, hulled and halved
- 1 cup pineapple chunks
- 1 cup kiwi, peeled and sliced
- 1 cup melon, cubed
- 1 cup blueberries
- Wooden skewers
Instructions
- Prepare the Fruits: Wash all the fruits thoroughly. Cut strawberries, pineapple, kiwi, and melon into bite-sized pieces.
- Assemble the Skewers: On each wooden skewer, alternate the different fruit pieces to create a colorful pattern. Leave space at the ends for easy handling.
- Make the Yogurt Dip: In a small bowl, mix 1 cup of plain yogurt with 1 tablespoon of honey (or to taste). For extra flavor, you can also add a splash of vanilla extract.
- Serve: Arrange the fruit skewers on a platter and serve with the yogurt dip on the side for dipping.
Homemade Granola Bars
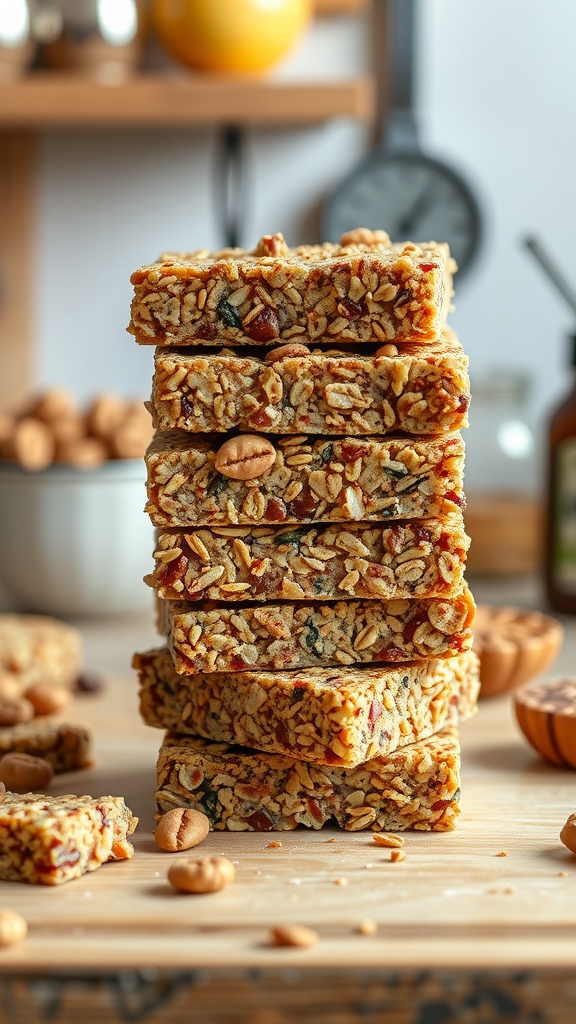
Homemade granola bars are the perfect snack when you’re looking for something healthy yet satisfying. They combine chewy oats, crunchy nuts, and a hint of sweetness, making them a delightful treat for both kids and adults. Plus, they’re super simple to whip up, allowing you to customize them with your favorite ingredients!
Whether you’re packing them for lunch, enjoying them on a hike, or just snacking at home, these bars are a convenient and nutritious option. With minimal effort, you can create a batch that rivals store-bought versions, only better because you know exactly what’s in them!
Ingredients
- 2 cups rolled oats
- 1 cup mixed nuts (such as almonds and walnuts)
- 1/2 cup honey or maple syrup
- 1/4 cup nut butter (peanut or almond)
- 1/2 cup dried fruit (like cranberries or raisins)
- 1/4 teaspoon salt
- 1/2 teaspoon vanilla extract
Instructions
- Preheat your oven to 350°F (175°C) and line an 8×8-inch baking dish with parchment paper.
- In a large bowl, mix together the oats, chopped nuts, dried fruit, and salt.
- In a small saucepan, combine the honey (or maple syrup) and nut butter over low heat, stirring until melted and well combined. Remove from heat and stir in the vanilla extract.
- Pour the wet mixture over the dry ingredients and stir until everything is evenly coated.
- Spread the mixture evenly in the prepared baking dish, pressing it down firmly.
- Bake for 20-25 minutes, or until the edges are golden brown. Allow to cool completely before slicing into bars.
- Store in an airtight container for up to a week.
Savory Muffins with Cheese and Herbs

These savory muffins are a delightful blend of cheese and fresh herbs, making them a perfect snack or light meal. With a fluffy texture and a rich flavor, they are easy to whip up in no time, making them an excellent choice for busy days or casual gatherings.
Whether enjoyed warm from the oven or as a grab-and-go snack, these muffins bring a comforting taste that’s both satisfying and delicious. Ideal for breakfast, brunch, or anytime you crave something savory, they are sure to please anyone who tries them!
Ingredients
- 2 cups all-purpose flour
- 1 tablespoon baking powder
- 1/2 teaspoon salt
- 1/4 teaspoon black pepper
- 1 cup shredded cheese (cheddar or your choice)
- 1/2 cup chopped fresh herbs (like parsley, chives, or thyme)
- 1 cup milk
- 1/3 cup vegetable oil
- 2 large eggs
Instructions
- Preheat the oven to 375°F (190°C) and line a muffin tin with liners.
- In a large bowl, combine the flour, baking powder, salt, and black pepper.
- Stir in the shredded cheese and chopped herbs until well mixed.
- In another bowl, whisk together the milk, vegetable oil, and eggs until combined.
- Pour the wet ingredients into the dry ingredients and mix until just combined; be careful not to overmix.
- Spoon the batter into the prepared muffin tin, filling each cup about three-quarters full.
- Bake for 20-25 minutes, or until the muffins are golden brown and a toothpick inserted in the center comes out clean.
- Let them cool slightly before serving. Enjoy!
Pineapple Cilantro Salsa
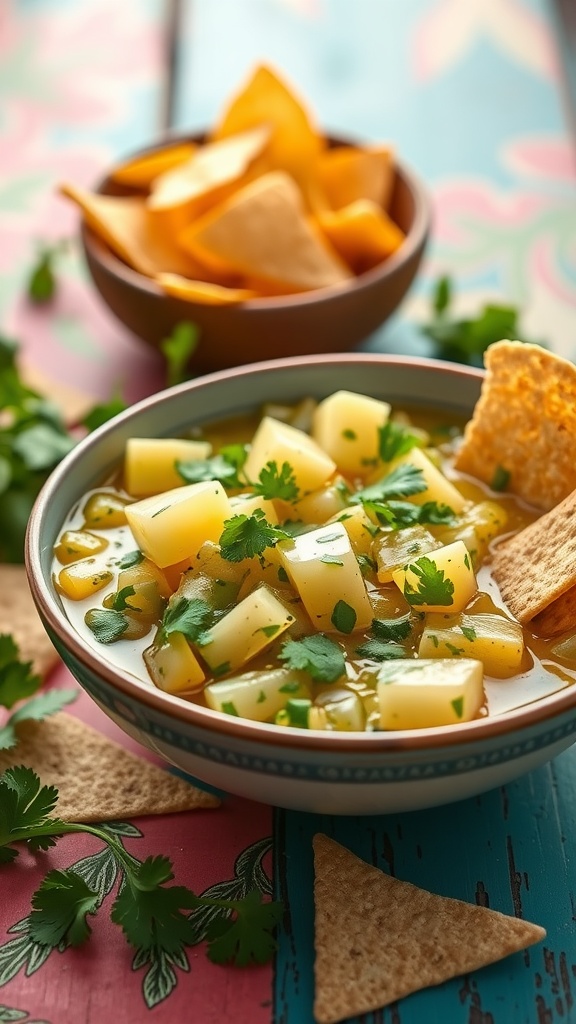
Pineapple Cilantro Salsa is a bright and refreshing dip that combines the sweetness of pineapple with the freshness of cilantro and a hint of lime. This salsa is not only easy to whip up, but it also brings a zesty kick to any snack time or gathering. Whether you’re serving it with chips or as a topping for grilled chicken or fish, it’s sure to add a lively flavor to your dishes.
The contrast of juicy pineapple chunks and aromatic cilantro creates a delightful medley that tantalizes the taste buds. Plus, the vibrant colors make it a feast for the eyes!
Ingredients
- 2 cups fresh pineapple, diced
- 1/2 cup red onion, finely chopped
- 1/4 cup fresh cilantro, chopped
- 1 jalapeño, seeded and minced (optional)
- Juice of 1 lime
- Salt to taste
Instructions
- In a mixing bowl, combine the diced pineapple, chopped red onion, cilantro, and jalapeño, if using.
- Pour the lime juice over the mixture and add salt to taste. Stir well to combine.
- Let the salsa sit for at least 10 minutes to allow the flavors to meld together.
- Serve with tortilla chips or use as a topping for your favorite dishes.
Frozen Yogurt Bark with Fruits
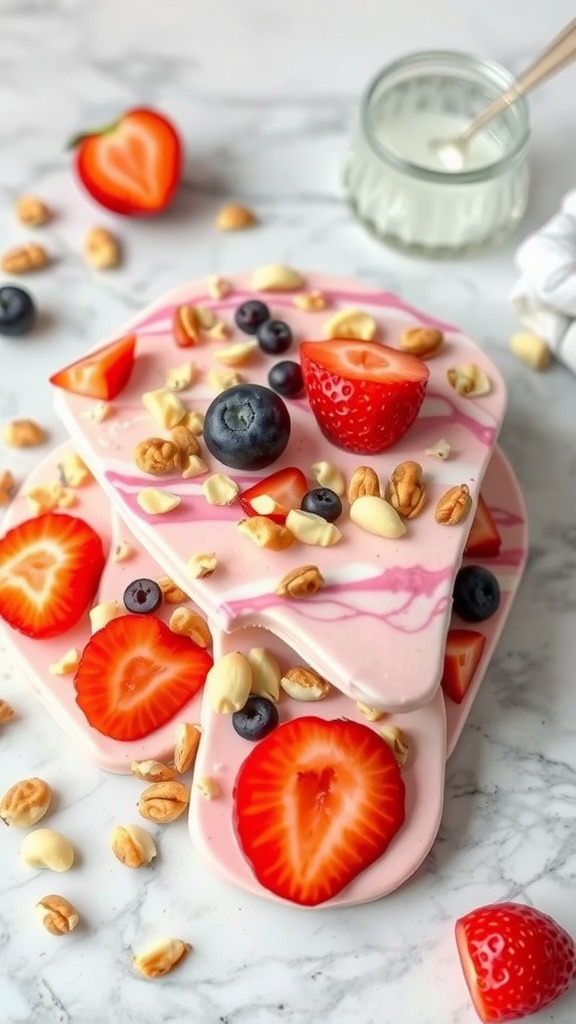
Frozen yogurt bark is a simple and delightful treat that combines creamy yogurt with fresh fruits and crunchy toppings. This snack not only satisfies your sweet tooth but also provides a refreshing way to enjoy healthier ingredients. Perfect for warm days or as a fun dessert, it’s easy to prepare and customize based on your favorite fruits and flavors.
The combination of tangy yogurt with the sweetness of fruits creates a delicious balance. Plus, the added toppings give it a satisfying crunch that everyone can enjoy. Whether you’re looking for a quick snack or something to impress friends at a gathering, this frozen yogurt bark is an excellent choice.
Ingredients
- 2 cups plain or flavored yogurt
- 1 cup strawberries, sliced
- 1/2 cup blueberries
- 1/4 cup granola or nuts
- 1-2 tablespoons honey or maple syrup (optional)
Instructions
- Prepare the Yogurt: Spread the yogurt evenly on a parchment-lined baking sheet, smoothing it out with a spatula.
- Add the Fruits: Evenly distribute the sliced strawberries and blueberries on top of the yogurt.
- Top It Off: Sprinkle granola or nuts over the fruits for added crunch.
- Sweeten It: Drizzle honey or maple syrup over the top if you like a little extra sweetness.
- Freeze: Place the baking sheet in the freezer for about 3-4 hours, or until the yogurt is completely frozen.
- Break and Enjoy: Once frozen, break the yogurt bark into pieces and enjoy your tasty, refreshing snack!
Cinnamon Sugar Tortilla Chips

Cinnamon sugar tortilla chips are a delightful treat that combines the crunch of freshly baked tortilla chips with a sweet cinnamon sugar coating. These snacks are not only easy to whip up but also bring a warm, inviting flavor that’s perfect for any occasion. Whether you’re hosting a gathering or just want a cozy night in, these chips are sure to satisfy your cravings.
The best part? They are quick to make! With just a few simple ingredients, you can create a crispy snack that pairs wonderfully with dips or can be enjoyed on their own. The hint of cinnamon sugar adds a touch of sweetness that turns ordinary tortilla chips into something special.
Ingredients
- 6 medium flour tortillas
- 1/4 cup granulated sugar
- 1 tablespoon ground cinnamon
- 1/4 cup unsalted butter, melted
- Pinch of salt
Instructions
- Preheat your oven to 350°F (175°C) and prepare a baking sheet by lining it with parchment paper.
- In a small bowl, mix the sugar, cinnamon, and salt until well combined.
- Brush both sides of each tortilla with melted butter, then sprinkle the cinnamon sugar mixture generously over the top.
- Cut the tortillas into triangles and arrange them in a single layer on the prepared baking sheet.
- Bake for about 10-12 minutes or until the chips are golden and crispy, flipping halfway through to ensure even cooking.
- Let them cool slightly before serving. Enjoy your cinnamon sugar tortilla chips with your favorite dip or as a sweet snack on their own!
Chocolate-Dipped Fruit

If you’re looking for a sweet treat that’s both delicious and easy to make, chocolate-dipped fruit is the way to go. This snack combines the rich, creamy taste of chocolate with the natural sweetness of fresh fruit, creating a delightful burst of flavors. Plus, it’s a fun and simple recipe to whip up, making it perfect for any occasion.
With just a few ingredients and minimal prep time, you can enjoy a guilt-free indulgence that caters to both your sweet tooth and your cravings for something healthy. Whether it’s strawberries, bananas, or any fruit of your choice, this treat is sure to satisfy!
Ingredients
- 1 cup dark or milk chocolate chips
- 1 tablespoon coconut oil (optional)
- 2 cups fresh strawberries
- 2 ripe bananas
Instructions
- Prepare the Fruit: Wash the strawberries and pat them dry. Peel the bananas and cut them into thick slices.
- Melt the Chocolate: In a microwave-safe bowl, combine chocolate chips and coconut oil. Microwave in 30-second intervals, stirring after each, until melted and smooth.
- Dip the Fruit: Hold each strawberry by the stem and dip it into the melted chocolate, letting the excess drip off. For banana slices, dip one side into the chocolate.
- Cool and Set: Place the dipped fruit on a parchment-lined tray. Refrigerate for about 30 minutes until the chocolate hardens.
- Serve: Enjoy your chocolate-dipped fruit fresh from the refrigerator!
Homemade Veggie Chips
Homemade veggie chips are a delightful and healthy alternative to traditional potato chips. They offer a satisfying crunch and can be made with a variety of vegetables, allowing you to customize the flavors to your liking. Whether you choose sweet potatoes, beets, or kale, you’ll enjoy a snack that’s not only tasty but also packed with nutrients.
The best part? Making these chips is super easy! You can whip them up in no time, and they’re perfect for munching on during movie nights or as a quick snack between meals. With a sprinkle of your favorite seasonings, these veggie chips can be as simple or as zesty as you prefer.
Ingredients
- 2 medium sweet potatoes
- 2 medium beets
- 1 tablespoon olive oil
- 1 teaspoon sea salt
- 1/2 teaspoon paprika (optional)
- 1/2 teaspoon garlic powder (optional)
Instructions
- Preheat your oven to 375°F (190°C).
- Wash and peel the sweet potatoes and beets. Slice them thinly using a mandoline or sharp knife.
- In a large bowl, toss the vegetable slices with olive oil, sea salt, and any additional seasonings.
- Spread the slices in a single layer on a baking sheet lined with parchment paper.
- Bake for 15-20 minutes, flipping halfway through, until the edges are crispy and lightly browned.
- Let them cool before serving. Enjoy your homemade veggie chips!
Marinated Olives
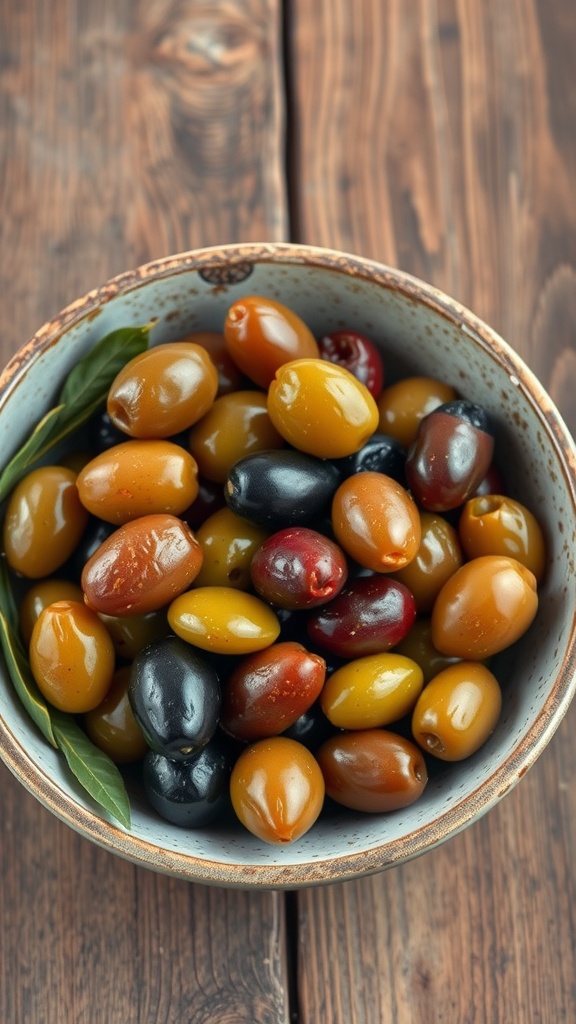
Marinated olives are a delightful snack that adds a burst of flavor to any occasion. These savory bites are not only tasty but also super easy to make. With a simple marinade, you can elevate the humble olive into a zesty treat that’s perfect for entertaining or casual munching.
The combination of herbs, spices, and olive oil brings out the natural flavors of the olives, making each bite rich and satisfying. Whether you prefer them as part of a charcuterie board or simply enjoyed on their own, marinated olives are versatile and fun to customize. Here’s a quick recipe to try!
Ingredients
- 2 cups mixed olives (green, black, Kalamata)
- 1/4 cup extra virgin olive oil
- 2 cloves garlic, minced
- 1 teaspoon dried oregano
- 1 teaspoon red pepper flakes (optional)
- Zest of 1 lemon
- Juice of 1 lemon
- 2-3 sprigs fresh rosemary or thyme
Instructions
- Combine Ingredients: In a bowl, mix together the olives, olive oil, garlic, oregano, red pepper flakes, lemon zest, and lemon juice. Stir until well combined.
- Add Fresh Herbs: Toss in the fresh rosemary or thyme, ensuring the herbs are evenly distributed.
- Marinate: Cover the bowl and let the mixture marinate in the refrigerator for at least 30 minutes. For the best flavor, allow it to sit for a few hours or overnight.
- Serve: Bring the marinated olives to room temperature before serving, and enjoy them as a tasty appetizer or snack.
Gourmet Deviled Eggs

Gourmet deviled eggs are a delightful twist on a classic snack. Creamy, flavorful, and with just the right amount of seasoning, these eggs are sure to impress. They’re simple to make and can be dressed up with a variety of toppings, offering endless possibilities for flavor combinations.
Whether you’re serving them at a party or enjoying them as a quick snack, these deviled eggs provide a satisfying mix of creamy and tangy flavors. Plus, they are a great source of protein, making them both delicious and nutritious!
Ingredients
- 6 large eggs
- 1/4 cup mayonnaise
- 1 teaspoon Dijon mustard
- 1 teaspoon apple cider vinegar
- Salt and pepper to taste
- 1 tablespoon fresh herbs (like dill or chives), chopped
- Paprika for garnish
- Optional toppings: crispy bacon bits or sliced olives
Instructions
- Boil the Eggs: Place the eggs in a pot, cover with cold water, and bring to a boil. Once boiling, cover and remove from heat. Let sit for 12 minutes, then cool in cold water.
- Prepare the Filling: Peel the cooled eggs and slice them in half lengthwise. Remove the yolks and place them in a mixing bowl. Mash the yolks with mayonnaise, Dijon mustard, apple cider vinegar, salt, and pepper until smooth.
- Mix in the Herbs: Stir in the fresh herbs, mixing until well combined.
- Fill the Egg Whites: Spoon or pipe the yolk mixture back into the egg whites. For a fancy touch, use a piping bag to create swirls.
- Garnish and Serve: Sprinkle paprika on top and add any optional toppings. Serve chilled or at room temperature.